Xerox 2006NPC DocuColor 2006 Win2000 User Software Installation - Page 8
Print Test directly to the printer
 |
UPC - 042215475440
View all Xerox 2006NPC manuals
Add to My Manuals
Save this manual to your list of manuals |
Page 8 highlights
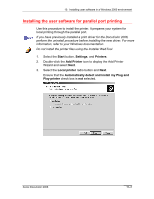
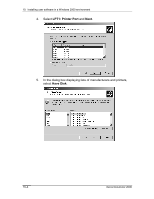
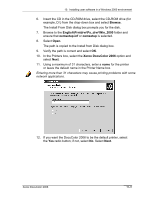
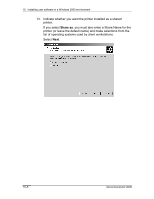
10. Installing user software in a Windows 2000 environment 16. Select the Yes button. If this is the first printer driver you are installing on the computer, you are prompted to install additional files from the Windows 2000 CD. Insert it into the CD-ROM drive, browse to the i386 folder, and then select OK. When installation is complete, the Printers window is displayed with an icon for the newly installed printer. 17. Right-click the printer icon and select Properties. 18. Select the Advanced tab to display Spool Settings. 19. Select either the Spool print jobs so program finishes printing faster option or the Print directly to the printer option. • If the Port Timeout in Seconds is set to 10, you can select either option; however, spooling is faster. • If the Port Timeout in Seconds is set to 5, select the Print directly to the printer option. 20. To confirm the connection, print a Windows test page. Select the General tab. Select the Print Test Page button and OK. You are now ready to print from your applications through the parallel port. Configure any options installed on your printer. Refer to the section Setting the printer options. 10-8 Xerox DocuColor 2006
-
 1
1 -
2
-
 3
3 -
 4
4 -
 5
5 -
 6
6 -
 7
7 -
 8
8 -
 9
9 -
 10
10 -
 11
11 -
 12
12 -
 13
13 -
14
-
15
-
16
-
17
-
18
-
19
-
20
-
21
-
22
-
23
-
24
-
25
-
26
-
27
-
28
-
29
-
30
-
31
-
32
-
33
-
34
 |
 |
