Xerox 3117 User Guide
Xerox 3117 - Phaser B/W Laser Printer Manual
 |
UPC - 095205220537
View all Xerox 3117 manuals
Add to My Manuals
Save this manual to your list of manuals |
Xerox 3117 manual content summary:
- Xerox 3117 | User Guide - Page 1
- Xerox 3117 | User Guide - Page 2
of the detailed instructions for using your printer and information for maintaining and troubleshooting the printer. The Software User Guide which is the second section of this guide provides information you need for installing the supplied software and using its features. This manual is provided - Xerox 3117 | User Guide - Page 3
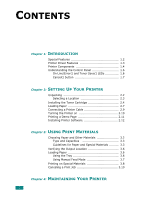
2: SETTING UP YOUR PRINTER Unpacking 2.2 Selecting a Location 2.3 Installing the Toner Cartridge 2.4 Loading Paper 2.7 Connecting a Printer Cable 2.9 Turning the Printer on 2.10 Printing a Demo Page 2.11 Installing Printer Software 2.12 Chapter 3: USING PRINT MATERIALS Choosing Paper and - Xerox 3117 | User Guide - Page 4
Around the Toner Cartridge 5.9 Tips for Avoiding Paper Jams 5.11 Solving Print Quality Problems 5.11 Print Quality Checklist 5.11 Solving Print Quality Problems 5.12 Troubleshooting Error Messages 5.17 Common Windows Problems 5.18 Common Linux Problems 5.19 Chapter 6: SPECIFICATIONS Printer - Xerox 3117 | User Guide - Page 5
may have misunderstood the operating instruction. If you cannot resolve the conflict, contact your sales or service representative for assistance. 5 Unplug diminish performance, and may result in the risk of fire or electric shock. 10 Do not allow pets to chew on the AC power or PC interface cords. - Xerox 3117 | User Guide - Page 6
. •If the machine exhibits a sudden and distinct change in performance. 14 Adjust only those controls covered by the operating instructions. Improper adjustment of other controls may result in damage, and may require extensive work by a qualified service technician to restore the machine to normal - Xerox 3117 | User Guide - Page 7
above a Class I level during normal operation, user maintenance, or prescribed service condition. WARNING Never operate or service the printer with the protective cover removed from Laser/ Scanner assembly. The reflected beam, although invisible, can damage your eyes. When using this product - Xerox 3117 | User Guide - Page 8
please contact your nearest Xerox dealer. Power Saver This printer contains advanced energy conservation printer does not receive data for an extended period of time, power consumption is automatically lowered. The energy star emblem does not represent EPA endorsement of any product or service - Xerox 3117 | User Guide - Page 9
installation. This equipment generates, uses and can radiate radio frequency energy and, if not installed and used in accordance with the instructions or an experienced radio/TV technician for help. CAUTION: Changes or modifications not expressly approved by the manufacturer responsible for - Xerox 3117 | User Guide - Page 10
and Certifications The CE marking applied to this product symbolizes Xerox Corporation. Declaration of Conformity with the following applicable 93 approximation of the laws of the Member States related to electromagnetic compatibility. March 9, 1999: Council Directive 1999/5/EC on radio equipment - Xerox 3117 | User Guide - Page 11
10 - Xerox 3117 | User Guide - Page 12
1 Introduction Congratulations on the purchase of your Printer! This chapter includes: • Special Features • Printer Driver Features • Printer Components • Understanding the Control Panel - Xerox 3117 | User Guide - Page 13
letterhead on plain paper. For details, see Software User Guide. • This printer meets Energy Star guidelines for energy efficiency. Print in various environments • You can print in Windows 98/Me/2000/XP. • Your printer is compatible with various Linux OS. • Your printer comes with the USB interface - Xerox 3117 | User Guide - Page 14
and media type • number of copies Table below lists a general overview of features supported by your printer drivers. Feature Printer Driver Win 98/Me/ 2000/XP Linux Toner Save Y Y Print quality option Y Y Poster printing Y N Multiple pages per sheet (N-up) Y Y(2,4) Fit to page - Xerox 3117 | User Guide - Page 15
Printer Components Front View Output support Paper output tray Top cover (Face down) Control panel Paper input tray Front cover Rear guide Side guides Toner cartridge 1.4 INTRODUCTION - Xerox 3117 | User Guide - Page 16
Rear View 1 Power switch Power receptacle USB port INTRODUCTION 1.5 - Xerox 3117 | User Guide - Page 17
paper, no paper, the open top or front cover, or the empty toner cartridge. See "Troubleshooting Error Messages" on page 5.17. If you press the button while the printer is receiving data, the LED blinks red to cancel printing. In Manual Feed mode, if there is no paper in the tray, the LED - Xerox 3117 | User Guide - Page 18
button once again, this LED is off and the Toner Save mode is disabled. If the and LEDs blink, your system has some problems. To solve the problem, see "Troubleshooting Error Messages" on page 5.17 Cancel( ) button Function Description Printing demo page In Ready mode, press and hold this - Xerox 3117 | User Guide - Page 19
2 Setting Up Your Printer This chapter provides step by step information on setting up your printer. This chapter includes: • Unpacking • Installing the Toner Cartridge • Loading Paper • Connecting a Printer Cable • Turning the Printer on • Printing a Demo Page • Installing Printer Software - Xerox 3117 | User Guide - Page 20
and all accessories from the packing carton. Make sure that the printer has been packed with the following items: 2 Toner Cartridge Power Cord CD-ROM Quick Install Guide USB Cable Notes: • If any items are missing or damaged, notify your dealer immediately. • Components may differ from one - Xerox 3117 | User Guide - Page 21
2 Carefully remove all of packing tape from the printer. Tape Selecting a Location Select a level, stable place of heat, cold, and humidity. See the image below for clearance space. Do not place the printer close to the edge of your desk or table! Clearance Space •Front: 482.6 mm (enough space - Xerox 3117 | User Guide - Page 22
it toward you to open. 2 Note: Because the printer is very light, it may be moved when you use it; for example, when opening/closing the tray or installing/ removing the toner cartridge. Be careful not to move the printer. 2 Remove the toner cartridge from its bag and remove the paper protecting the - Xerox 3117 | User Guide - Page 23
the toner cartridge to light for more than few minutes. Cover it with a piece of paper, if left exposed for more than a few minutes. • Do not touch the green underside of the toner cartridge. Use the handle on the cartridge to avoid touching this area. 4 Locate the cartridge slots inside the printer - Xerox 3117 | User Guide - Page 24
cover is securely closed. If the cover is not firmly closed, printing errors may occur when you print. Note: When printing text at 5% coverage, you can expect a toner cartridge life of approximately 3,000 pages (1,000 pages for the toner cartridge that is shipped with the printer). SETTING UP YOUR - Xerox 3117 | User Guide - Page 25
and pull it out to extend the tray. Note: Because the printer is very light, it may be moved when you use it; for example, when opening/closing the tray or installing/ removing the toner cartridge. Be careful not to move the printer. 2 Prepare a stack of paper for loading by flexing or fanning them - Xerox 3117 | User Guide - Page 26
3 Load paper with the print side facing up. 2 Make sure that all four corners are flat in the tray. 4 Pay attention not to overload paper. Paper overloading may cause paper jams. 5 Pinch the rear guide to adjust for the paper length and pinch the side guide and slide it to the left flush against - Xerox 3117 | User Guide - Page 27
Connecting a Printer Cable To print from your computer, you need to connect your printer to your computer with a Universal Serial Bus (USB) cable. Note: Connecting the printer to the USB port of the computer requires a certified USB cable. 1 Make sure that both the printer and the computer are - Xerox 3117 | User Guide - Page 28
on the printer using the power switch. 2 1 To the AC outlet Cautions: • The fusing area at the rear portion of the inside of your printer is hot when powered. Be careful not to be burned when accessing this area. • Do not disassemble the printer when it is - Xerox 3117 | User Guide - Page 29
Printing a Demo Page Print a demo page to make sure that the printer is operating correctly. 1 Press and hold down the button on the control panel for about 2 seconds to print a demo page. 2 The Demo page shows the printer's current configuration. 2.11 SETTING UP YOUR PRINTER - Xerox 3117 | User Guide - Page 30
/Me/2000 Windows XP 64 MB or higher 128 MB or higher Free Disk Space Windows 98/Me/2000 Windows XP 300 MB or higher 1 GB or higher Internet Explorer 5.0 or higher NOTE: For Windows 2000/XP, the system administrator should install the software. Printer driver for Linux You can print in Linux - Xerox 3117 | User Guide - Page 31
2.13 SETTING UP YOUR PRINTER - Xerox 3117 | User Guide - Page 32
chapter will help you understand types of paper you can use with this printer and how to properly load paper in the tray for the best print quality. This chapter includes: • Choosing Paper and Other Materials • Verifying the Output Location • Loading Paper • Printing on Special Materials • Canceling - Xerox 3117 | User Guide - Page 33
that fits easily within the paper adjusters of the paper feeder. • Weight: Your printer supports paper weight as follows: • 16~24 lbs (60~90 g/m2) bond for the tray • 16~43 lbs (60~165 g/m2) bond for the manual feed • Brightness: Some papers are whiter than others and produce sharper, more vibrant - Xerox 3117 | User Guide - Page 34
and the poor print quality. • Use only high quality copier grade paper for the best print quality. • Avoid oF to 86 oF). The relative humidity should be between 10 % and 70 %. • During storage, you should use • Only use materials specifically recommended for use in laser printers. • To prevent - Xerox 3117 | User Guide - Page 35
windows, coated lining, selfadhesive seals, or other synthetic materials. - Do not use damaged or poorly made envelopes. - Only use envelopes recommended for laser printers expose the printed transparencies to prolonged sunlight. - Only use transparencies recommended for use in laser printers. - - Xerox 3117 | User Guide - Page 36
can be printed with this printer. The minimum size is 76 by 127mm(3.0 by 5.0 in.) and the maximum size is 216 by 356mm(8.5 by 14 in.) - Always insert the short-edge into the Manual Feed first. If you want to print in landscape mode, make this selection through your software. Inserting paper - Xerox 3117 | User Guide - Page 37
Location The printer has the paper output tray that collects paper facedown, in correct order. Notes: • If you continuously print many pages, loading helps prevent paper jams and ensure trouble-free printing. Do not remove the paper in the tray while a job is printing. Doing so may cause a paper jam - Xerox 3117 | User Guide - Page 38
the paper guide against the print material without bending the paper. 2 When you print a document, you must select Manual Feed for Source from the software application, and then select the correct paper size and type. For details, see Software User Guide. 3 Press the button on the printer to start - Xerox 3117 | User Guide - Page 39
down. The stamp area is on the left side and the end of the envelope with the stamp area enters the printer first and center of the tray. Cautions: If you print 20 envelopes in succession, the surface of the top cover may become hot. Please exercise caution. •Load labels in the - Xerox 3117 | User Guide - Page 40
. 3 Notes: • To prevent transparencies from sticking to each other, do not let the printed sheets stack up as they are printed out. • Place transparencies on a flat surface after removing them from the printer. • Do not use transparencies that are separating from the backing sheet. •Load card stock - Xerox 3117 | User Guide - Page 41
size and type. For details, see Software User Guide. 5 Press the button to start feeding. Canceling a Print Job There are two ways to cancel a print job. To stop a print job from the Control Panel Press the button on the control panel. The printer will finish printing the page that is moving - Xerox 3117 | User Guide - Page 42
To stop a print job from the Printers folder 1 From the windows Start menu, select Settings. 2 Select Printers to open the Printers window, and double- click the your printer icon. 3 From the Document menu, select Cancel Printing (Windows 98/Me) or Cancel (Windows 2000/XP). In Manual Feed mode, - Xerox 3117 | User Guide - Page 43
4 Maintaining Your Printer This chapter provides suggestions for maintaining the toner cartridge and the printer. This chapter includes: • Maintaining the Toner Cartridge • Using the Toner Save Mode • Cleaning the Printer • Consumables and Replacement Parts - Xerox 3117 | User Guide - Page 44
a refilled cartridge. • Store toner cartridges in the same environment as the printer. • To prevent damage to the toner cartridge, do not expose it to light for more than few minute. Toner cartridge life expectancy The life of the toner cartridge depends on the amount of toner 4 that print jobs - Xerox 3117 | User Guide - Page 45
current print job before replacing the toner cartridge. 1 Open the front cover. 2 Pull the toner cartridge out and remove it from the printer. Cautions: • Avoid reaching too far into the printer. The fusing area may be hot. • To prevent damage to the toner cartridge, do not expose it to light for - Xerox 3117 | User Guide - Page 46
water sets toner into fabric. 4 Reinsert the toner cartridge into the printer. Ensure that the toner cartridge snaps into place. 4 5 Close the front cover. Make sure that the cover is securely closed. If it is not firmly closed, printing errors may occur when you print. MAINTAINING YOUR PRINTER 4.4 - Xerox 3117 | User Guide - Page 47
the Toner Cartridge If the print remains light after redistributing toner (see page 4.3), replace the toner cartridge. Remove the old cartridge and install a new toner cartridge. See "Installing the Toner Cartridge" on page 2.4. Using the Toner Save Mode The Toner Save mode allows the printer to - Xerox 3117 | User Guide - Page 48
below each time the toner cartridge is replaced or if print quality problems occur. Note: While cleaning the inside of the printer, be careful not to touch the transfer roller (located underneath the toner cartridge). Oil from your fingers can cause print quality problems. Caution: Cleaning the - Xerox 3117 | User Guide - Page 49
out and remove it from the printer.. 4 With a dry, lint-free cloth, wipe away any dust and spilled toner from the toner cartridge area and the toner cartridge cavity. Note: To prevent damage to the toner cartridge, do not expose it to light for more than few minute. Cover it with a piece of - Xerox 3117 | User Guide - Page 50
6 Reinsert the toner cartridge and close the cover. Make sure that the cover is securely closed. If it is not firmly closed, printing errors may occur when you print. 7 Plug in the power cord, and turn the printer on. 4 MAINTAINING YOUR PRINTER 4.8 - Xerox 3117 | User Guide - Page 51
Pick-up Roller Approx. 50,000 pages Fuser Unit Approx. 50,000 pages To purchase the consumables and replacement parts, contact Xerox dealer or the place where you bought your product. We strongly recommend that items be installed by a trained service personnel. 4.9 MAINTAINING YOUR PRINTER - Xerox 3117 | User Guide - Page 52
information for what to do if you encounter an error while using your printer. This chapter includes: • Troubleshooting Checklist • Solving General Printing Problems • Clearing Paper Jams • Solving Print Quality Problems • Troubleshooting Error Messages • Common Windows Problems • Common Linux - Xerox 3117 | User Guide - Page 53
"Solving General Printing Problems" on page 5.3. If completing the checklist does not resolve the printer problem, check the following troubleshooting sections. • "Solving General Printing Problems" on page 5.3. • "Troubleshooting Error Messages" on page 5.17. • "Common Windows Problems" on page - Xerox 3117 | User Guide - Page 54
Loading Paper" on page 2.7. • Install the toner cartridge. See "Installing the Toner Cartridge" on page 2.4. If the problem persists, contact your service representative. The printer may be in Add paper to the tray and press the 5 Manual Feed mode. button on the printer's control panel to begin - Xerox 3117 | User Guide - Page 55
does not print. (continued) The printer driver may be incorrectly installed. Reinstall the printer driver; see Software User Guide. Try printing a demo page. The printer is malfunctioning. Check the LEDs on the control panel to determine if the printer is indicating a system error. Paper does - Xerox 3117 | User Guide - Page 56
cable. The wrong printer driver was selected. Check the application's printer selection menu to ensure that your printer is selected. The software application is malfunctioning. Try printing a job from another application. Pages print, but are blank. The toner cartridge is defective or out - Xerox 3117 | User Guide - Page 57
" on page 6.3. • Paper that is outside of the supported size range has been used. See "Paper Specifications" on page 6.3. If a paper jam occurs, the LED on the control panel lights red. Find and remove the jammed paper. If it is invisible, look inside the printer. 5.6 SOLVING PROBLEMS - Xerox 3117 | User Guide - Page 58
in loose toner on the page. If you get any toner on your clothes, wash them in cold water as hot water will set the toner into the Cautions: • When removing the jammed paper, be careful not to touch the heat roller (located underneath the inner cover). It is hot and could cause burns! • The - Xerox 3117 | User Guide - Page 59
3 Loosen the paper if it is caught in the heat rollers. Then pull the paper gently out. 4 Close the inner cover and the top cover. Printing resumes automatically. Note: Failed pages will not reprint. Try printing the pages. 5.8 SOLVING PROBLEMS - Xerox 3117 | User Guide - Page 60
tray. Make sure that all of the paper is properly aligned in the tray. 2 Open and close the front or top cover to resume printing the document from failed pages. Around the Toner Cartridge 1 Open the front cover. 5 2 Pull the toner cartridge out and remove it from the printer. SOLVING PROBLEMS 5.9 - Xerox 3117 | User Guide - Page 61
3 Gently pull the paper toward you. 4 Check that there is no other paper in the printer. 5 Reinstall the toner cartridge and close the front cover. Your printer resumes printing the document from failed pages. 5.10 SOLVING PROBLEMS - Xerox 3117 | User Guide - Page 62
inside of the printer (see page 4.6). • Adjust the print resolution from the printer properties (see Software User Guide). • Ensure that the Toner Save mode is off (see Software User Guide and page 4.5). • Clear general printing problems (see page 5.3). • Install a new toner cartridge, and check the - Xerox 3117 | User Guide - Page 63
page is light, the print resolution setting is too light or the Toner Save mode is on. Adjust the print resolution and the Toner Save mode in the printer properties. For details, see Software User Guide. • A combination of faded or smeared defects may indicate that the toner cartridge needs cleaning - Xerox 3117 | User Guide - Page 64
fix the problem. • Change to a lighter weight pages. See "Paper Specifications" on page 6.3. • Check the printer's environment; very dry (low humidity) or high humidity (higher than 80% RH) conditions can increase the amount of background shading. • Remove the old toner cartridge and install a new - Xerox 3117 | User Guide - Page 65
, change the printing layout to avoid printing over areas that have overlapping seams on the reverse side. Printing on seams can cause problems. • If background scatter covers the entire surface area of a printed page, adjust the print resolution through your software application or the printer - Xerox 3117 | User Guide - Page 66
Install a new toner cartridge. 5 • The printer may require repair. Contact a service representative. Loose toner • Clean the inside of the printer. • Check the paper type and quality. See "Paper Specifications" on page 6.3. • Install a new toner cartridge. • If the problem persists, the printer - Xerox 3117 | User Guide - Page 67
: • The toner cartridge may be installed improperly. Remove the cartridge and reinsert. • The toner cartridge may be defective. Install a new toner cartridge. See "Installing the Toner Cartridge" on page 2.4. • If the problem persists, the printer may require repair. Contact a service representative - Xerox 3117 | User Guide - Page 68
Load the paper in the Tray. • The toner cartridge is out of toner. Remove the old toner LED lights cartridge and install a new one. See "Installing the Toner red Cartridge" on page 2.4. • You pressed the button while the printer is receiving data. • In Manual Feed mode, there is no paper in - Xerox 3117 | User Guide - Page 69
Group, then restart Windows. Reinstall the printer software. Close all other applications, reboot Windows, and try printing again. Note: Refer to Microsoft Windows 98, Me, 2000 or XP User's Guide that came with your PC for further information on Windows error messages. 5.18 SOLVING PROBLEMS - Xerox 3117 | User Guide - Page 70
file. since the default queue in LPRng is defined as the first queue in /etc/printcap, therefore it is not possible for the Xerox Printer Package to change the default when some queues have otherwise been defined using printtool. • LPD systems identify the default queue as the one named 'lp - Xerox 3117 | User Guide - Page 71
feeds EPS data to CUPS, the document may not print correctly. I can't print to a SMB (Windows) printer. To be able to configure and use SMB-shared printers (such as printers shared on a Windows machine), you need to have a correct installation of the SAMBA package that enables that feature. The - Xerox 3117 | User Guide - Page 72
printer, I sometimes get compliant PostScript output that may not be supported by 5 error messages printing Ghostscript, or even the printer error messages. However, since the application is at probably fault, contact your software vendor to inform them of the issue. SOLVING PROBLEMS 5.21 - Xerox 3117 | User Guide - Page 73
5.22 SOLVING PROBLEMS - Xerox 3117 | User Guide - Page 74
6 Specifications This chapter includes: • Printer Specifications • Paper Specifications - Xerox 3117 | User Guide - Page 75
(RAM) 8 MB (non expandable) Fonts Windows font Interface USB 1.1 (Compatible with USB 2.0) OS Compatibility d Windows 98/Me/2000/XP, Various Linux OS a. Print speed will be affected by Operating system used, computing performance, application software, connecting method, media type, media - Xerox 3117 | User Guide - Page 76
that does not meet the guidelines outlined in this User's Guide can cause the following problems: • Poor print quality • Increased paper jams • Premature wear on the printer. Notes: • Some paper may meet all of the guidelines in this guide and still not produce satisfactory results. This may be the - Xerox 3117 | User Guide - Page 77
manual feed mode Envelopes No.10 manual feed mode Card stocks Post Card (101.6 x 152.4/4 x 6) 90 to 163 g/m2 Minimum size (custom, 76 x 127/3 x5) 16 to 43 lb (60 to Maximum size (Legal) 165 g/m2 bond) a. The printer supports a wide range of media sizes. b. Capacity may vary depending on print - Xerox 3117 | User Guide - Page 78
or recycled), check the label on the package. The following problems may cause print quality deviations, jamming or even damage to the printer. Symptom Problem with Paper Solution Poor print quality or toner adhesion, problems with feeding Too moist, too rough, too smooth or embossed; faulty - Xerox 3117 | User Guide - Page 79
Category Acid Content Caliper Curl in Ream Cut Edge Conditions Fusing Compatibility Grain Moisture Content Smoothness Specifications 5.5 ~ 8.0 pH 0.094 ~ 0.18 mm (3.0 ~ 7.0 mils) Flat within 5 mm (0.02 in.) Cut with sharp blades with no visible fray. Must not scorch, melt, offset, or - Xerox 3117 | User Guide - Page 80
Ideally, the printer and paper used it absorbs any excess moisture, causing light print and dropouts. Also, as paper loses and be properly maintained to ensure optimum printer performance. The required condition 6 is proof wrapping. If the printer environment is subject to extremes, unwrap only - Xerox 3117 | User Guide - Page 81
5.6 Q quality problem, solve 5.12 S software overview 2.12 system requirements Windows 2.12 specification paper 6.3 printer 6.2 system requirements Windows 2.12 T toner install 2.4 life 4.2 redistribute 4.3 replace 4.5 toner save 4.5 transparencies, print 3.9 turn on, printer 2.10 U unpack 2.2 USB - Xerox 3117 | User Guide - Page 82
- Xerox 3117 | User Guide - Page 83
CONTENTS Chapter 1: INSTALLING PRINTER SOFTWARE IN WINDOWS Installing Printer Software ...3 Reinstalling Printer Software ...3 Removing Printer Software ...3 Chapter 2: BASIC PRINTING Printing a Document ...4 Printer Settings ...5 Layout Tab ...5 Paper Tab ...6 Graphics Tab ...7 Other Features Tab - Xerox 3117 | User Guide - Page 84
a Host Computer 16 Setting Up a Client Computer 16 Chapter 5: USING YOUR PRINTER IN LINUX System Requirements ...17 Installing the Printer Driver ...18 Changing the Printer Connection Method 19 Uninstalling the Printer Driver 20 Using the Configuration Tool 20 Changing LLPR Properties ...21 2 - Xerox 3117 | User Guide - Page 85
appears. If the installation window does not appear, click Start and then Run. Type X:\Setup.exe, replacing "X" with the letter which represents your drive and click OK. 2 Choose the type of installation. • Install Printer Driver: Installs the software for your printer. • User Guide: Allows you to - Xerox 3117 | User Guide - Page 86
Help Printing a Document NOTE: • Your printer driver Properties window that appears in this User's Guide may differ depending on the printer in use. However the composition of the printer properties window is similar. • Check the Operating System(s) that are compatible with your printer. Please - Xerox 3117 | User Guide - Page 87
are displayed, you can review and change the settings needed for your print job. Your printer properties window may differ, depending on your operating system. This Software User's Guide shows the Properties window for Windows 98. Your printer driver Properties window that appears in this User - Xerox 3117 | User Guide - Page 88
Paper Tab Use the following options to set the basic paper handling specifications when you access the printer properties. See "Printing a Document" on page 4 for more information on accessing printer properties. Click the Paper tab to access various paper properties. 1 2 3 4 5 1 Copies Copies - Xerox 3117 | User Guide - Page 89
. 7 Basic Printing • TrueType Options: This option determines what the driver tells the printer about how to image the text in your document. Select the appropriate setting according to the status of your document. This option is available only when you use Windows 98/Me. - Download as Bit Image - Xerox 3117 | User Guide - Page 90
. The following procedure is for Windows XP. For other Windows OS, refer to the corresponding Windows User's Guide or online help. 1 Click the Windows Start menu. 2 Select Printers and Faxes. 3 Select your printer driver icon. 4 Right-click on the printer driver icon and select Properties. 5 Click - Xerox 3117 | User Guide - Page 91
from the upper right corner of the window, and then click on any setting. 3 Click Save. When you save Favorites, all current driver settings are saved. To use a saved setting, select the item from the Favorites drop down list. The printer is now set to print according to the Favorites setting you - Xerox 3117 | User Guide - Page 92
options and advanced printing tasks. NOTE: • Your printer driver Properties window that appears in this User's Guide may differ depending on the printer in use. However the composition of the printer properties window is similar. • If you need to know the exact name of your printer, you can check - Xerox 3117 | User Guide - Page 93
9, or 16 sheets of paper, for the purpose of pasting the sheets together to form one poster-size document. 1 To change the print settings from your software application, access printer properties. See "Printing a Document" on page 4. 2 Click the Layout tab, select Poster in the Type drop- down list - Xerox 3117 | User Guide - Page 94
digital document size. This can be useful when you want to check fine details on a small document. 1 To change the print settings from your software application, access printer properties. See "Printing a Document" on page 4. 2 From the Paper tab, select Fit to Page in the Type drop- down list - Xerox 3117 | User Guide - Page 95
the watermark message and options. 4 Click Update to save the changes. 5 Click OK until you exit the Print window. Deleting a Watermark 1 To change the print settings from your software application, access printer properties. See "Printing a Document" on page 4. 2 From the Other Features tab, click - Xerox 3117 | User Guide - Page 96
the document as an overlay, access printer properties. See "Printing a Document" on page 4. 3 Click the Other Features tab, and click Edit button in the Overlay section. Preview Image 4 In the Edit Overlay window, click Create Overlay. 5 In the Create Overlay window, type a name of up to eight - Xerox 3117 | User Guide - Page 97
an overlay with a document: 1 Create or open the document you want to print. 2 To change the print settings from your software application, access printer properties. See "Printing a Document" on page 4. 3 Click the Other Features tab. 4 Select the desired overlay from the Overlay drop-down list - Xerox 3117 | User Guide - Page 98
is for Windows XP. For other Windows OS, refer to the corresponding Windows User's Guide or online help. NOTES: • Check the Operating System(s) that are compatible with your printer. Please refer to the OS Compatibility section of Printer Specifications in your Printer User's Guide. • If you - Xerox 3117 | User Guide - Page 99
environment. This chapter includes: • System Requirements • Installing the Printer Driver • Changing the Printer Connection Method • Uninstalling the Printer Driver • Using the Configuration Tool • Changing LLPR Properties System Requirements Supported OS • Redhat 6.2/7.0/7.1 and above • Linux - Xerox 3117 | User Guide - Page 100
. 8 You see the printers currently installed in your system. Select the printer you want to use. The function tabs available for the selected printer appear at the top of the Add a Printer window. NOTE: If the printer supports PS printing, it is recommended to select the PS driver. 18 Using Your - Xerox 3117 | User Guide - Page 101
printing system in use. 11 To exit, click OK. 12 When the window indicates that the new printer is successfully configured, click OK. 13 The Linux Printer Configuration window reappears. From the Info tab, you can view information about your printer driver. If necessary, you can change the printer - Xerox 3117 | User Guide - Page 102
by typing in "linux-config." 2 The Linux Printer Configuration window shows a list of installed printers in the left pane. The right pane shows a number of tabs that display information regarding the currently selected printer. Select your printer driver, if not currently selected. 3 The Info tab - Xerox 3117 | User Guide - Page 103
change the default printer settings. You can also open the LLPR Properties window in the following ways: •From the Startup Menu icon at the bottom of the screen, select Linux Printer, and then Linux LPR. •If the Linux Printer Configuration window is currently open, select Test Print from the Print - Xerox 3117 | User Guide - Page 104
Linux 21 Windows 6 poster, print 11 power save, set 8 print document 4 fit to page 12 from Windows 4 N-up Windows 10 overlay 14 poster 12 scaling 11 watermark 12 printer properties, set Linux 21 Windows 5 printer resolution, set Windows 7 printer software install Linux 18 Windows 3 uninstall Linux
-
 1
1 -
 2
2 -
 3
3 -
 4
4 -
 5
5 -
 6
6 -
 7
7 -
8
-
9
-
10
-
11
-
12
-
13
-
14
-
15
-
16
-
17
-
18
-
19
-
20
-
21
-
22
-
23
-
24
-
25
-
26
-
27
-
28
-
29
-
30
-
31
-
32
-
33
-
34
-
35
-
36
-
37
-
38
-
39
-
40
-
41
-
42
-
43
-
44
-
45
-
46
-
47
-
48
-
49
-
50
-
51
-
52
-
53
-
54
-
55
-
56
-
57
-
58
-
59
-
60
-
61
-
62
-
63
-
64
-
65
-
66
-
67
-
68
-
69
-
70
-
71
-
72
-
73
-
74
-
75
-
76
-
77
-
78
-
79
-
80
-
81
-
82
-
83
-
84
-
85
-
86
-
87
-
88
-
89
-
90
-
91
-
92
-
93
-
94
-
95
-
96
-
97
-
98
-
99
-
100
-
101
-
102
-
103
-
104
 |
 |