Xerox M118i Getting Started with Scan to PC Desktop - Page 3
Installing Scan to PC Desktop
 |
UPC - 095205219265
View all Xerox M118i manuals
Add to My Manuals
Save this manual to your list of manuals |
Page 3 highlights
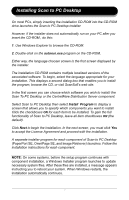
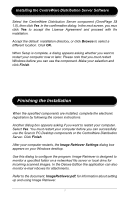
I Installing Scan to PC Desktop On most PCs, simply inserting the installation CD-ROM into the CD-ROM drive launches the Scan to PC Desktop installer. However, if the installer does not automatically run on your PC after you insert the CD-ROM , do this: 1. Use Windows Explorer to browse the CD-ROM. 2. Double-click on the autorun.exe program on the CD-ROM. Either way, the language chooser screen is the first screen displayed by the installer. The installation CD-ROM contains multiple localized versions of the associated software. To begin, select the language appropriate for your installation. This displays a second dialog box that enables you to install the program, browse the CD, or visit ScanSoft's web site. In the first screen you can choose which software you wish to install: the Scan To PC Desktop or the CentreWare Distribution Server component. Select Scan to PC Desktop then select Install Program to display a screen that allows you to specify which components you want to install. Click the checkboxes ON for each item to be installed. To gain the full functionality of Scan to PC Desktop, leave all item checkboxes ON (the default). Click Next to begin the installation. In the next screen, you must click Yes to accept the License Agreement and proceed with the installation. A separate installer program for each component of Scan to PC Desktop (PaperPort SE, OmniPage SE, and Image Retriever) launches. Follow the installation instructions for each component. NOTE: On some systems, before the setup program continues with component installation, a Windows Installer program launches to update necessary system files. After these files are installed, a message appears instructing you to reboot your system. When Windows restarts, the installation automatically continues. 1
-
 1
1 -
 2
2 -
 3
3 -
 4
4 -
 5
5 -
 6
6 -
 7
7 -
 8
8 -
 9
9 -
10
-
11
-
12
-
13
-
14
-
15
-
16
-
17
-
18
-
19
-
20
-
21
-
22
-
23
-
24
-
25
 |
 |
