Yamaha CLP-130 Owner's Manual
Yamaha CLP-130 Manual
 |
View all Yamaha CLP-130 manuals
Add to My Manuals
Save this manual to your list of manuals |
Yamaha CLP-130 manual content summary:
- Yamaha CLP-130 | Owner's Manual - Page 1
Owner's Manual Bedienungsanleitung Mode d'emploi Manual de instrucciones Before using the Clavinova, be sure to read "PRECAUTIONS„ on pages 6 -7. Achten Sie darauf, vor Einsatz des Clavinova die "VORSICHTSMASSNAHMEN„ auf Seite 6-7 durchzulesen. Avant d'utiliser le Clavinova keyboard la unidad sale de - Yamaha CLP-130 | Owner's Manual - Page 2
operating and maintenance (servicing) instructions in the literature SPECIFICATIONS SUBJECT TO CHANGE: The information contained in this manual is believed to be correct at the time of printing. However, Yamaha manual as a permanent record of your purchase. CLP-130 Model Serial No. Purchase Date - Yamaha CLP-130 | Owner's Manual - Page 3
(page 69): This section introduces reference material. * The models CLP-130/120 will be referred to as the CLP/Clavinova in this Owner's Manual. * The illustrations and LED displays shown in this owner's manual are for instructional purposes only and may appear somewhat different from those on your - Yamaha CLP-130 | Owner's Manual - Page 4
52 Troubleshooting 56 Options 56 CLP-120: Keyboard Stand Assembly ......... 57 CLP-130: Keyboard Stand Assembly ......... 60 Preset Voice List 63 Demo Song List 66 Index 67 Appendix Factory Setting List 70 MIDI Data Format 71 MIDI Implementation Chart 75 Specifications 76 4 CLP-130/120 - Yamaha CLP-130 | Owner's Manual - Page 5
from "50 Greats for the Piano Listening to 50 Piano Preset Songs" on page 17 Clavinova AUX IN jacks" on page 51 Connecting a computer Connecting a Personal Computer" on page 52 Assembling Assembling and disassembling the Clavinova CLP-130/120": Keyboard Stand Assembly" on pages page 57-62 CLP-130 - Yamaha CLP-130 | Owner's Manual - Page 6
BEFORE PROCEEDING * Please keep this manual in a safe place for future from the outlet, and have the instrument inspected by qualified Yamaha service personnel. CAUTION Always follow the basic precautions listed below to avoid in the instrument overheating. 6 CLP-130/120 PRECAUTIONS (1)B-7 1/2 - Yamaha CLP-130 | Owner's Manual - Page 7
cord from the AC outlet. Then have the instrument inspected by qualified Yamaha service personnel. G Do not place vinyl, plastic or rubber objects on the instrument, since this might discolor the panel or keyboard. G Do not rest your weight on, or place heavy objects on the instrument, and do not use - Yamaha CLP-130 | Owner's Manual - Page 8
ENGLISH Accessories • "50 Greats for the Piano" (Music Book) • Owner's Manual This manual contains complete instructions for operating your Clavinova. • Bench A bench may be included or optional, depending on your locale. Maintenance Clean the instrument using a dry or slightly damp soft cloth ( - Yamaha CLP-130 | Owner's Manual - Page 9
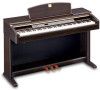
Clavinova CLP-130/120 digital piano offers unmatched sonic realism and natural grand-piano type playability as well as Yamaha's original "AWM Dynamic Stereo Sampling (CLP-130)/AWM Stereo Sampling (CLP-120)" tonegeneration technology for rich, musical voices, and a special "Graded Hammer" keyboard - Yamaha CLP-130 | Owner's Manual - Page 10
a piece of metal or paper on top of the key cover. Small objects placed on the key cover may fall inside the unit when the cover is as far as it will go. 2. Flip down the two metal supports at the left and right on the rear of the music rest. 3. Lower . 10 CLP-130/120 Before Using the Clavinova - Yamaha CLP-130 | Owner's Manual - Page 11
the key cover Clavinova at a high volume level for a long period of time, or your hearing may be damaged. TERMINOLOGY MASTER VOLUME: The volume level of the entire keyboard sound TIP You can also adjust the [PHONES] output level and the AUX IN input level using the [MASTER VOLUME] slider. CLP-130 - Yamaha CLP-130 | Owner's Manual - Page 12
HP. SW SPEAKER PHONES standard stereo phone plug Using the Headphone Hanger A headphone hanger is included in the CLP-130/120 package so that you can hang the headphones on the Clavinova. Install the headphone hanger using included two screws (4 × 10mm) as shown in the figure. CAUTION Do not hang - Yamaha CLP-130 | Owner's Manual - Page 13
45 F8. (CLP-130) / F7. (CLP-120) MIDI Functions ..... 45 F9. (CLP-130) / F8. (CLP-120) Backup Functions.. 48 About MIDI 49 Connections 50 Connectors 50 Connecting a Personal Computer 52 Troubleshooting 56 Options 56 CLP-120: Keyboard Stand Assembly 57 CLP-130: Keyboard Stand Assembly 60 - Yamaha CLP-130 | Owner's Manual - Page 14
(CLP-130) 2 MIN MAX MASTER VOLUME MELLOW BRIGHT 3 BRILLIANCE 45 6 START/STOP TEMPO FUNCTION DEMO METRONOME TEMPO / FUNCTION 7 TEMPO/ OTHER VALUE - /NO +/ YES 8 PRESET USER 1 USER 2 USER 3 TRACK 1 TRACK START/STOP REC 2 SONG 9 GRAND PIANO 1 GRAND PIANO 2 E.PIANO E.PIANO - Yamaha CLP-130 | Owner's Manual - Page 15
L/L+R R L/L+R AUX IN G Connectors (CLP-120) MIDI THRU OUT IN Mac MIDI PC-1 PC-2 TO HOST HOST SELECT HI J PEDAL E values, as shown below, depending on the operation. Tempo (Normal indication) A song number of "50 Greats for the Piano" Function number Parameter value CLP-130 - Yamaha CLP-130 | Owner's Manual - Page 16
CLP-130/120's voices. 25 4 3 MIN MAX MASTER VOLUME MELLOW BRIGHT BRILLIANCE START/STOP TEMPO FUNCTION DEMO METRONOME TEMPO / FUNCTION TEMPO/ OTHER VALUE - /NO +/ YES PRESET USER 1 USER 2 USER 3 TRACK 1 TRACK START/STOP REC 2 SONG GRAND PIANO 1 GRAND PIANO 2 E.PIANO E.PIANO - Yamaha CLP-130 | Owner's Manual - Page 17
VALUE - /NO +/ YES PRESET USER 1 USER 2 USER 3 TRACK 1 TRACK START/STOP REC 2 SONG GRAND PIANO 1 GRAND E.PIANO E.PIANO PIANO Song: On the CLP-130/120, performance data is called a "Song." This includes demonstration tunes and piano preset tunes. TIP You can play the keyboard along with the - Yamaha CLP-130 | Owner's Manual - Page 18
MIDI reception is not possible in Piano Song mode. Piano song data is not transmitted via the MIDI on the keyboard. The VALUE - /NO +/ YES PRESET USER 1 USER 2 USER 3 TRACK 1 TRACK START/STOP REC 2 SONG GRAND PIANO 1 GRAND PIANO 2 E.PIANO E.PIANO CLP-130/120 Listening to 50 Piano Preset Songs - Yamaha CLP-130 | Owner's Manual - Page 19
automati- cally as soon as you start playing on the keyboard. To engage the Synchro Start function press the SONG [ Stop playback. When playback is complete, it automatically stops and the Clavinova locates the top of the song. If you wish to stop CLP-130/120 Listening to 50 Piano Preset Songs 19 - Yamaha CLP-130 | Owner's Manual - Page 20
help guide you into the phrase) starts at the A point of the song. However, when the A point is set at the beginning of the song, the automatic lead-in is not played. NOTE The A and B points are automatically canceled when a new song is selected. 20 CLP-130/120 Listening to 50 Piano Preset Songs - Yamaha CLP-130 | Owner's Manual - Page 21
VALUE - /NO +/ YES PRESET USER 1 USER 2 USER 3 TRACK 1 TRACK START/STOP REC 2 SONG GRAND PIANO 1 GRAND PIANO 2 E.PIANO E.PIANO PIANO 1 voice on the CLP130 Voice: On the Clavinova, a voice means a you strike the keys, although different playing (page 61: CLP-130, page 58: CLP-120). TIP The - Yamaha CLP-130 | Owner's Manual - Page 22
E.PIANO E.PIANO PIANO 2 1 2 HARPSI- E.CLAVICHORD CHORD VIBRAPHONE VARIATION CHURCH JAZZ ORGAN ORGAN STRINGS CHOIR GUITAR WOOD BASS E.BASS SPLIT VOICE ROOM CHORUS HALL 1 PHASER HARD HALL 2 TREMOLO MEDIUM STAGE DELAY SOFT ON REVERB EFFECT TOUCH TRANSPOSE [VARIATION] (CLP-130 - Yamaha CLP-130 | Owner's Manual - Page 23
Even if the REVERB effect is OFF, a "Soundboard Reverb" effect will be applied when the GRAND PIANO 1 voice is selected. Adjusting Reverb Depth Adjust the reverb depth for the selected voice by using TIP Default depth settings are different for each voice. CLP-130/120 Selecting & Playing Voices 23 - Yamaha CLP-130 | Owner's Manual - Page 24
maximum loudness to be produced with relatively light key pressure. All notes are produced at the same volume no matter how hard the keyboard is played. You can adjust the volume. TIP This setting does not change the weight of the keyboard. TIP Normal setting = MEDIUM TIP The touch sensitivity - Yamaha CLP-130 | Owner's Manual - Page 25
: Changing the key signature of a song. On the Clavinova, transposing shifts the pitch of the entire keyboard. TIP The transposition range: -12: -12 semitones (down one octave) 0: normal pitch 12: 12 semitones (up one octave) TIP Notes below and above the A-1 .... C7 range of the CLP-130/ 120 sound - Yamaha CLP-130 | Owner's Manual - Page 26
two voices simultaneously across the entire range of the keyboard. In this way, you can simulate a melody PIANO 1 GRAND E.PIANO E.PIANO PIANO 2 1 2 HARPSI- E.CLAVICHORD CHORD VIBRAPHONE CHURCH ORGAN JAZZ ORGAN STRINGS CHOIR GUITAR WOOD BASS E.BASS VOICE 8 9 10 11 12 13 14 The CLP-130 - Yamaha CLP-130 | Owner's Manual - Page 27
CLP-130) Split mode enables you to play two different voices on the keyboard VALUE - /NO +/ YES PRESET USER 1 USER 2 USER 3 TRACK 1 TRACK START/STOP REC 2 SONG GRAND PIANO 1 GRAND E.PIANO E.PIANO PIANO The split point is initially set at the F 2 key by default. If you do not need to change - Yamaha CLP-130 | Owner's Manual - Page 28
F4 (page 43) you can change the depth value for each voice as you like. Effect depth setting via the panel controls (i.e. pressing the [-/NO] or [+/YES] buttons while holding the [EFFECT] button - see page 23) will be applied to the right voice only. 28 CLP-130/120 Selecting & Playing Voices - Yamaha CLP-130 | Owner's Manual - Page 29
/ FUNCTION TEMPO/ OTHER VALUE - /NO +/ YES PRESET USER 1 USER 2 USER 3 TRACK 1 TRACK START/STOP REC 2 SONG GRAND PIANO 1 GRAND PIANO 2 E.PIANO E.PIANO 1 2 HARPSI- E. be adjusted via the Metronome Volume function in Function mode (page 45). CLP-130/120 Selecting & Playing Voices 29 - Yamaha CLP-130 | Owner's Manual - Page 30
record and play back what you've played on the CLP130/120 keyboard can be an effective practice aid. You can, for to an external MIDI storage device such as the Yamaha MIDI Data Filer MDF3 by using the Bulk Data Dump function described on page 47. 1. Select a song for recording. (CLP-130) Press the - Yamaha CLP-130 | Owner's Manual - Page 31
a note on the keyboard or press the SONG value in KiloBytes (a unit used of measurement for data) indicates how much space remains available for recording on the Clavinova. You can record up to a maximum of about 9,400 notes on the CLP130/120 depending on pedal usage and other factors. TIP (CLP-130 - Yamaha CLP-130 | Owner's Manual - Page 32
recorded on the previous track), press the playback track button before pressing the [REC] button (step 2, above) so that its indicator is turned off. 32 CLP-130/120 Recording Your Performance - Yamaha CLP-130 | Owner's Manual - Page 33
• [EFFECT] depth • Dual mode voices • Dual balance (F3) • Dual detune (F3) • Dual octave shift (F3) • Split mode voices (CLP-130) • Split balance (F4: CLP-130) • Split octave shift (F4:CLP-130) Entire Song • Tempo • Time signature (beat) • [REVERB] type (including OFF) • [EFFECT] type (including OFF - Yamaha CLP-130 | Owner's Manual - Page 34
selection • [VARIATION] ON/OFF (CLP-130) • [REVERB] depth • [EFFECT] depth • Dual mode voices • Split mode voices (CLP-130) Entire Song • Tempo • from [E. PIANO 1] to [E. PIANO 2], press the [E. PIANO 2] button. Be careful not to press the SONG [START/STOP] button or a key on the keyboard, either - Yamaha CLP-130 | Owner's Manual - Page 35
(the song's original tempo) is set when you press the [M] and [L] buttons simultaneously. 3. Stop playback. When playback is complete, the Clavinova automatically stops and locates the top of the song. To stop playback in the middle of a song, press the SONG [START/STOP] button. NOTE (CLP-130) When - Yamaha CLP-130 | Owner's Manual - Page 36
are lit in green. While the Clavinova is playing or stopped, pressing these as soon as you begin playing on the keyboard. This function is useful when you wish of a part of a song from "50 Greats for the Piano" for which playback is turned off (pages 18, 45). CLP-130/120 Playing Back Recorded Songs - Yamaha CLP-130 | Owner's Manual - Page 37
Clavinova functions, such as fine tuning the pitch, selecting a voice for the metronome, repeating playback, etc. The following parameters are available. The CLP-130 has nine main functions, and the CLP MIDI Transmit Transpose Panel/Status Transmit Bulk Data Dump Voice MIDI Tuning Others CLP-130 F1 - Yamaha CLP-130 | Owner's Manual - Page 38
VALUE - /NO +/ YES PRESET USER 1 USER 2 USER 3 TRACK 1 TRACK 2 START/ STOP REC SONG GRAND PIANO 1 GRAND PIANO 2 E.PIANO E.PIANO -F9 (CLP-130) / F1-F8 (CLP-120). value, accordingly. Depending on the setting, the default setting (which is used when you first turn on the power to the Clavinova - Yamaha CLP-130 | Owner's Manual - Page 39
the respective sub-mode. - /NO +/ YES Select a desired sub-mode. LCD indication Change the value. 5. Do the following when you finish using the func- tion. To exit Function mode, press the [TEMPO/FUNCTION#] button so that its [TEMPO] indicator lights. CLP-130/120 Detailed Settings - [FUNCTION] 39 - Yamaha CLP-130 | Owner's Manual - Page 40
play the Clavinova along keys (two white keys at the left end) simultaneously and press the [-/NO] [+/YES] buttons simultaneously. (During the procedure described above, the display indi- cates a value in Hz < ... >. After the procedure, the display returns to the previous indication.) 40 CLP-130 - Yamaha CLP-130 | Owner's Manual - Page 41
You can experience these tunings with the Clavinova. Equal One octave is divided into twelve equal intervals. Currently the most popular piano tuning scale. PureMajor/PureMinor Based on ) followed by a high bar if sharp followed by a low bar if flat CLP-130/120 Detailed Settings - [FUNCTION] 41 - Yamaha CLP-130 | Owner's Manual - Page 42
the values. TIP SHORTCUT: You can jump directly to the Dual mode functions by pressing the [TEMPO/FUNCTION#] button while holding the two Dual mode voice buttons. To exit Function mode, you still need to press the [TEMPO/ FUNCTION#] button so that the TEMPO indicator lights up. 42 CLP-130 - Yamaha CLP-130 | Owner's Manual - Page 43
reset the values. TIP SHORTCUT: You can jump directly to Split mode functions by press- ing the [TEMPO/FUNCTION#] button while holding the [SPLIT] button. To exit Function mode, you still need to press the [TEMPO/ FUNCTION#] button so that the TEMPO indicator lights up. CLP-130/120 Detailed - Yamaha CLP-130 | Owner's Manual - Page 44
the values. Sub-mode F5.1 (CLP-130)/F4.1 (CLP-120) CLP-130) Sustain Sample Depth Setting range: 0 - 20 Normal setting: 12 The GRAND PIANO CLP-130) Keyoff Sample Volume Setting range: 0 - 20 Normal setting: 10 You can adjust the volume of the keyoff sound (the subtle sound produced when the keys - Yamaha CLP-130 | Owner's Manual - Page 45
F8.1: (CLP-130)/F7.1: (CLP-120) MIDI Transmit Channel Selection In any MIDI control setup, the MIDI channels of the transmitting and receiving equipment must be matched for proper data transfer. This parameter enables you to specify the channel on which the Clavinova transmits MIDI data. Setting - Yamaha CLP-130 | Owner's Manual - Page 46
2 only, enabling the Clavinova to play 1 and 2 channel song data received from a music computer or sequencer. TIP Program change and other like channel messages received will not affect the CLP-130/120's panel settings or the notes you play on the keyboard. NOTE No MIDI reception occurs when Demo - Yamaha CLP-130 | Owner's Manual - Page 47
on transmitting and receiving setup data via MIDI, refer to the owner's manual for the connected MIDI device. F8.8: (CLP-130)/F7.8: (CLP-120) Bulk Data Dump You can save current song data on the Clavinova as MIDI bulk data by transferring it to a connected MIDI data filer (such as an MDF3) or - Yamaha CLP-130 | Owner's Manual - Page 48
) / Factory Preset Recall All Dual mode, Split mode, reverb, effect, touch sensitivity, tuning settings, and the settings affected by the Backup Functions can be restored to their original factory preset values by holding the C7 key (right-most key on the keyboard) while - Yamaha CLP-130 | Owner's Manual - Page 49
. Using MIDI, you can control a connected MIDI device from the Clavinova, or control the Clavinova from a connected MIDI device or computer. MIDI connectors MIDI Mac MIDI PC-1 PC-2 HOST SELECT THRU OUT IN (CLP-130) MIDI [IN]: Receives MIDI data. MIDI [OUT]: Transmits MIDI data. MIDI [THRU - Yamaha CLP-130 | Owner's Manual - Page 50
connecting the Clavinova to other electronic components, turn off the power to all the components. Before turning the power on or off to all components, set all volume levels to minimum (0). Otherwise, electrical shock or damage to the components may result. PEDAL CLP-130 6 MIDI Mac MIDI PC - Yamaha CLP-130 | Owner's Manual - Page 51
settings do not. NOTE If you connect the Clavinova to a monaural device, use only the AUX MIDI when you use these connectors. (Refer to "About MIDI" on page 49 for more information.) 6 PEDAL jack Connect the pedal cord from the pedal box. (Refer to "Keyboard Stand Assembly" on pages 57-62.) CLP-130 - Yamaha CLP-130 | Owner's Manual - Page 52
.com/ Yamaha Manual Library: http://www2.yamaha.co.jp/manual/english/ There are three methods by which to connect the Clavinova to a personal computer: 1. Connect the serial port on the computer to the Clavinova's TO HOST jack (page 53). 2. Use a MIDI interface and the Clavinova's MIDI connectors - Yamaha CLP-130 | Owner's Manual - Page 53
users (regarding the MIDI driver) To transfer data via the computer's serial port and the Clavinova's TO HOST jack, you need to install a specific MIDI driver (the Yamaha CBX driver for Windows 8-pin 2 3 4 8 5 5 (CTS) 4 (RTS) 3 (RxD) 7 (GND) D-sub 25-pin 2 (TxD) CLP-130/120 Connections 53 - Yamaha CLP-130 | Owner's Manual - Page 54
interface device to connect a computer to the Clavinova using special MIDI cables. Clavinova MIDI Mac MIDI PC-1 PC-2 HOST SELECT THRU OUT (CLP-130) IN MIDI OUT MIDI IN MIDI OUT MIDI IN MIDI interface MIDI OUT MIDI IN MIDI interface Windows Clavinova HOST SELECT switch setting Set the - Yamaha CLP-130 | Owner's Manual - Page 55
using a USB cable. Install the driver (that came with the USB interface) on the computer, and connect the USB interface to the Clavinova using a serial cable or MIDI cables. For more information, refer to the instruction manual for the USB interface. An example of connecting the USB interface to the - Yamaha CLP-130 | Owner's Manual - Page 56
an internal malfunction has occurred. In this case, contact your Yamaha dealer. Options BC-100 Bench A comfortable bench styled to match your Yamaha Clavinova. HPE-160 Stereo Headphones High-performance lightweight dynamic headphones with extra-soft ear pads. 56 CLP-130/120 Troubleshooting/Options - Yamaha CLP-130 | Owner's Manual - Page 57
cord inside AC power cord TIP A headphone hanger is included in the CLP-120 package. You can attach a headphone hanger on the Clavinova to hang the headphones (page 12). 1. Attach the side panels to pedal box using four 4×20 mm tapping screws 4. CLP-130/120 CLP-120: Keyboard Stand Assembly 57 - Yamaha CLP-130 | Owner's Manual - Page 58
Use 6x16 mm short screws 2 to secure the main unit from the front. 58 CLP-130/120 CLP-120: Keyboard Stand Assembly 240 Voltage Selector Before connecting the AC power cord, check the setting of the improper voltage setting can cause serious damage to the Clavinova or result in improper operation. - Yamaha CLP-130 | Owner's Manual - Page 59
all screws. When moving the instrument after assembly, always hold the bottom of the main unit. CAUTION Do not hold the key cover or top portion. Improper handling can result in damage to the instrument or personal injury. Key cover Top portion CLP-130/120 CLP-120: Keyboard Stand Assembly 59 - Yamaha CLP-130 | Owner's Manual - Page 60
cord inside AC power cord TIP A headphone hanger is included in the CLP-130 package. You can attach a headphone hanger on the Clavinova to hang the headphones (page 12). 1. Attach the side panels to pedal box using four 4×20 mm tapping screws 4. 60 CLP-130/120 CLP-130: Keyboard Stand Assembly - Yamaha CLP-130 | Owner's Manual - Page 61
be extra careful so as not to drop the main unit. • Do not hold the keyboard in any position other than the position shown in the illustration. Be sure to place your setting can cause serious damage to the Clavinova or result in improper operation. CLP-130/120 CLP-130: Keyboard Stand Assembly 61 - Yamaha CLP-130 | Owner's Manual - Page 62
all screws. When moving the instrument after assembly, always hold the bottom of the main unit. CAUTION Do not hold the key cover or top portion. Improper handling can result in damage to the instrument or personal injury. Key cover Top portion 62 CLP-130/120 CLP-130: Keyboard Stand Assembly - Yamaha CLP-130 | Owner's Manual - Page 63
ENGLISH Preset Voice List CLP-130 Voice Name Stereo Touch Dynamic Key-Off Sampling Response Sampling*1 Sampling*2 Voice Descriptions GRANDPIANO 1 Recorded samples from a full concert grand piano. Also includes three levels of dynamic sampling, sustain samples, and key-off samples for - Yamaha CLP-130 | Owner's Manual - Page 64
Voice Name Stereo Touch Dynamic Key-Off Sampling Response Sampling*1 Sampling*2 Voice Descriptions GUITAR Warm and natural-sounding nylon guitar. of an acoustic instrument. *2. Contains a very subtle sample that is produced when the keys are released. ENGLISH 64 CLP-130/120 Preset Voice List - Yamaha CLP-130 | Owner's Manual - Page 65
2 CHOIR Spacious strings ensemble with a slow attack. Try combining this voice with a piano or electric piano in the DUAL mode. A big, spacious choir voice. Perfect for creating rich harmonies a very subtle sample that is produced when the keys are released. CLP-130/120 Preset Voice List 65 - Yamaha CLP-130 | Owner's Manual - Page 66
Invention No.1 The demonstration pieces listed above are short rearranged excerpts the original compositions. All other songs are original (©2002 Yamaha Corporation). Piano Voice Demo Description (CLP-130) Voice Name GRAND PIANO1 GRAND PIANO2 E.PIANO1 E.PIANO2 HARPSICHORD E.CLAVICHORD VIBRAPHONE - Yamaha CLP-130 | Owner's Manual - Page 67
Piano Preset Songs 17 Tempo (Recorded Songs 35 Volume (50 Piano (LED display 52 K Key Cover 10 L LED display MIDI 49 MIDI [IN] [OUT] [THRU 15, 51 MIDI cables 49, 54, 55 MIDI connectors 49, 54 MIDI Data Format 71 MIDI driver 53 MIDI Functions 45 Music Rest 10 N Normal setting 22 CLP-130 - Yamaha CLP-130 | Owner's Manual - Page 68
, 22 SPEAKER 12, 15 Specifications 76 SPLIT (CLP-130 14, 27, 43 START/STOP Piano Preset Songs 18 TRACK1/2 (Recording 31 Transporting 8 TRANSPOSE 14, 25 Troubleshooting 56 Tuning ➝ Fine Tuning of the Pitch 40 U USB 55 USER 1/2/3 (CLP-130 30 V VARIATION (CLP-130 22 VOICE 14, 21 68 CLP-130 - Yamaha CLP-130 | Owner's Manual - Page 69
Format / MIDI-Datenformat / Format des données MIDI / Formato de datos MIDI 71 MIDI Implementation Chart / MIDI Implementierung stabelle / Feuille d'implantation MIDI / Gráfica de implementación MIDI 75 Specifications / Technische Daten / Caractéristiques techniques / Especificaciones 76 CLP-130/120 - Yamaha CLP-130 | Owner's Manual - Page 70
de ajustes de fábrica Voice Variation (CLP-130) Dual Mode Split Mode (CLP-130) Split Mode Left Voice (CLP-130) Reverb Type Reverb Depth Effect Type Effect Depth Touch Sensitivity Volume in the FIXED Mode Metronome Metronome Time Signature Tempo Transpose GRAND PIANO 1 OFF OFF OFF WOOD BASS Preset - Yamaha CLP-130 | Owner's Manual - Page 71
in this section can help you to control the CLP-130/120. Falls Sie bereits mit MIDI vertraut sind oder einen Computer zur Erzeugung von MIDI-Steuermeldungen für die Instrumente verwenden, können Sie sich zur Steuerung des CLP-130/120 nach den im folgenden Abschnitt aufgeführten Spezifikationen - Yamaha CLP-130 | Owner's Manual - Page 72
CLP-130 GRANDPIANO 1 VARIATION GRANDPIANO 2 VARIATION E.PIANO 1 VARIATION E.PIANO and an All Note Off occurs. 6. SYSTEM EXCLUSIVE MESSAGES (Yamaha MIDI Format) Panel Data Transmit Data format: [F0H] -> [43H (32) Absolute tempo high byte (33) Key-Off Sampling Depth • Panel data send requests cannot - Yamaha CLP-130 | Owner's Manual - Page 73
= Yamaha ID 73H = Clavinova ID 7FH = Extended Product ID xxH = Product ID (CLP-130: 26H / CLP-120: 25H) 11H = Special control 0nH = Control MIDI change (n=channel number) cc = Control number vv = Value F7H = End of Exclusive Control 0n ccH vvH Split Point Always 00H 14H 14H : Split Key Number - Yamaha CLP-130 | Owner's Manual - Page 74
ROOM 02H 10H HALL 1 01H 10H HALL 2 01H 11H STAGE 03H 10H Sound board 03H 12H Refer to Effect MIDI Map 00 : basic type 00(=Effect off) 00 Description 0 - 127 Default value (H) 7F EFFECT MSB LSB CHORUS 42H 10H PHASER 48H 10H TREMOLO 46H 10H DELAY 05H 10H 74 CLP-130/120 Appendix - Yamaha CLP-130 | Owner's Manual - Page 75
Model CLP-130/120 MIDI Implementation Chart Date : 24,Oct 2001 Version : 1.0 Function... Transmitted Basic Channel Default 1 Changed 1 - 16 Mode Default 3 Messages ˛ Altered Note 9 - 120 Number : True voice Velocity Note ON Ø 9nH,v=1-127 Note OFF ˛ 9nH,v=0 After Touch Key's ˛ Ch - Yamaha CLP-130 | Owner's Manual - Page 76
Item CLP-130 CLP-120 Keyboard 88 keys (A-1 40 1/4"] Weight 54kg (119lbs., 1oz) 51kg (112lbs., 7oz) Accessories Owner's Manual, "50 greats for the Piano" (Music Yamaha dealer. * Die technischen Daten und Beschreibungen in dieser Bedienungsanleitung dienen nur der Information. Yamaha - Yamaha CLP-130 | Owner's Manual - Page 77
over and try again. If the problem persists, contact an electrician to have in the owners manual, on the name plate, or specifically recommended by Yamaha. 5. service this product beyond that described in the user-maintenance instructions. All other servicing should be referred to qualified service - Yamaha CLP-130 | Owner's Manual - Page 78
instructions contained in this manual, meets FCC requirements. Modifications not expressly approved by Yamaha may OFF" and "ON", please try to eliminate the problem by using one of the following measures: Relocate either please contact Yamaha Corporation of America, Electronic Service Division, 6600 - Yamaha CLP-130 | Owner's Manual - Page 79
Yamaha Musica Italia S.P.A. Combo Division Viale Italia 88, 20020 Lainate (Milano), Italy Tel: 02-935-771 SPAIN/PORTUGAL Yamaha Yamaha Corporation, Asia-Pacific Music Marketing Group Nakazawa-cho 10-1, Hamamatsu, Japan 430-8650 Tel: +81-53-460-2312 HEAD OFFICE Yamaha Corporation, Pro Audio & Digital - Yamaha CLP-130 | Owner's Manual - Page 80
Clavinova Web site (English only) http://www.yamahaclavinova.com/ Yamaha Manual Library http://www2.yamaha.co.jp/manual/english/ M.D.G., Pro Audio & Digital Musical Instrument Division, Yamaha Corporation C 2002 Yamaha Corporation V856070AP???.?-0?B0 Printed in Indonesia
-
 1
1 -
 2
2 -
 3
3 -
 4
4 -
 5
5 -
 6
6 -
 7
7 -
8
-
9
-
10
-
11
-
12
-
13
-
14
-
15
-
16
-
17
-
18
-
19
-
20
-
21
-
22
-
23
-
24
-
25
-
26
-
27
-
28
-
29
-
30
-
31
-
32
-
33
-
34
-
35
-
36
-
37
-
38
-
39
-
40
-
41
-
42
-
43
-
44
-
45
-
46
-
47
-
48
-
49
-
50
-
51
-
52
-
53
-
54
-
55
-
56
-
57
-
58
-
59
-
60
-
61
-
62
-
63
-
64
-
65
-
66
-
67
-
68
-
69
-
70
-
71
-
72
-
73
-
74
-
75
-
76
-
77
-
78
-
79
-
80
 |
 |

Owner's Manual
Bedienungsanleitung
Mode d'emploi
Manual de instrucciones
Before using the Clavinova, be sure to read
“
PRECAUTIONS
„
on pages 6-7.
Achten Sie darauf, vor Einsatz des Clavinova die
“
VORSICHTSMASSNAHMEN
„
auf Seite 6-7
durchzulesen.
Avant d'utiliser le Clavinova, lire attentivement la section
«
PRECAUTIONS D'USAGE
»
aux
pages 6-7.
Antes de utilizar el Clavinova, lea las
“
PRECAUCIONES
„
que debe tener en cuenta en las páginas
6 -7.
IMPORTANT
Check your power supply
Make sure that your local AC mains voltage matches the voltage specified on the name plate
on the bottom panel. In some areas a voltage selector may be provided on the bottom panel of
the main keyboard unit near the power cord. Make sure that the voltage selector is set for the
voltage in your area. The voltage selector is set at 240V when the unit is initially shipped. To
change the setting use a "minus" screwdriver to rotate the selector dial so that the correct voltage
appears next to the pointer on the panel.
WICHTIG
Überprüfung der Stromversorgung
Vergewissern Sie sich vor dem Anschließen an das Stromnetz, daß die örtliche Netzspannung den
Betriebsspannungswerten auf dem Typenschild an der Unterseite des Instruments entspricht. In
bestimmten Verkaufsgebieten ist das Instrument mit einem Spannungswähler an der Unterseite
neben der Netzkabeldurchführung ausgestattet. Falls vorhanden, muß der Spannungswähler auf
die örtliche Netzspannung eingestellt werden. Der Spannungswähler wurde werkseitig auf 240 V
voreingestellt. Zum Verstellen drehen Sie den Spannungsregler mit einem Schlitzschraubendreher,
bis der Zeiger auf den korrekten Spannungswert weist.
IMPORTANT
Contrô
ler la source d'alimentation
Vé
rifiez que la tension sp
é
cifi
é
e sur le panneau inf
é
rieur correspond
à
la tension du secteur. Dans
certaines r
é
gions, l'instrument peut
ê
tre
é
quip
é
d'un s
é
lecteur de tension situ
é
sur le panneau
inf
é
rieur du clavier
à
proximit
é
du cordon d'alimentation.
V
é
rifiez que ce s
é
lecteur est bien r
é
gl
é
en fonction de la tension secteur de votre r
é
gion. Le
s
é
lecteur de tension est r
é
gl
é
sur 240 V au d
é
part d'usine. Pour modifier ce r
é
glage, utilisez un
tournevis
à
lame plate pour tourner le s
é
lecteur afin de mettre l'indication correspondant
à
la
tension de votre r
é
gion vis
à
vis du rep
è
re triangulaire situ
é
sur le panneau.
IMPORTANTE
Verifique la alimentaci
ó
n de corriente
Aseg
ú
rese de que tensi
ó
n de alimentaci
ó
n de CA de su
á
rea corresponde con la tensi
ó
n
especificada en la placa de caracter
í
sticas del panel inferior. En algunas zonas puede haberse
incorporado un selector de tensi
ó
n en el panel inferior de la unidad del teclado principal, cerca del
cable de alimentaci
ó
n. Aseg
ú
rese de que el selector de tensi
ó
n est
é
ajustado a la tensi
ó
n de su
á
rea. El selector de tensi
ó
n se ajusta a 240V cuando la unidad sale de f
á
brica. Para cambiar el
ajuste, emplee un destornillador de cabeza "recta" para girar el selector de modo que aparezca la
tensi
ó
n correcta al lado del indicador del panel.