Yamaha CVP-305 Owner's Manual
Yamaha CVP-305 Manual
 |
View all Yamaha CVP-305 manuals
Add to My Manuals
Save this manual to your list of manuals |
Yamaha CVP-305 manual content summary:
- Yamaha CVP-305 | Owner's Manual - Page 1
- Yamaha CVP-305 | Owner's Manual - Page 2
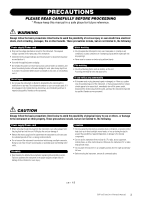
in the safety instruction section. CAUTION authorized by Yamaha. Product performance owners responsibility. Please study this manual carefully and consult your dealer before requesting service manual as a permanent record of your purchase. CVP-305 CVP-303 Model CVP-301 Serial No. Purchase Date - Yamaha CVP-305 | Owner's Manual - Page 3
the outlet, and have the instrument inspected by qualified Yamaha service personnel. CAUTION Always follow the basic precautions listed below to avoid the possibility of physical injury to you • Before moving the instrument, remove all connected cables. (1)B-7 1/2 CVP-305/303/301 Owner's Manual 3 - Yamaha CVP-305 | Owner's Manual - Page 4
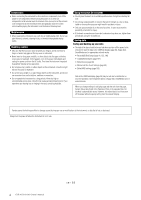
without properly exiting from the relevant display. Yamaha cannot be held responsible for damage caused by improper use or modifications to the instrument, or data that is lost or destroyed. Always turn the power off when the instrument is not in use. 4 CVP-305/303/301 Owner's Manual (1)B-7 2/2 - Yamaha CVP-305 | Owner's Manual - Page 5
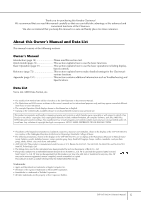
information such as Troubleshooting and Specifications. Data List Voice List, MIDI Data Format, etc. • The models CVP-305/303/301 will be referred to as the CVP/Clavinova in this Owner's Manual. • The illustrations and LCD screens as shown in this owner's manual are for instructional purposes only - Yamaha CVP-305 | Owner's Manual - Page 6
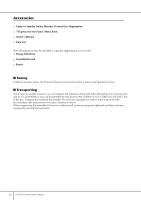
Accessories Guide to Yamaha Online Member Product User Registration "50 greats for the Piano" Music Book Owner's Manual Data List The following items may be included or optional, depending on your locale: Floppy Disk Drive SmartMedia card Bench ■ Tuning Unlike an acoustic piano, the Clavinova does - Yamaha CVP-305 | Owner's Manual - Page 7
Clavinova 16 Music Rest 16 Sheet Music Braces 17 Using Headphones 17 Changing the Display Language 18 Display Settings 19 Handling the Floppy Disk Drive (FDD) and Floppy Disks 21 Handling SmartMediaTM*Memory Cards ......... 22 Quick Guide Playing the Demos TOUCH CVP-307 Owner's Manual 7 - Yamaha CVP-305 | Owner's Manual - Page 8
192 Basic Operation 192 Pre-Programmed MIDI Templates 192 MIDI System Settings 194 MIDI Transmit Settings 194 MIDI Receive Settings 195 Setting the Bass Note for Style Playback via MIDI Receive 195 Setting the Chord Type for Style Playback via MIDI Receive 196 8 CVP-307 Owner's Manual - Yamaha CVP-305 | Owner's Manual - Page 9
Other Devices Appendix Troubleshooting 197 CVP-305: Keyboard Stand Assembly 202 CVP-303: Keyboard Stand Assembly 204 CVP-301: Keyboard Stand Assembly 206 Installing the Floppy Disk Drive (Included/Optional 208 Specifications 209 Index 211 Introduction Quick Guide Basic Operation Reference - Yamaha CVP-305 | Owner's Manual - Page 10
melodies on top. It's like having an expert ensemble playing behind you. Select an accompaniment Style-such as pop, jazz, Latin, etc.-and let the Clavinova be your backing band! STYLE SELECT 10 CVP-305/303/301 Owner's Manual - Yamaha CVP-305 | Owner's Manual - Page 11
learn- ing and practicing pieces. Guide Lamps page 38 The key guide lamps are also helpful in learning and Clavinova also connects directly to the Internet, letting you download Song data from special websites, and save them to internal memory or a SmartMedia card. CVP-305/303/301 Owner's Manual - Yamaha CVP-305 | Owner's Manual - Page 12
57 Y [FUNCTION] button P. 26 Z [SOUND CREATOR] button P. 89 [ [DIGITAL RECORDING] button P. 113, 137 \ [BALANCE] button P. 39 ] [MIXING CONSOLE] P. 26 g [DEMO] button P. 23 h [MUSIC FINDER] button P. 50 i [DATA ENTRY] dial P. 61 j [ENTER] button P. 61 12 CVP-305/303/301 Owner's Manual - Yamaha CVP-305 | Owner's Manual - Page 13
123 s [1]-[8] buttons P. 121 t [MEMORY] button P. 121 Pedals u Left pedal P. 29 v Sostenuto pedal P. 29 w Damper pedal P. 29 x Keyboard guide lamps P. 38 For information on the jacks and connectors located on the bottom left of the instrument, see page 180. CVP-305/303/301 Owner's Manual 13 - Yamaha CVP-305 | Owner's Manual - Page 14
of the power cable into the AC connector on the Clavinova, then plug the other end of the cable into the proper AC outlet on the wall. CVP-305 CVP-303/CVP-301 (The shape of the plug and outlet differ the keyboard lights up. The power indicator lights up. 14 CVP-305/303/301 Owner's Manual - Yamaha CVP-305 | Owner's Manual - Page 15
key cover. CVP-301: Slide the cover toward you and gently lower the cover over the keys. CVP-305/303 CVP-301 CAUTION Be careful to avoid catching your fingers when closing the cover. CAUTION Be careful to avoid catching your fingers when closing the cover. CVP-305/303/301 Owner's Manual 15 - Yamaha CVP-305 | Owner's Manual - Page 16
as far as it will go. 2 Raise the two metal supports (at the rear of the music rest). 3 Gently lower the music rest backward until it is all the way down. CVP-305/303 CVP-301 CAUTION Be careful to avoid catching your fingers. Close the sheet music braces 16 CVP-305/303/301 Owner's Manual - Yamaha CVP-305 | Owner's Manual - Page 17
either of these jacks.) CAUTION Do not listen with the headphones at high volume for long periods of time. Doing so may cause hearing loss. CVP-305/303 INPUT VOLUME MIC. LINE IN MIC. LINE PHONES MIN MAX CVP-301 CVP-305/303/301 Owner's Manual 17 - Yamaha CVP-305 | Owner's Manual - Page 18
is selected, the speakers will not sound and you can only hear the Clavinova sound via the headphones. Changing the Display Language This determines the language used [FUNCTION] → [I] UTILITY → TAB[√][®] OWNER 2 Press the [4π†]/[5π†] button to select a language. 18 CVP-305/303/301 Owner's Manual - Yamaha CVP-305 | Owner's Manual - Page 19
Settings Introduction Adjusting the Brightness of the Display (CVP305/303) Adjust the brightness of the display. 1 Call up the operation display. [FUNCTION] → [I] UTILITY → TAB[√][®] CONFIG 2 2 Press the [2π†] button to adjust the brightness of the display. CVP-305/303/301 Owner's Manual 19 - Yamaha CVP-305 | Owner's Manual - Page 20
the [I] (OWNER NAME) button and call up the Owner Name dis- play. Refer to page 67 for character-entry details. Displaying the version number To check the version number of this instrument, press and hold the [I] (OWNER NAME) button in the display in step 2 above. 20 CVP-305/303/301 Owner's Manual - Yamaha CVP-305 | Owner's Manual - Page 21
. Ask your Yamaha dealer about the data, slide the disk's write-protect tab to the "protect" position (tab open). When saving data, make sure that the disk's write-protect tab is set to the "overwrite" position (tab closed). Write-protect tab open (protect position) CVP-305/303/301 Owner's Manual - Yamaha CVP-305 | Owner's Manual - Page 22
Card (another name for SmartMedia cards). The SSFDC Forum is a voluntary organization established for the promotion of area (within the circle) of the SmartMedia card. Conversely, to save data on the SmartMedia card, make sure to remove the write-protect seal from CVP-305/303/301 Owner's Manual - Yamaha CVP-305 | Owner's Manual - Page 23
buttons to select the desired language. 2 Press the [DEMO] button to start the Demos. Demos will play back continuously until stopped. 2 DEMO 3 Press the [EXIT] button to stop the Demo playback. When the Demo stops, the display returns to the MAIN display. CVP-305/303/301 Owner's Manual 23 - Yamaha CVP-305 | Owner's Manual - Page 24
menu. 2 Press one of the [A]-[I] buttons to show a specific Demo. To return back to the previous display, press the [J] button. When the Demo has more than one screen. Press a [†] button corresponding to the screen number. 3 Press the [EXIT] button to exit from Demo. 24 CVP-305/303/301 Owner's Manual - Yamaha CVP-305 | Owner's Manual - Page 25
start with, you should know a little about the basic displays that appear in the Quick Guide. There are three basic displays: Main display ➤ File selection display ➤ Function display ➤ See call up and use the Song Selection display. 2 SONG SELECT 1 3, 5 4 3, 5 CVP-305/303/301 Owner's Manual 25 - Yamaha CVP-305 | Owner's Manual - Page 26
data are installed as preset data. USER Internal memory that allows both reading and writing of data. CARD For transferring data to and from SmartMedia, with the CVP's card slot. n When the USB Press the [FUNCTION] button. Categories of detailed settings are shown. 26 CVP-305/303/301 Owner's Manual - Yamaha CVP-305 | Owner's Manual - Page 27
, arrows are used in the instructions, indicating in shorthand the process of calling up certain displays and functions. For example, the instructions above can be indicated in shorthand as: [FUNCTION] → [D] CONTROLLER → TAB [®] KEYBOARD/PANEL → [A] 1 INITIAL TOUCH. CVP-305/303/301 Owner's Manual 27 - Yamaha CVP-305 | Owner's Manual - Page 28
down the [PIANO] button on the lower right of the panel for a short time, until a message appears prompting you to enable Piano Lock. 2 Press the [F] (OK) button to enable Piano Lock. 3 To turn Piano Lock off, hold down the [PIANO] button again for a short time. 28 CVP-305/303/301 Owner's Manual - Yamaha CVP-305 | Owner's Manual - Page 29
Piano voice is selected, pressing this pedal reduces the volume and slightly changes the timbre of the notes you play. The settings assigned to this pedal may differ depending on the selected Voice. n The depth of the left pedal effect can be adjusted (page 91). CVP-305/303/301 Owner's Manual - Yamaha CVP-305 | Owner's Manual - Page 30
Quick Guide ● Foot Controller/Footswitch An optional Yamaha foot controller you continuously increase or decrease the value. You can also use the [DATA ENTRY] dial to adjust the value. To reset the tempo, press the [I] UTILITY → TAB [√] CONFIG 1 → [B] 2 METRONOME 30 CVP-305/303/301 Owner's Manual - Yamaha CVP-305 | Owner's Manual - Page 31
Guide Clavinova features a variety of Voices such as strings or wind instruments, including exceptionally realistic piano [PIANO] button to display various piano Voices. ORGAN FLUTES n About the various Voices Refer to the Voice List in the separate Data List booklet CVP-305/303/301 Owner's Manual 31 - Yamaha CVP-305 | Owner's Manual - Page 32
Guide 3 4 4 4 Press one of the [A]-[J] buttons to select the desired Voice. n You can instantly jump back to the Main display by "double-clicking" on one of the [A]-[J] buttons. 5 Play the keyboard. n Restoring the Piano settings Press the piano-shaped [PIANO . 32 CVP-305/303/301 Owner's Manual - Yamaha CVP-305 | Owner's Manual - Page 33
with the left and right hands. For example, you can set up the keyboard to play the bass Voice with your left hand and the piano Voice with your right hand. CVP-305/303/301 Owner's Manual 33 - Yamaha CVP-305 | Owner's Manual - Page 34
Guide Practicing with the Preset Songs SCORE KARAOKE SONG SELECT n Song On the Clavinova, performance data is called a "Song." Playing Back Songs Before Practicing Clavinova includes not only the preset demo can also select the file by using the [DATA ENTRY] dial, then press the [ENTER] button - Yamaha CVP-305 | Owner's Manual - Page 35
Quick Guide 5 Press the SONG [PLAY/PAUSE] button to start playback. REC STOP PLAY/ PAUSE 6 Press the SONG [STOP] button to stop playback. , in order. 5 To turn off the Song sequence playback, press the [H] button to select "OFF" in the display in step 2. CVP-305/303/301 Owner's Manual 35 - Yamaha CVP-305 | Owner's Manual - Page 36
Quick Guide Boost the volume of the part to be practiced On the CVP, a single Song can contain separate data for up to sixteen MIDI channels. Specify the channel for practicing and increase the playback volume for the can show you which channel you wish to boost. 36 CVP-305/303/301 Owner's Manual - Yamaha CVP-305 | Owner's Manual - Page 37
Guide Displaying Music Notation (Score) You can view the music notation of the selected Song. We suggest that you read through the music notation before starting to practice. n • The Clavinova can display the music notation of commercially-available music data . CVP-305/303/301 Owner's Manual 37 - Yamaha CVP-305 | Owner's Manual - Page 38
selected. AUTO The MIDI channels in the Song data for the right- guide lamps. Practicing the Right-hand Part (TRACK 1) Using the Guide Lamps 1 Select a Song (page 34). 2 Turn the [GUIDE] button on. SONG SCORE KARAOKE SELECT 2 3 PLAY/ REC STOP PAUSE 4 38 CVP-305/303/301 Owner's Manual - Yamaha CVP-305 | Owner's Manual - Page 39
the muted part using the guide lamps. n Adjusting the tempo the [DATA ENTRY] guide lamp flash a lead-in to the music In the GUIDE GUIDE instructions "One-handed Practice with the Guide Lamps" above. There are additional functions in the Guide feature, as described below. To select a guide CVP-305/303 - Yamaha CVP-305 | Owner's Manual - Page 40
. Press the [REPEAT] button again at the ending point (B). After an automatic lead-in (to help guide you into the phrase), the range from Point A to Point B is played back repeatedly. n Instantly playback. 5 Press the [REPEAT] button to turn off Repeat playback. 40 CVP-305/303/301 Owner's Manual - Yamaha CVP-305 | Owner's Manual - Page 41
Quick Guide Other Methods for Specifying the A-B Repeat Range ● Specifying the repeat range while Songs are stopped 1 Press the [FF] button to you to save the recorded performance appears. To close the message, press the [EXIT] button. REC STOP PLAY/ PAUSE CVP-305/303/301 Owner's Manual 41 - Yamaha CVP-305 | Owner's Manual - Page 42
Quick Guide 6 Press the SONG [PLAY/PAUSE] button to play back the recorded performance. REC check whether the Song contains chord data or not. 1 Select a Song (page 34). In these example instructions, we recommend that you use the Songs in the "Sing-a-long" folder. 42 CVP-305/303/301 Owner's Manual - Yamaha CVP-305 | Owner's Manual - Page 43
Quick Guide 2 Press the [PERFORMANCE ASSISTANT] button to turn the feature on. SCORE KARAOKE SONG SELECT 3 Press the SONG [PLAY/PAUSE] 5 Press the SONG [STOP] button to stop playback. 6 Press the [PERFORMANCE ASSISTANT] button again to turn the feature off. CVP-305/303/301 Owner's Manual 43 - Yamaha CVP-305 | Owner's Manual - Page 44
Quick Guide Playing Accompaniment with the Auto Accompaniment Feature (Style Playback) The Auto Accompaniment Traditional Style: Country Pop C 3 21 2 MARY HAD A LITTLE LAMB C G 3 2 C 35 1 1 C C 3 21 2 3 4 G C 2 3 21 1 Ending 1 1 4 1 44 CVP-305/303/301 Owner's Manual - Yamaha CVP-305 | Owner's Manual - Page 45
SELECT] button to call up the Style selection display. 2 STYLE SELECT 1 3, 4 3, 4 Quick Guide 2 Press the TAB [√] button to select the PRESET tab. n The Style type and its defining are seven different fingering methods you can use to specify chords (page 98). CVP-305/303/301 Owner's Manual 45 - Yamaha CVP-305 | Owner's Manual - Page 46
the velocity (loudness) of the sound when the Tap function is used can be selected in the following display. [FUNCTION] → [I] UTILITY →TAB[√] CONFIG 1 → [B] 4 TAP 46 CVP-305/303/301 Owner's Manual - Yamaha CVP-305 | Owner's Manual - Page 47
Quick Guide During Style Playback STYLE SELECT ● Main This is used for playing the main part of the Song. It plays an accompaniment example, you can set this function to Intro to conveniently have an Intro play automatically whenever you select a Style (page 101). CVP-305/303/301 Owner's Manual 47 - Yamaha CVP-305 | Owner's Manual - Page 48
data and cannot be played. Holding the LEFT part Voice (Left Hold) This function causes the LEFT part Voice to be held even when the keys are released. Non-decaying voices such as strings are held continuously, while decay-type voices such as piano (page 98). 48 CVP-305/303/301 Owner's Manual - Yamaha CVP-305 | Owner's Manual - Page 49
Checking How to Play Chords with the Guide Lamps For Songs containing chord data, you can have the individual notes of the chords indicated with the Guide lamps on the instrument. 1 Select a Song (page to make them selectable only via the panel controls (page 122). CVP-305/303/301 Owner's Manual 49 - Yamaha CVP-305 | Owner's Manual - Page 50
Quick Guide Helpful hints for using One Touch Setting ● Automatically changing One page 104). n The data (records) of the Music Finder are not the same as Song data and cannot be played back. 1 Press the [MUSIC FINDER] button to call up the MUSIC FINDER display. 50 CVP-305/303/301 Owner's Manual - Yamaha CVP-305 | Owner's Manual - Page 51
is sorted by tempo. Changing the order of the records Press the [G] (SORT ORDER) button to change the order of the records (ascending or descending). CVP-305/303/301 Owner's Manual 51 - Yamaha CVP-305 | Owner's Manual - Page 52
lyric data. Sing with the microphone as you read the lyrics shown in the display. Lyrics can also be displayed with the music score, letting you play and sing while following along with the notation and lyrics. (CVP-305/303) SCORE KARAOKE Quick Guide Connecting a Microphone (CVP-305/303 - Yamaha CVP-305 | Owner's Manual - Page 53
Quick Guide Singing with the Lyrics Display Try singing while playing back a Song containing lyric data 1 Select a Song (page 34). 2 Press the [KARAOKE] button to [-] button. • Resetting the transposition Press the TRANSPOSE [+][-] buttons simultaneously. CVP-305/303/301 Owner's Manual 53 - Yamaha CVP-305 | Owner's Manual - Page 54
, letting you easily check whether the Song contains chord data or not. 2 Press the [MIC SETTING/VOCAL HARMONY] button to call up the harmony vocals (Vocal Harmony) Setting display. 4 2 3 3 Press the [6π†]/[7π†] buttons to turn the harmony vocals (Vocal Harmony) on. 54 CVP-305/303/301 Owner's Manual - Yamaha CVP-305 | Owner's Manual - Page 55
select a Vocal Harmony type. For details on the Vocal Harmony types, refer to the separate Data List. Quick Guide 6 Press the [ACMP ON/OFF] button to turn on Auto Accompaniment. 7 Press the SONG types are available. Select the one most suited to your purpose. CVP-305/303/301 Owner's Manual 55 - Yamaha CVP-305 | Owner's Manual - Page 56
Guide ●KEYBOARD Transpose pitch of the keyboard played Voices and Style playback (controlled by what you play in the chord section of the keyboard). ●SONG Transposes the pitch of Song playback. ●MASTER Transpose the overall pitch of the CVP your audience (page 164). 56 CVP-305/303/301 Owner's Manual - Yamaha CVP-305 | Owner's Manual - Page 57
desired language of the display messages in the Help display (see above). In this example, press the [F] (YES) button to start formatting the SmartMedia card. CVP-305/303/301 Owner's Manual 57 - Yamaha CVP-305 | Owner's Manual - Page 58
Guide function display Press the [DIRECT ACCESS] button, then press the [GUIDE] button. 1 2 Returning to the Main display Here's a convenient way to return to the Main display from any other display: Simply press the [DIRECT ACCESS] button, then the [EXIT] button. 58 CVP-305/303/301 Owner's Manual - Yamaha CVP-305 | Owner's Manual - Page 59
indicated on the CVP-305/303. If the Song contains the chord data, the current chord name will be displayed in the "CHORD" segment (see 3 below). On the CVP-305/303, pressing the [C] tempo of the Song or Style. On the CVP-301, the time signature is also displayed. CVP-305/303/301 Owner's Manual 59 - Yamaha CVP-305 | Owner's Manual - Page 60
or (preset) data is stored. edited data is saved. Card Location where data on SmartMedia card is saved. • Data files and folders The data, both pre-programmed and your own original, are saved as "files." You can drop files into a folder. Folder File Folder Icon 60 CVP-305/303/301 Owner's Manual - Yamaha CVP-305 | Owner's Manual - Page 61
two ways to do so. • Press one of the [A]-[J] buttons. • Select the file by using the [DATA ENTRY] dial, then press the [ENTER] button to execute. 4 Press the [EXIT] button to return to the Each folder shown in this display contains appropriately categorized Voices. CVP-305/303/301 Owner's Manual 61 - Yamaha CVP-305 | Owner's Manual - Page 62
page 67 Formatting a floppy disk To format a floppy disk, select "USB" in step 3 at right. CAUTION Make sure to read page 21 for erases all data on the card. Make sure that the SmartMedia card you're formatting does not contain important data! • Make card. 3 4 62 CVP-305/303/301 Owner's Manual - Yamaha CVP-305 | Owner's Manual - Page 63
CREATOR display, press the [SAVE] display button. The File Selection display for the corresponding data appears. Keep in mind that the Save operation is executed from the File Selection display located at the appropriate position among the files in alphabetical order. CVP-305/303/301 Owner's Manual 63 - Yamaha CVP-305 | Owner's Manual - Page 64
Songs Commercially available song data may be copy protected Orchestra Collection (DOC) Songs, and Disklavier Piano Soft Songs. These cannot be copied/moved cards and hard disk. Prot. 2 Orig Indicates Yamaha-protection-formatted Songs. These cannot be copied. CVP-305/303/301 Owner's Manual - Yamaha CVP-305 | Owner's Manual - Page 65
) button to select all files/folders indicated on the current display including the other pages. To cancel the selection, press the [6†] (ALL OFF) button again. CVP-305/303/301 Owner's Manual 65 - Yamaha CVP-305 | Owner's Manual - Page 66
cancel the Delete operation, press the [8†] (CANCEL) button. 5 Follow the on-display instructions. Deleting all data in a Smart- YES Delete the file/folder Media card at once Formatting a SmartMedia card 7 Press the [8π] (OK) button to apply the selected icon. 66 CVP-305/303/301 Owner's Manual - Yamaha CVP-305 | Owner's Manual - Page 67
. 3 Input the name of the new folder (see below). Entering Characters The instructions that follow show you how to enter characters in naming your files/ folders and size), marks (half size) 2 Use the [DATA ENTRY] dial to move the cursor to the desired position. CVP-305/303/301 Owner's Manual 67 - Yamaha CVP-305 | Owner's Manual - Page 68
actually entering a character by moving the cursor, press the [6†] button to call up the mark list. 2 Use the [DATA ENTRY] dial to move the cursor to the desired mark, then press the [8π] (OK) button actually enter the new name and return to the previous display. 68 CVP-305/303/301 Owner's Manual - Yamaha CVP-305 | Owner's Manual - Page 69
the separate Data List booklet for details about which parameters belong to the System Setup. Restores the MIDI settings including the MIDI templates all your original data for the respective item (MIDI SETUP, USER EFFECT, MUSIC FINDER, and FILES&FOLDERS). 4 23 CVP-305/303/301 Owner's Manual 69 - Yamaha CVP-305 | Owner's Manual - Page 70
Data List booklet for details on which parameters belong to the System Setup. The MIDI settings including the MIDI templates on the User tab display are handled as a single file. The User Effect settings including the user effect types, user master EQ types, and user vocal harmony types (CVP-305/303 - Yamaha CVP-305 | Owner's Manual - Page 71
, MIDI Template and System Data 1 Insert/connect the backup media (desti- nation), such as a SmartMedia card or USB storage data. 4 Select the appropriate tab (CARD or USB) to which you want to save the data by using the TAB [√]/[®] buttons. 5 Save your data (page 63). CVP-305/303/301 Owner's Manual - Yamaha CVP-305 | Owner's Manual - Page 72
precise velocities need to play the sounds, they're not intended for playing from the keyboard. They are, however, very useful and convenient when creating MIDI data-especially when you want to avoid using several different Voices just for a single instrument part. 72 CVP-305/303/301 Owner's Manual - Yamaha CVP-305 | Owner's Manual - Page 73
Playing Different Voices Simultaneously The Clavinova keyboard features various functions and For example, try playing the bass Voice with your left hand and the piano Voice with your right. The keyboard lamp will light at the split point Right 2 part Right 1 part CVP-305/303/301 Owner's Manual 73 - Yamaha CVP-305 | Owner's Manual - Page 74
play. Press one of the [A]-[J] buttons to select a Voice. Play the keyboard. Press the PART ON/OFF [RIGHT 2] button again to turn it off. 74 CVP-305/303/301 Owner's Manual - Yamaha CVP-305 | Owner's Manual - Page 75
turning the Left part on and off while you play. Specifying the split point (the border between the rightand left-hand range) See page 100. CVP-305/303/301 Owner's Manual 75 - Yamaha CVP-305 | Owner's Manual - Page 76
vibrates in a second. You can fine-tune the pitch of the entire instrument-useful when you play the Clavinova along with other instruments or CD music. 1 Call up the operation display. [FUNCTION] → [A] MASTER TUNE/ illustration at the upper right of the display. 76 CVP-305/303/301 Owner's Manual - Yamaha CVP-305 | Owner's Manual - Page 77
-2.3 -11.7 -3.9 -7.8 -11.7 -3.9 -7.8 KIRNBERGER 0 -10.2 -7.0 -6.3 -14.1 -2.3 -10.2 -3.1 -7.8 -10.2 -3.9 -11.7 ARABIC 1 0 0 -50.0 0 0 0 0 0 0 -50.0 0 0 ARABIC 2 0 0 0 0 -50.0 0 0 0 0 0 0 -50.0 * In the display, the rounded off value is shown. CVP-305/303/301 Owner's Manual 77 - Yamaha CVP-305 | Owner's Manual - Page 78
the Portamento effect (depending on the selected Voice) by playing legato. With the digital effects built into the Clavinova, you can add ambience and depth to your music in a variety of ways- 80). The available settings differ depending on the Harmony/Echo type. 78 CVP-305/303/301 Owner's Manual - Yamaha CVP-305 | Owner's Manual - Page 79
you hold down two notes on the keyboard simultaneously (last two notes if more than two notes are held), and it plays those notes alternately. CVP-305/303/301 Owner's Manual 79 - Yamaha CVP-305 | Owner's Manual - Page 80
the relevant setting display. For information on the available parameters, see the section "Adjustable items (parameters) in the MIXING CONSOLE displays" on page 82. 80 CVP-305/303/301 Owner's Manual - Yamaha CVP-305 | Owner's Manual - Page 81
to Registration Memory (page 121). • Saving the STYLE PART display settings Save them as Style data. 1 Press the [DIGITAL RECORDING] button. Instantly setting all parts to the same value Once you've selected a [CHANNEL ON/OFF] button to call up the SONG display. CVP-305/303/301 Owner's Manual 81 - Yamaha CVP-305 | Owner's Manual - Page 82
in the STYLE PART display can only be assigned to Drumkit Voices and SFX kit Voices. • When playing GM song data, channel 10 (in the SONG CH 9-16 page) can only be used for a Drum Kit Voice. Adjustable Items the amount of the DSP sound for each part or channel. 82 CVP-305/303/301 Owner's Manual - Yamaha CVP-305 | Owner's Manual - Page 83
-compatible song data. When you play back any commercially available XG song data or that Clavinova. Replaces only the piano Voices. Replaces only the recommended Voices that are suitable for playing back the song. All Voices are returned to the original XG Voices. CVP-305/303/301 Owner's Manual - Yamaha CVP-305 | Owner's Manual - Page 84
. Using, Creating and Editing Voices 5 DSP: Stands for Digital Signal Processor (or Processing). DSP changes and enhances the audio signal in the digital realm to produce a wide range of effects. Use the [1π†]/[2π†] buttons to select the effect BLOCK. 5 6 78 84 CVP-305/303/301 Owner's Manual - Yamaha CVP-305 | Owner's Manual - Page 85
simultaneously. STYLE PART SONG CHANNNEL 1-16 In addition to the Reverb and Chorus types, the Clavinova has special DSP effects, that include additional effects usually used for a specific part, such button. To select its variation parameter, press the [E] button. CVP-305/303/301 Owner's Manual 85 - Yamaha CVP-305 | Owner's Manual - Page 86
). When recalling the saved effect, use the same procedure as in step 8. If you want to change the effect name, press the [H] (NAME) button. 86 CVP-305/303/301 Owner's Manual - Yamaha CVP-305 | Owner's Manual - Page 87
and close spaces where the sound is relatively "dead" and free of echoes. The Clavinova possesses a high-grade fiveband digital EQ. With this function, a final effect-tone control can be added to the up the MASTER EQ EDIT display. Using, Creating and Editing Voices CVP-305/303/301 Owner's Manual 87 - Yamaha CVP-305 | Owner's Manual - Page 88
EQ can be created and saved. When recalling the saved EQ type, use the same procedure as in step 6. Using, Creating and Editing Voices 88 CVP-305/303/301 Owner's Manual - Yamaha CVP-305 | Owner's Manual - Page 89
(Sound Creator) The Clavinova has a Sound Creator feature it as a User Voice to the USER/CARD/(USB) display for future recall. The editing method is different ORGAN FLUTES Voices compared to other Voices. For instructions on editing the ORGAN FLUTES Voices, see page CVP-305/303/301 Owner's Manual 89 - Yamaha CVP-305 | Owner's Manual - Page 90
(page 96), which are automatically called up when the Voice is selected. PIANO This display is available only when the Natural! piano Voice (page 72) is selected. TUNING CURVE Determines the tuning curve. Select modulates the Filter modulation, or the wah effect. 90 CVP-305/303/301 Owner's Manual - Yamaha CVP-305 | Owner's Manual - Page 91
the emphasis given to the cutoff frequency (resonance), set in BRIGHTNESS above (see diagram). Higher values result in a more pronounced effect. Volume Resonance Frequency (pitch) CVP-305/303/301 Owner's Manual 91 - Yamaha CVP-305 | Owner's Manual - Page 92
-such as the quick attack and decay of percussion sounds, or the long release of a sustained piano tone. ATTACK Determines how quickly the sound reaches its maximum level after the key is played. The VIBRATE should be set to on or off when selecting the Voice. 92 CVP-305/303/301 Owner's Manual - Yamaha CVP-305 | Owner's Manual - Page 93
the [FUNCTION] → [F] HARMONY/ECHO display. See page 78. Creating Your Original Organ Flutes Voices The Clavinova features a variety of lush, dynamic organ Voices that you can call up with the [ORGAN FLUTES] edited (page 31). Using, Creating and Editing Voices CVP-305/303/301 Owner's Manual 93 - Yamaha CVP-305 | Owner's Manual - Page 94
wish to store the settings here, make sure to save the settings as a User Voice before selecting another Voice or turning the power off. 94 CVP-305/303/301 Owner's Manual - Yamaha CVP-305 | Owner's Manual - Page 95
the attack portion of the sound producing a longer or shorter decay immediately after the initial attack. The longer the graphic bar, the longer the decay. CVP-305/303/301 Owner's Manual 95 - Yamaha CVP-305 | Owner's Manual - Page 96
part. 3 Use the [4π†]-[8π†] buttons to enable/disable automatic calling up of the settings (ON or OFF) independently for each parameter group. Refer to the separate Data List for a list of parameters contained in each parameter group. 96 CVP-305/303/301 Owner's Manual - Yamaha CVP-305 | Owner's Manual - Page 97
Accompaniment Styles Reference to Quick Guide pages Playing "Mary Had follows the chords of the player. As a result, your accompaniment. Pianist These special Styles provide piano-only accompaniment. Just by playing the Editing the Auto Accompaniment Styles CVP-305/303/301 Owner's Manual 97 - Yamaha CVP-305 | Owner's Manual - Page 98
CVP supplies appropriately orchestrated rhythm, bass, and chord accompaniment in the selected Style. The Fingered type recognizes the various chord types which are listed on the separate Data List booklet the STYLE CONTROL [START/STOP] button to stop the rhythm. 98 CVP-305/303/301 Owner's Manual - Yamaha CVP-305 | Owner's Manual - Page 99
minimum. FADE OUT HOLD TIME Determines the time the volume is held at 0 following the fade out. Using, Creating and Editing the Auto Accompaniment Styles CVP-305/303/301 Owner's Manual 99 - Yamaha CVP-305 | Owner's Manual - Page 100
Point (L) Chord section Voice LEFT Voice RIGHT 1and 2 Press the [H] (S) button or the [G] (L) button and rotate the [DATA ENTRY] dial. Split Point (L) cannot be set lower than Split Point (S), and Split Point (S) cannot be set higher than Split Point (L). 100 CVP-305/303/301 Owner's Manual - Yamaha CVP-305 | Owner's Manual - Page 101
any of the MAIN A-D sections is not included in the Style data, the nearest section is automatically selected. For example, when MAIN D is not contained in the selected Style, MAIN C will be called up. Using, Creating and Editing the Auto Accompaniment Styles CVP-305/303/301 Owner's Manual 101 - Yamaha CVP-305 | Owner's Manual - Page 102
Editing the Volume Balance and Voice Combination (MIXING CONSOLE)" on page 80, and follow the instructions. Convenient Music Finder feature Music Finder (page 50) is a convenient feature that calls entered Music/Keyword/Style, press the [F]/[G]/[H] (CLEAR) button. 102 CVP-305/303/301 Owner's Manual - Yamaha CVP-305 | Owner's Manual - Page 103
settings you use most often in your performance. 1 Select the desired record from the Music Finder display. Using, Creating and Editing the Auto Accompaniment Styles CVP-305/303/301 Owner's Manual 103 - Yamaha CVP-305 | Owner's Manual - Page 104
to be edited in the Music Finder display. 2 Press the [8π†] (RECORD EDIT) button to call up the Edit display. 3 Edit the record as desired. 104 CVP-305/303/301 Owner's Manual - Yamaha CVP-305 | Owner's Manual - Page 105
to both the ALL display and the FAVORITE display. The maximum number of records is 2500 (CVP-305/303)/ 1200 (CVP-301), including internal records. • Overwriting an existing record Press the [8π] (OK) button. 63). All records are saved together as a single file. CVP-305/303/301 Owner's Manual 105 - Yamaha CVP-305 | Owner's Manual - Page 106
Data You can restore the CVP's Music Finder to its original factory settings (page 69). Calling up Music Finder Records Saved to USER/CARD To call up the Music Finder records you've saved to USER/CARD, follow the instructions Editing the Auto Accompaniment Styles 106 CVP-305/303/301 Owner's Manual - Yamaha CVP-305 | Owner's Manual - Page 107
create a Style by separately recording the channels, or by importing pattern data from other existing Styles. Style Section Four different Fill-ins are available Chord 1 Chord 2 Pad Phrase 1 Phrase 2 Rhythm 1 Rhythm 2 Bass Chord 1 Chord 2 Pad Phrase 1 Phrase 2 CVP-305/303/301 Owner's Manual 107 - Yamaha CVP-305 | Owner's Manual - Page 108
other channels (except rhythm), delete the original data before recording. When using realtime recording based on NEW STYLE) button from the display shown in step 5 below. Press the [DIGITAL RECORDING] button. Press the [B] button to call up the Style Creator display 108 CVP-305/303/301 Owner's Manual - Yamaha CVP-305 | Owner's Manual - Page 109
of the Section buttons calls up the SECTION display. Change the sections by using the [6π†]/[7π†] buttons and execute the selection by pressing the [8π] button. 9 10-1 CVP-305/303/301 Owner's Manual 109 - Yamaha CVP-305 | Owner's Manual - Page 110
. 14 Press the [I] (SAVE) button to call up the Style Selection display to save your data. Save the data in the Style Selection display (page 63). Rules when recording non-rhythm channels • Use only the . Using, Creating and Editing the Auto Accompaniment Styles 110 CVP-305/303/301 Owner's Manual - Yamaha CVP-305 | Owner's Manual - Page 111
. Select the recording channel in the BASIC tab display. • In the Style Creator, only the channel data and System Exclusive messages can be entered. You can switch between the two types of lists by pressing the [F] button. Chord and Lyrics data are not available. CVP-305/303/301 Owner's Manual 111 - Yamaha CVP-305 | Owner's Manual - Page 112
) buttons. 6 Repeat steps 3-5 above to replace the patterns of other channels. 7 Press the [J] (SAVE) button to call up the Style Selection display, and save your data from the display (page 63). CAUTION The recorded Style will be lost if you change to another Style or you turn the power off without - Yamaha CVP-305 | Owner's Manual - Page 113
Styles 1 Select a Style to be edited. 2 Press the [DIGITAL RECORDING] button. 3 Call up the Style Creator/Edit display by The editing features let you delete data as desired and apply quantize settings for each channel in the Style data. • Making Style File Format CVP-305/303/301 Owner's Manual 113 - Yamaha CVP-305 | Owner's Manual - Page 114
data. The edited Style will be lost if Save the data in the Style Selection display (page 63). you change to another Style or you turn the power off without executing the Save operation (page 63). Using, Creating and Editing the Auto Accompaniment Styles 114 CVP-305/303/301 Owner's Manual - Yamaha CVP-305 | Owner's Manual - Page 115
section/channel. Values above 100% boost the overall velocity, while values below 100% reduce it. Style Creator Using, Creating and Editing the Auto Accompaniment Styles CVP-305/303/301 Owner's Manual 115 - Yamaha CVP-305 | Owner's Manual - Page 116
measure of the destination location, to which the data is to be copied. BAR CLEAR This function clears all data from the specified range of measures within the selected channel. REMOVE EVENT This function lets you remove specific events from the selected channel. 116 CVP-305/303/301 Owner's Manual - Yamaha CVP-305 | Owner's Manual - Page 117
Chord Type change) The Style File Format (SFF) combines all of Yamaha's auto accompaniment (Style playback) know-how into a single unified of a piccolo sound). Editing of Style File Format data is related only to note conversion. Editing the rhythm ). 1 4 2 3 CVP-305/303/301 Owner's Manual 117 - Yamaha CVP-305 | Owner's Manual - Page 118
Press the [I] (SAVE) button to call up the Style Selection display to save your data. Save the data in the Style Selection display (page 63). Auditioning Your Style with a Specific Chord Normally . When playing a C major chord. When playing an F major chord. 118 CVP-305/303/301 Owner's Manual - Yamaha CVP-305 | Owner's Manual - Page 119
for chord transposition. Use this for the Chord 1 and Chord 2 channels, especially when they contain piano or guitar-like chordal parts. MELODIC MINOR When the played chord changes from a major to a Using, Creating and Editing the Auto Accompaniment Styles CVP-305/303/301 Owner's Manual 119 - Yamaha CVP-305 | Owner's Manual - Page 120
root note of the next chord. However, the octave of the new note remains the same. Using, Creating and Editing the Auto Accompaniment Styles 120 CVP-305/303/301 Owner's Manual - Yamaha CVP-305 | Owner's Manual - Page 121
(such as Voice, Style, effects, and so on) as desired. Refer to the separate Data List for a list of parameters that can be registered with the Registration Memory function. 2 Press the REGISTRATION MEMORY [ the B6 key (right-most B key on the key- board). CVP-305/303/301 Owner's Manual 121 - Yamaha CVP-305 | Owner's Manual - Page 122
Setting, Music Finder, Song or incoming MIDI data, etc. Call up the Parameter Lock display ([FUNCTION] → [I] UTILITY → TAB [√] CONFIG 1 → [B] 3 PARAMETER LOCK). Select the desired parameter by using the [1π†]-[7π†] buttons, then lock it with the [8π] (OK) button. 122 CVP-305/303/301 Owner's Manual - Yamaha CVP-305 | Owner's Manual - Page 123
items and leave them unchanged, even when selecting other Registration Memory buttons. 1 Call up the operation display. [FUNCTION] → [E] REGIST SEQUENCE/FREEZE/VOICE SET → TAB [√]/[®] FREEZE CVP-305/303/301 Owner's Manual 123 - Yamaha CVP-305 | Owner's Manual - Page 124
at the lower part of the display correspond to the REGISTRATION MEMORY [1]-[8] buttons on the panel. Program the Sequence order from left to right. 124 CVP-305/303/301 Owner's Manual - Yamaha CVP-305 | Owner's Manual - Page 125
the [6†] button to save the Bank file (page 63). CAUTION Keep in mind that all Registration Sequence data is lost when changing Registration Memory Banks, unless you've saved it with the Registration Memory Bank file. Registering and Recalling Custom Panel Setups CVP-305/303/301 Owner's Manual 125 - Yamaha CVP-305 | Owner's Manual - Page 126
data downloaded from the Yamaha Web site and commercially available Disk Songs are available when you connect the optional floppy disk drive to the instrument. The CVP is compatible with the Song disks (floppy disks) that bear the following marks: Using, Creating and Editing Songs 126 CVP-305/303 - Yamaha CVP-305 | Owner's Manual - Page 127
explains detailed operations and functions related to Song playback which are not covered in the "Quick Guide." ■ Starting/Stopping a Song Press the SONG [PLAY/PAUSE] button to start Song playback, following the fade out. Using, Creating and Editing Songs CVP-305/303/301 Owner's Manual 127 - Yamaha CVP-305 | Owner's Manual - Page 128
Mark is a pre-programmed marker in certain Song data, which specifies a certain location (set of number). The preset Songs in the "Follow Lights" folder contain the Guide settings. These Songs are inappropriate for use with ALL or RANDOM repeat Editing Songs 128 CVP-305/303/301 Owner's Manual - Yamaha CVP-305 | Owner's Manual - Page 129
the Song data are replaced with style channels-allowing you to play the accompaniment parts of the Song yourself. Try playing chords along with the Song playback as shown in the instructions below. to turn the Quick Start "OFF." Using, Creating and Editing Songs CVP-305/303/301 Owner's Manual 129 - Yamaha CVP-305 | Owner's Manual - Page 130
Adjusting the Volume Balance and Voice Combination, etc. (MIXING CONSOLE) Reading Song data automatically when inserting a SmartMedia card You can have the instrument automatically call up the in step 2 of the Setup procedure. Using, Creating and Editing Songs 130 CVP-305/303/301 Owner's Manual - Yamaha CVP-305 | Owner's Manual - Page 131
(GUIDE LAMP) butUse the [A]/[B] buttons to select the desired Guide function type. The ton in the SONG SETTING dis- following types are available. play (in step 1 as described at left) to turn the keyboard guide lamps off. 2 1 Using, Creating and Editing Songs CVP-305/303/301 Owner's Manual - Yamaha CVP-305 | Owner's Manual - Page 132
). If the guide lamps do not light as intended, you may need to assign the appropriate right- and left-hand channels to Track 1 and 2 respectively, by using the [1π†]/[2π†] buttons in the SONG SETTING display as described in step 1 on the previous page. 132 CVP-305/303/301 Owner's Manual Using - Yamaha CVP-305 | Owner's Manual - Page 133
data files. There are three methods as shown below. Realtime Recording Quick Recording ➤ page 134 This convenient and simple recording method lets you quickly record your performance-useful, for example, in recording solo piano to re-record a specific part. CVP-305/303/301 Owner's Manual 133 - Yamaha CVP-305 | Owner's Manual - Page 134
performance and the Style playback simultaneously Press the SONG [TRACK 1 (R)]/[TRACK 2 (L)] buttons and the SONG[EXTRA TRACKS (STYLE)] button. Using, Creating and Editing Songs 134 CVP-305/303/301 Owner's Manual - Yamaha CVP-305 | Owner's Manual - Page 135
the recorded • For recording to [TRACK 1]/ performance data appears. To close the message, press the [EXIT] button. See step 7 for instructions on saving your recording. [TRACK 2] recording, press the Channels See page 137. Using, Creating and Editing Songs CVP-305/303/301 Owner's Manual 135 - Yamaha CVP-305 | Owner's Manual - Page 136
. For instructions on saving Song data, see step 8. 6 Listen to your newly recorded performance. Press the SONG [PLAY/ PAUSE] button to playback the performance you just recorded. REC STOP PLAY/ PAUSE 7 To record another channel, repeat steps 2 through 6. 136 CVP-305/303/301 Owner's Manual - Yamaha CVP-305 | Owner's Manual - Page 137
, commonly used with piano or guitar Voices. data such as melodies and chords. Basic Operations for Step Recording 1 Press the SONG[REC] and SONG[STOP] buttons simultaneously. A blank Song ("New Song") is called up for recording. Using, Creating and Editing Songs CVP-305/303/301 Owner's Manual - Yamaha CVP-305 | Owner's Manual - Page 138
Recording Your Performance REC STOP PLAY/ PAUSE 1 3 2 2 Press the [DIGITAL RECORDING] button. 3 Press the [A] button to call up the Song Creator display for recording/ editing a page 139. For recording chords See page 146. Using, Creating and Editing Songs 138 CVP-305/303/301 Owner's Manual - Yamaha CVP-305 | Owner's Manual - Page 139
" on page 138. Since the music score displayed on the instrument is generated from the recorded MIDI data, it may not appear exactly the same as shown below. 3-5 1 2 67 * The numbers [G] [H] [I] buttons See page 141. Using, Creating and Editing Songs CVP-305/303/301 Owner's Manual 139 - Yamaha CVP-305 | Owner's Manual - Page 140
page 63). Deleting data Mistakenly entered notes can be deleted. 1 Use the [A]/[B] buttons in the STEP RECORD display (page 138) to select the data you want to delete. 2 Press the [J] (DELETE) button to delete the selected data. Using, Creating and Editing Songs 140 CVP-305/303/301 Owner's Manual - Yamaha CVP-305 | Owner's Manual - Page 141
the [DATA ENTRY] dial. [I] button Determines the note type to be entered. Pressing the button alternately switches the note selectors (at the bottom of the display) among three basic note values: normal, dotted and triplet. Using, Creating and Editing Songs CVP-305/303/301 Owner's Manual 141 - Yamaha CVP-305 | Owner's Manual - Page 142
, press the [7π†] button. Using, Creating and Editing Songs 6 Press the [H] button to select the "Staccato." 7 Press the [7π†] button to select the eighth-note length. 142 CVP-305/303/301 Owner's Manual - Yamaha CVP-305 | Owner's Manual - Page 143
your data, then save the data in the Song Selection display (page 63). CAUTION The recorded Song data will be lost if you select another Song or turn the power to the instrument off without executing the Save operation (page 63). Using, Creating and Editing Songs CVP-305/303/301 Owner's Manual - Yamaha CVP-305 | Owner's Manual - Page 144
keyboard, press the [7π†] button. Do not release the C3 key yet. Keep holding it while executing the following steps. Using, Creating and Editing Songs 144 CVP-305/303/301 Owner's Manual - Yamaha CVP-305 | Owner's Manual - Page 145
Song Selection display for saving your data, then save the data in the Song Selection display (page 63). CAUTION The recorded Song data will be lost if you select another Song or turn the power to the instrument off without executing the Save operation (page 63). CVP-305/303/301 Owner's Manual 145 - Yamaha CVP-305 | Owner's Manual - Page 146
(Intro, Main, Ending, and so on) one at a time with precise timing. These instructions show how to record chord changes using the Step Record function. The explanations here apply to the STYLE CONTROL [BREAK] button. 6F G7 4 5 Using, Creating and Editing Songs 146 CVP-305/303/301 Owner's Manual - Yamaha CVP-305 | Owner's Manual - Page 147
the power to the instrument off without executing the Save operation (page 63). Deleting data Mistakenly entered notes can be deleted (page 140). Entering fill-ins Turn the STYLE [MAIN VARIATION (A, B, C, D)] pattern playback.) Using, Creating and Editing Songs CVP-305/303/301 Owner's Manual 147 - Yamaha CVP-305 | Owner's Manual - Page 148
1 Select a Song for editing. 2 Press the [DIGITAL RECORDING] button. 2 3 3 Press the [A] button lets you edit the channel events. For example, you can delete data or transpose notes by channel. • Editing Note or Chord Events ( CVP-305/303/301 Owner's Manual Using, Creating and Editing Songs - Yamaha CVP-305 | Owner's Manual - Page 149
display button), at which point recording stops and normal playback continues. This setting maintains all data after the point at which recording is stopped. You can set the Punch Out measure by pressing the [6π†] buttons. Using, Creating and Editing Songs CVP-305/303/301 Owner's Manual 149 - Yamaha CVP-305 | Owner's Manual - Page 150
display) is completed, this button changes to "UNDO," letting you restore the original data if you are not satisfied with the Operation results. The Undo function only has one level; only the immediate operation can be undone. Using, Creating and Editing Songs 150 CVP-305/303/301 Owner's Manual - Yamaha CVP-305 | Owner's Manual - Page 151
=50 ■ Deleting the data of the specified channel (DELETE menu) You can delete the data of the specified channel in the Song. Select the channel whose data to be deleted by using the [1π†]-[8π†] buttons, then press the [D] (EXECUTE) button to execute the operation. CVP-305/303/301 Owner's Manual 151 - Yamaha CVP-305 | Owner's Manual - Page 152
Records the settings in the Lyrics display. MIC SETTING (CVP-305/303) Records the microphone and the Vocal Harmony settings in the Mixing Console display (page 80). 3 Checkmark the selected item by pressing the [8π] button. Using, Creating and Editing Songs 152 CVP-305/303/301 Owner's Manual - Yamaha CVP-305 | Owner's Manual - Page 153
recorded Song data will be lost if you select another saving your data, then save the data in the Song Selection display (page 63). Song or turn the power to the instrument off without executing the Save operation (page 63). Using, Creating and Editing Songs CVP-305/303/301 Owner's Manual 153 - Yamaha CVP-305 | Owner's Manual - Page 154
Console described on page 80), etc. Prog (Program Change) MIDI program change number for selecting a Voice. P.Bnd (Pitch Bend) Data for changing the pitch of a Voice continuously. A.T.(Aftertouch) Style S.Vol Overall volume of the Accompaniment Style 154 CVP-305/303/301 Owner's Manual - Yamaha CVP-305 | Owner's Manual - Page 155
your data, then save the data in the Song Selection display (page 63). CAUTION The recorded Song data will be lost if you select another Song or turn the power to the instrument off without executing the Save operation (page 63). Using, Creating and Editing Songs CVP-305/303/301 Owner's Manual - Yamaha CVP-305 | Owner's Manual - Page 156
the Clavinova. On some MIDI devices, this event may delete the currently displayed lyrics and display the next set of lyrics. CAUTION The recorded Song data your data, then save the data in the Song Selection display (page 63). Using, Creating and Editing Songs 156 CVP-305/303/301 Owner's Manual - Yamaha CVP-305 | Owner's Manual - Page 157
Microphone (CVP-305/303) Reference to Quick Guide pages Singing how to create your own Vocal Harmony (page 54) types, and lists the detailed parameters for editing. Up to ten Vocal Harmony types can HARMONY TYPE selection display. Using a Microphone (CVP-305/303) CVP-305/303/301 Owner's Manual 157 - Yamaha CVP-305 | Owner's Manual - Page 158
pressing the [8π†] (RETURN) button to return to the Vocal Harmony selection display. 8 Using a Microphone (CVP-305/303) 5 6 7 6 Use the [3π†]-[5π†] buttons to select the parameter (page 159) you want to off without executing the save operation (page 63). 158 CVP-305/303/301 Owner's Manual - Yamaha CVP-305 | Owner's Manual - Page 159
DELAY Specifies the length of the delay before the vibrato effect begins when a note is produced. Higher values result in a longer delay. Using a Microphone (CVP-305/303) CVP-305/303/301 Owner's Manual 159 - Yamaha CVP-305 | Owner's Manual - Page 160
you can "play" the voices of the Clavinova with your voice. (The Clavinova tracks the pitch of your voice and converts it to note data for the tone generator. Keep in mind, button to call up the MICROPHONE SET- TING display. Using a Microphone (CVP-305/303) 160 CVP-305/303/301 Owner's Manual - Yamaha CVP-305 | Owner's Manual - Page 161
as required to tailor the overall frequency response. The Clavinova features a high-grade three-band (LOW, MID and HIGH) digital equalizer function for the microphone sound. • Hz input level at which the gate begins to open. CVP-305/303/301 Owner's Manual 161 Using a Microphone (CVP-305/303) - Yamaha CVP-305 | Owner's Manual - Page 162
set to "OFF," song data control over harmony is turned off. When set to one of the values 1-16, note data (played from a song on the CVP or an external MIDI sequencer) contained on the to L63>H, only the lead vocal is output. Using a Microphone (CVP-305/303) 162 CVP-305/303/301 Owner's Manual - Yamaha CVP-305 | Owner's Manual - Page 163
below. AUTO When the [ACMP ON/OFF] or [LEFT] is set to ON and if chord data exists in the song, the mode is automatically set to CHORDAL. In all other cases, the mode • VOLUME Adjusts the output volume of the microphone sound. Using a Microphone (CVP-305/303) CVP-305/303/301 Owner's Manual 163 - Yamaha CVP-305 | Owner's Manual - Page 164
TING display. 3 Press the TAB [®] button to select the TALK SETTING tab display. 3 4 Using a Microphone (CVP-305/303) 6 5 4 Use the [A]/[B] buttons to select the item (parameter) (page 165) to be set. 5 exiting from this display, the settings will be lost. 164 CVP-305/303/301 Owner's Manual - Yamaha CVP-305 | Owner's Manual - Page 165
applied to the microphone sound. DSP MIC DEPTH This sets the depth of the DSP effect applied to the microphone sound. Talk Setting Using a Microphone (CVP-305/303) CVP-305/303/301 Owner's Manual 165 - Yamaha CVP-305 | Owner's Manual - Page 166
LAN cable LAN cable USB-LAN adapter Connecting the Clavinova Directly to the Internet Connection example 3: Wireless connection Modem* Access point USB wireless LAN adapter * Here, "modem" refers to an ADSL modem, optical network unit (ONU) or cable modem. 166 CVP-305/303/301 Owner's Manual - Yamaha CVP-305 | Owner's Manual - Page 167
then the [EXIT] button. Entering characters For instructions on entering characters in the website, see DATA ENTRY] dial to scroll through the display and view those parts of the page that are not shown. Scroll bar Connecting the Clavinova Directly to the Internet CVP-305/303/301 Owner's Manual - Yamaha CVP-305 | Owner's Manual - Page 168
call up the link destination. Connecting the Clavinova Directly to the Internet You can also select and call up links by using the [DATA ENTRY] dial and pressing the [ENTER] . 2 4 3 1 5 2 Select the desired character type by pressing the [A]/[B] buttons. 168 CVP-305/303/301 Owner's Manual - Yamaha CVP-305 | Owner's Manual - Page 169
Operations in the Special Clavinova Website 3 Use the [6†]/[7π†]/[8†] buttons to move the highlight to the desired character. You can also use the [DATA ENTRY] dial to ) button, press the [2π†] (FORWARD) button. CVP-305/303/301 Owner's Manual 169 Connecting the Clavinova Directly to the Internet - Yamaha CVP-305 | Owner's Manual - Page 170
downloaded data is saved in the "MyDownloads" folder in the Card tab display of the File Selection display. To close the folder and call up the next highest level folder, press the [8π] (UP) button in the File Selection display. 170 CVP-305/303/301 Owner's Manual Connecting the Clavinova Directly - Yamaha CVP-305 | Owner's Manual - Page 171
web page is shown below the list. 2 Call up the display for registering bookmarks by pressing the [3π†] (ADD) button. Connecting the Clavinova Directly to the Internet 3 Select the position of the new bookmark by pressing the [1π†] (UP/ DOWN) button. 3 4 CVP-305/303/301 Owner's Manual 171 - Yamaha CVP-305 | Owner's Manual - Page 172
Operations in the Special Clavinova Website 4 To save the bookmark, press the [7π†] (EXECUTE) button, or press the [8π†] (CANCEL) . 2 3 3 Press the [2π†] (JUMP) button to open the page of the selected bookmark. 172 CVP-305/303/301 Owner's Manual Connecting the Clavinova Directly to the Internet - Yamaha CVP-305 | Owner's Manual - Page 173
entering characters, see page 168. 5 Delete Deletes the selected bookmark from the Bookmark list. 6 Move Changes the order of the bookmarks. 1 Select the bookmark you wish and returns to the browser display. CVP-305/303/301 Owner's Manual 173 Connecting the Clavinova Directly to the Internet - Yamaha CVP-305 | Owner's Manual - Page 174
Home page for the browser. However, you can specify any desired page on the special Clavinova website to be the Home page. 1 Open the page you wish to set as your button. To cancel, press the [8π†] (CANCEL) button. Connecting the Clavinova Directly to the Internet 174 CVP-305/303/301 Owner's Manual - Yamaha CVP-305 | Owner's Manual - Page 175
the [DATA ENTRY] dial. Entering Characters When the character input dis- play is opened, you can enter characters. (Refer to "Entering Characters" on page 168.) 56 6 To execute the setting, press the [3π] (ENTER) button. To cancel, press the [3†] (CANCEL) button. CVP-305/303/301 Owner's Manual - Yamaha CVP-305 | Owner's Manual - Page 176
the home page setting. 5 Show images Image data and pictures in the web page are shown in the browser when this is set to on. Image data is not shown when this is set to off "Use DHCP" above is set to "OFF." 176 CVP-305/303/301 Owner's Manual Connecting the Clavinova Directly to the Internet - Yamaha CVP-305 | Owner's Manual - Page 177
the SSID setting. 2 Channel Determines the channel. 3 Encryption Determines whether or not the data is encrypted. 4 WEP key type/WEP key length/WEP key These settings are available on the current connection. Connecting the Clavinova Directly to the Internet CVP-305/303/301 Owner's Manual 177 - Yamaha CVP-305 | Owner's Manual - Page 178
Internet function are not initialized when using the Initialize operation of the Clavinova; Internet settings must be initialized separately, as explained here. Initializing will the OTHERS tab display (page 177). Connecting the Clavinova Directly to the Internet 178 CVP-305/303/301 Owner's Manual - Yamaha CVP-305 | Owner's Manual - Page 179
Internet. A complete URL usually starts with the characters "http://." Refers to each individual page that makes up a website. A LAN connection that allows data transfer through a wireless, cable-free connection. Connecting the Clavinova Directly to the Internet CVP-305/303/301 Owner's Manual 179 - Yamaha CVP-305 | Owner's Manual - Page 180
. For instructions on connecting, see page 52. Please note that when connecting devices of high output level, make sure to set the [MIC. LINE] switch to "LINE." 345 Connecting Audio & Video Devices n Use audio cables and adaptor plugs having no (zero) resistance. 180 CVP-305/303/301 Owner's Manual - Yamaha CVP-305 | Owner's Manual - Page 181
appropriate optical cable to connect this terminal to the optical digital input terminal of a minidisk (MD) recorder or CD recorder for group sing-alongs and the like) displayed on the TV. For instructions on connecting, see page 53. Video out settings 1 Call up the CVP-305/303/301 Owner's Manual 181 - Yamaha CVP-305 | Owner's Manual - Page 182
[I] (AUX PEDAL POLARITY) button to switch the polarity. Details on the pedal functions are listed here. For func- * tions indicated with " ", use only the foot controller; proper operation cannot be done with a footswitch. Using Your Instrument with Other Devices 182 CVP-305/303/301 Owner's Manual - Yamaha CVP-305 | Owner's Manual - Page 183
PITCH BEND* MODULATION* DSP VARIATION VIBE ROTOR ON/OFF HARMONY/ECHO VOCAL HARMONY (CVP-305/303) TALK (CVP-305/303) SCORE PAGE+ SCORE PAGE- SONG PLAY/PAUSE STYLE START/STOP TAP TEMPO SYNCHRO and On Bass modes (page 97). Using Your Instrument with Other Devices CVP-305/303/301 Owner's Manual 183 - Yamaha CVP-305 | Owner's Manual - Page 184
drum kit (in KIT above) are shown here. This determines the particular instrument sound assigned to the pedal. Using Your Instrument with Other Devices 184 CVP-305/303/301 Owner's Manual - Yamaha CVP-305 | Owner's Manual - Page 185
USB MIDI driver. The instructions below explain how to connect and use the terminals. n If you are using a computer that has a USB interface, we recommend that you connect the computer and the instrument by USB, rather than by MIDI. n Driver A driver is software that provides a data-transfer - Yamaha CVP-305 | Owner's Manual - Page 186
necessarily support all commercially available USB storage devices. Yamaha cannot guarantee operation of USB storage devices that you purchase. Before purchasing USB storage devices, please consult your Yamaha dealer, or an authorized Yamaha distributor (see list at end of the Owner's Manual) for - Yamaha CVP-305 | Owner's Manual - Page 187
Computer USB storage device Instrument n Though the example here shows the use of a connected USB storage device, you can also back up your created data that you've saved to a SmartMedia card inserted to the CARD slot. Using Your Instrument with Other Devices CVP-305/303/301 Owner's Manual 187 - Yamaha CVP-305 | Owner's Manual - Page 188
acoustic instrument. This is called audio data, to distinguish it from MIDI data. Recording and playing back the performance of an acoustic instrument (audio data) Recording Playback Using Your Instrument with Other Devices 188 CVP-305/303/301 Owner's Manual In the above example, the actual - Yamaha CVP-305 | Owner's Manual - Page 189
for MIDI data reception when using the [USB] terminal). This is usually expressed as "it can play 16 instruments at the same time." Channel messages transmit information such as Note ON/OFF, Program Change, for each of the 16 channels. Using Your Instrument with Other Devices CVP-305/303/301 Owner - Yamaha CVP-305 | Owner's Manual - Page 190
Clavinova's keyboard and internal tone generator are also connected by MIDI. → LOCAL CONTROL (page 194) For example, several parts or channels can be transmitted simultaneously, including the Style data (as shown below). Using Your Instrument with Other Devices 190 CVP-305/303/301 Owner's Manual - Yamaha CVP-305 | Owner's Manual - Page 191
1. • Song data recorded on the CVP-305/303/301 is auto- matically saved as SMF Format 0. ● ESEQ This sequence format is compatible with many of Yamaha's MIDI devices, including the Clavinova series instruments. This is a common format used with various Yamaha software. • The CVP-305/303/301 is - Yamaha CVP-305 | Owner's Manual - Page 192
select a MIDI template. 3 To edit a template, press the [8†] (EDIT) button to call up the MIDI display for editing. The individual parameters settings are shown for the selected template. Here you can edit each parameter. Using Your Instrument with Other Devices 192 CVP-305/303/301 Owner's Manual - Yamaha CVP-305 | Owner's Manual - Page 193
). This template lets you play/control the chord root in Style playback with a MIDI pedal unit. This template lets you play the bass part for Style playback by using a MIDI pedal unit. No MIDI signals are sent or received. Using Your Instrument with Other Devices CVP-305/303/301 Owner's Manual 193 - Yamaha CVP-305 | Owner's Manual - Page 194
Clavinova' MIDI IN terminal), and that it is properly transmitting a MIDI clock signal. When this is set to an external device (MIDI, USB 1 or USB determines which parts will be sent as MIDI data and over which MIDI channel the data will be sent. Operation Select the CVP-305/303/301 Owner's Manual - Yamaha CVP-305 | Owner's Manual - Page 195
also determine the types of data to be received. ● The Clavinova can receive MIDI messages over 32 channels (16 channels x 2 ports) by USB connection. ● With the exception from merged MIDI data received over the channels. Using Your Instrument with Other Devices CVP-305/303/301 Owner's Manual 195 - Yamaha CVP-305 | Owner's Manual - Page 196
from merged MIDI data received over the MIDI program change numbers are one lower, since that number system starts from "0." • For the GS Voices, this feature is not available (the program change numbers are not shown). Using Your Instrument with Other Devices 196 CVP-305/303/301 Owner's Manual - Yamaha CVP-305 | Owner's Manual - Page 197
, etc.) cannot be directly copied or pasted to another media. • This is normal. Since directly copying data is not possi- ble, copy or paste the data once to the User display, then copy or paste it again to the Card/USB display after changing the media. Appendix CVP-305/303/301 Owner's Manual 197 - Yamaha CVP-305 | Owner's Manual - Page 198
demo? page 96). 198 CVP-305/303/301 Owner's Manual The Voice produces sure to press the STYLE CONTROL [START/STOP] button. • MIDI Clock may be set to "EXTERNAL." Make sure this is set Chord Types Recognized in the Fingered Mode" of the separate Data List. • You may be playing the keys according to - Yamaha CVP-305 | Owner's Manual - Page 199
a Registration Memory setting containing a User/Card Voice, the Clavinova selects the Preset voice (on which the User/ Card Voice button. • The Song has been stopped at the end of the Song data. Return to the beginning of the Song by pressing the SONG [STOP] button CVP-305/303/301 Owner's Manual 199 - Yamaha CVP-305 | Owner's Manual - Page 200
original has been changed. • MIDI Clock may be set to "EXTERNAL." Guide lamps. 200 CVP-305/303/301 Owner's Manual The Guide lamps light an octave or two lower/higher than the actual pitch. • The Guide data for the Clavinova has been recorded with special "free tempo" settings. For such Song data - Yamaha CVP-305 | Owner's Manual - Page 201
data, lyrics are not displayed. Some of the lyrics overlap each other. • This happens for Songs containing many lyrics. (CVP- [LEFT] to off. Finally, restart the Song. Video out (CVP-305) The Clavinova display contents cannot be sent via video out and do not show CVP-305/303/301 Owner's Manual 201 - Yamaha CVP-305 | Owner's Manual - Page 202
CVP-305: Keyboard Stand Assembly CAUTION • Be careful not to confuse parts, and be sure to install all parts in the correct direction. short screws to secure the main unit from the rear. * Use the front hole on the front brackets to attach the screws. 202 CVP-305/303/301 Owner's Manual Appendix - Yamaha CVP-305 | Owner's Manual - Page 203
left over? → Review the assembly procedure and correct any errors. • Is the Clavinova clear of doors and other movable fixtures? → Move the Clavinova to an appropriate location. • Does the Clavinova make a rattling here. Hold here. Do not hold here. Appendix 110 CVP-305/303/301 Owner's Manual 203 - Yamaha CVP-305 | Owner's Manual - Page 204
CVP-303: Keyboard Stand Assembly CAUTION • Be careful not to confuse parts, and be sure to install all parts in the correct direction. Please assemble place your hands at least 10 cm from either end of the main unit when positioning it. At least 10 cm Appendix 204 CVP-305/303/301 Owner's Manual - Yamaha CVP-305 | Owner's Manual - Page 205
to match the pin configuration of the AC wall outlets in your area. WARNING An improper voltage setting can cause serious damage to the Clavinova or result in improper operation. Key cover Do not hold here. Hold here. Do not hold here. CVP-305/303/301 Owner's Manual 205 - Yamaha CVP-305 | Owner's Manual - Page 206
CVP-301: Keyboard Stand Assembly CAUTION • Be careful not to confuse parts, and be sure to install all parts in the correct direction. Please to place your hands at least 10 cm from either end of the main unit when positioning it. At least 10 cm Appendix 206 CVP-305/303/301 Owner's Manual - Yamaha CVP-305 | Owner's Manual - Page 207
to match the pin configuration of the AC wall outlets in your area. WARNING An improper voltage setting can cause serious damage to the Clavinova or result in improper operation. Key cover Do not hold here. Hold here. Do not hold here. CVP-305/303/301 Owner's Manual 207 - Yamaha CVP-305 | Owner's Manual - Page 208
by using the included floppy disk drive case and screws. For a list of optional floppy disk drives available for this instrument, see "Optional Accessories the USB cable to the [USB TO DEVICE] terminal. 2 Fold the USB cable inside the case as shown. Appendix 208 CVP-305/303/301 Owner's Manual - Yamaha CVP-305 | Owner's Manual - Page 209
Guide Song Guide Lamp Performance assistant technology Recording Record Channels Internet Direct Connection CVP-305 CVP-303 CVP-301 AWM Dynamic Stereo Sampling AWM Stereo Sampling GH3 , Song Editing 16 External Adapter (via USB to DEVICE) Appendix CVP-305/303/301 Owner's Manual 209 - Yamaha CVP-305 | Owner's Manual - Page 210
. Piano Lock) Transpose Scale Type USB to HOST (Computer) USB to DEVICE Other Connectors Pedals Amplifiers/ Speakers Functions Amplifiers Speakers Dimensions [W ✕ D ✕ H] (with the Music Rest) Weight Optional Accessories Headphones Foot Switch Foot Controller USB-FDD Unit CVP-305 CVP-303 CVP - Yamaha CVP-305 | Owner's Manual - Page 211
18, 19, 196 Contrast 19 CONTROLLER 90 Cool 72 COPY 64 CUT 65 D Damper Pedal 29 DELETE 65 Demo 23 Demo (Voice 33 Direct Access 58 DOC (Disk Orchestra Collection 191 Drums 72 DSP 78 DSP/DSP VARIATION 78 , refer to the tab names in this index. Appendix CVP-305/303/301 Owner's Manual 211 - Yamaha CVP-305 | Owner's Manual - Page 212
191 GROOVE 114 GS 191 Guide 131 Guide Lamp 38 GUIDE LAMP ON/OFF 131 GUIDE LAMP TIMING 132 H CVP-305 72 MELODIC MINOR 119 Messages 57 MIC SETTING (CVP-305/303 160 microphone (CVP-305/303 52 MICROPHONE SETTING (CVP-305/303 160 MIDI 188 MIDI Settings 192 MIDI CVP-305/303/301 Owner's Manual - Yamaha CVP-305 | Owner's Manual - Page 213
Set the polarity of the pedal 182 SFX 72 Sheet Music Braces 17 SINGLE FINGER 98 SMF (Standard MIDI file 191 Song 34 SONG CH 1-8/9-16 81 Song channels 137 Sostenuto Pedal 29 SOUND 91 Sound the tab displays, refer to the tab names in this index. Appendix CVP-305/303/301 Owner's Manual 213 - Yamaha CVP-305 | Owner's Manual - Page 214
fty seven (57) of the songs pre-installed in this instrument (CVP-305/303): Alfie Theme from the Paramount Picture ALFIE Words by Hal David Richard Rodgers and Oscar Hammerstein II Copyright Renewed WILLIAMSON MUSIC owner of publication and allied rights throughout the world International Copyright - Yamaha CVP-305 | Owner's Manual - Page 215
Lyrics by Oscar Hammerstein II Music by Richard Rodgers Copyright © 1959 by Richard Rodgers and Oscar Hammerstein II Copyright Renewed WILLIAMSON MUSIC owner of publication and allied rights throughout the world International Copyright Secured All Rights Reserved My Way By Paul Anka, Jacques Revaux - Yamaha CVP-305 | Owner's Manual - Page 216
the Composition(s) embodied on this Multimedia Disc in the form of standard music notation, without the express written permission of the copyright owner. Somewhere, My Love Lara's Theme from DOCTOR ZHIVAGO Lyric by Paul Francis Webster Music by Maurice Jarre Copyright © 1965, 1966 (Renewed 1993 - Yamaha CVP-305 | Owner's Manual - Page 217
adapter other than one described in the owners manual, on the name plate, or specifically recommended by Yamaha. 5. WARNING: Do not place this product to service this product beyond that described in the user-maintenance instructions. All other servicing should be referred to qualified service - Yamaha CVP-305 | Owner's Manual - Page 218
1. IMPORTANT NOTICE: DO NOT MODIFY THIS UNIT! This product, when installed as indicated in the instructions contained in this manual, meets FCC requirements. Modifications not expressly approved by Yamaha may void your authority, granted by the FCC, to use the product. 2. IMPORTANT: When connecting - Yamaha CVP-305 | Owner's Manual - Page 219
Yamaha representative or the authorized distributor listed below. Pour plus de détails sur les produits, veuillez-vous adresser à Yamaha ou au distributeur le plus proche de vous figurant dans la liste Yamaha Yamaha Yamaha SWEDEN Yamaha Scandinavia av Yamaha Scandinavia CHINA Yamaha Yamaha Yamaha Yamaha - Yamaha CVP-305 | Owner's Manual - Page 220
-
 1
1 -
 2
2 -
 3
3 -
 4
4 -
 5
5 -
 6
6 -
 7
7 -
8
-
9
-
10
-
11
-
12
-
13
-
14
-
15
-
16
-
17
-
18
-
19
-
20
-
21
-
22
-
23
-
24
-
25
-
26
-
27
-
28
-
29
-
30
-
31
-
32
-
33
-
34
-
35
-
36
-
37
-
38
-
39
-
40
-
41
-
42
-
43
-
44
-
45
-
46
-
47
-
48
-
49
-
50
-
51
-
52
-
53
-
54
-
55
-
56
-
57
-
58
-
59
-
60
-
61
-
62
-
63
-
64
-
65
-
66
-
67
-
68
-
69
-
70
-
71
-
72
-
73
-
74
-
75
-
76
-
77
-
78
-
79
-
80
-
81
-
82
-
83
-
84
-
85
-
86
-
87
-
88
-
89
-
90
-
91
-
92
-
93
-
94
-
95
-
96
-
97
-
98
-
99
-
100
-
101
-
102
-
103
-
104
-
105
-
106
-
107
-
108
-
109
-
110
-
111
-
112
-
113
-
114
-
115
-
116
-
117
-
118
-
119
-
120
-
121
-
122
-
123
-
124
-
125
-
126
-
127
-
128
-
129
-
130
-
131
-
132
-
133
-
134
-
135
-
136
-
137
-
138
-
139
-
140
-
141
-
142
-
143
-
144
-
145
-
146
-
147
-
148
-
149
-
150
-
151
-
152
-
153
-
154
-
155
-
156
-
157
-
158
-
159
-
160
-
161
-
162
-
163
-
164
-
165
-
166
-
167
-
168
-
169
-
170
-
171
-
172
-
173
-
174
-
175
-
176
-
177
-
178
-
179
-
180
-
181
-
182
-
183
-
184
-
185
-
186
-
187
-
188
-
189
-
190
-
191
-
192
-
193
-
194
-
195
-
196
-
197
-
198
-
199
-
200
-
201
-
202
-
203
-
204
-
205
-
206
-
207
-
208
-
209
-
210
-
211
-
212
-
213
-
214
-
215
-
216
-
217
-
218
-
219
-
220
 |
 |