Yamaha CVP-96 Owner's Manual - Page 138
Song Copy SONG COPY Display
 |
View all Yamaha CVP-96 manuals
Add to My Manuals
Save this manual to your list of manuals |
Page 138 highlights
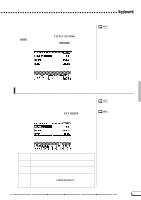
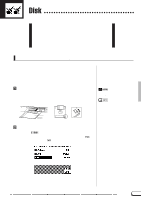
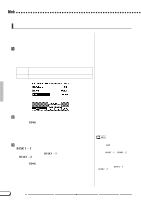
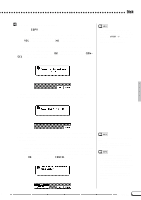
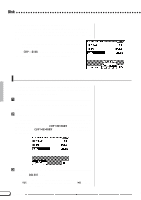
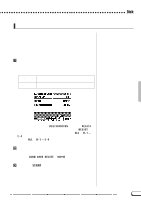
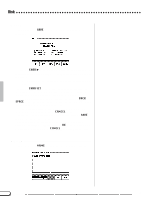
Disk Song Copy (SONG COPY) Display - PAGE 5 This function allows you to copy song data (data files on disk) recorded by the Clavinova to a different song number on the same disk, or to a different disk. ZSet up the disk(s Insert the disk containing the source song. ¿ Press either of the left-most two LCD buttons to select the copy type. Two copy types are available. DISK 1 - 1 This function allows you to copy the song to a different song number on the same disk. DISK 1 - 2 This function allows you to copy the song to a different disk. XSelect the source song Press the SONG button to highlight the parameter, then use the data dial or [-/+] buttons to select the source song. The selected song name will appear in the upper section of the LCD display. CSelect the destination song number (DISK1 - 1 only This step is only for the DISK1 - 1 copy type. If you have selected the DISK1 - 2 type copy, go on to step 4. Press the SONG button to highlight the parameter, then use the data dial or [-/+] buttons to select the destination song number. If the destination song number already contains data, the name of the song file will appear in the middle section of the LCD display. In this case, the original data of the destination song number will be erased and overwritten by the source song data when executing the copy operation. • If the Clavinova's internal memory contains song data recorded without a disk, the CVP mode will be automatically selected for copying the internal memory data to disk (see page 138), and the DISK1 - 1 or DISK1 - 2 copy mode cannot be selected. In this case if you want to keep the data of internal memory, copy it to disk first, and delete the internal memory data by using the Song Delete function (page 138). Then, attempt the DISK1 - 1 or DISK1 - 2 copy operation again. • When using the Copy function within the same disk, the operation cannot be performed if the destination song is set to the same number as the source song. In this case, a "Select a different number!" message appears. 136 CVP-98/96/600 136
-
 1
1 -
2
-
3
-
4
-
5
-
6
-
7
-
8
-
9
-
10
-
11
-
12
-
13
-
14
-
15
-
16
-
17
-
18
-
19
-
20
-
21
-
22
-
23
-
24
-
25
-
26
-
27
-
28
-
29
-
30
-
31
-
32
-
33
-
34
-
35
-
36
-
37
-
38
-
39
-
40
-
41
-
42
-
43
-
44
-
45
-
46
-
47
-
48
-
49
-
50
-
51
-
52
-
53
-
54
-
55
-
56
-
57
-
58
-
59
-
60
-
61
-
62
-
63
-
64
-
65
-
66
-
67
-
68
-
69
-
70
-
71
-
72
-
73
-
74
-
75
-
76
-
77
-
78
-
79
-
80
-
81
-
82
-
83
-
84
-
85
-
86
-
87
-
88
-
89
-
90
-
91
-
92
-
93
-
94
-
95
-
96
-
97
-
98
-
99
-
100
-
101
-
102
-
103
-
104
-
105
-
106
-
107
-
108
-
109
-
110
-
111
-
112
-
113
-
114
-
115
-
116
-
117
-
118
-
119
-
120
-
121
-
122
-
123
-
124
-
125
-
126
-
127
-
128
-
129
-
130
-
131
-
132
-
 133
133 -
 134
134 -
 135
135 -
 136
136 -
 137
137 -
 138
138 -
 139
139 -
 140
140 -
 141
141 -
 142
142 -
 143
143 -
144
-
145
-
146
-
147
-
148
-
149
-
150
-
151
-
152
-
153
-
154
-
155
-
156
-
157
-
158
-
159
-
160
-
161
-
162
-
163
-
164
 |
 |
