Yamaha DTX450K Owner's Manual - Page 16
Step 10, Attaching the hi-hat, Assembling the cym, bal pads, Rotating the tom, pads into place
 |
View all Yamaha DTX450K manuals
Add to My Manuals
Save this manual to your list of manuals |
Page 16 highlights
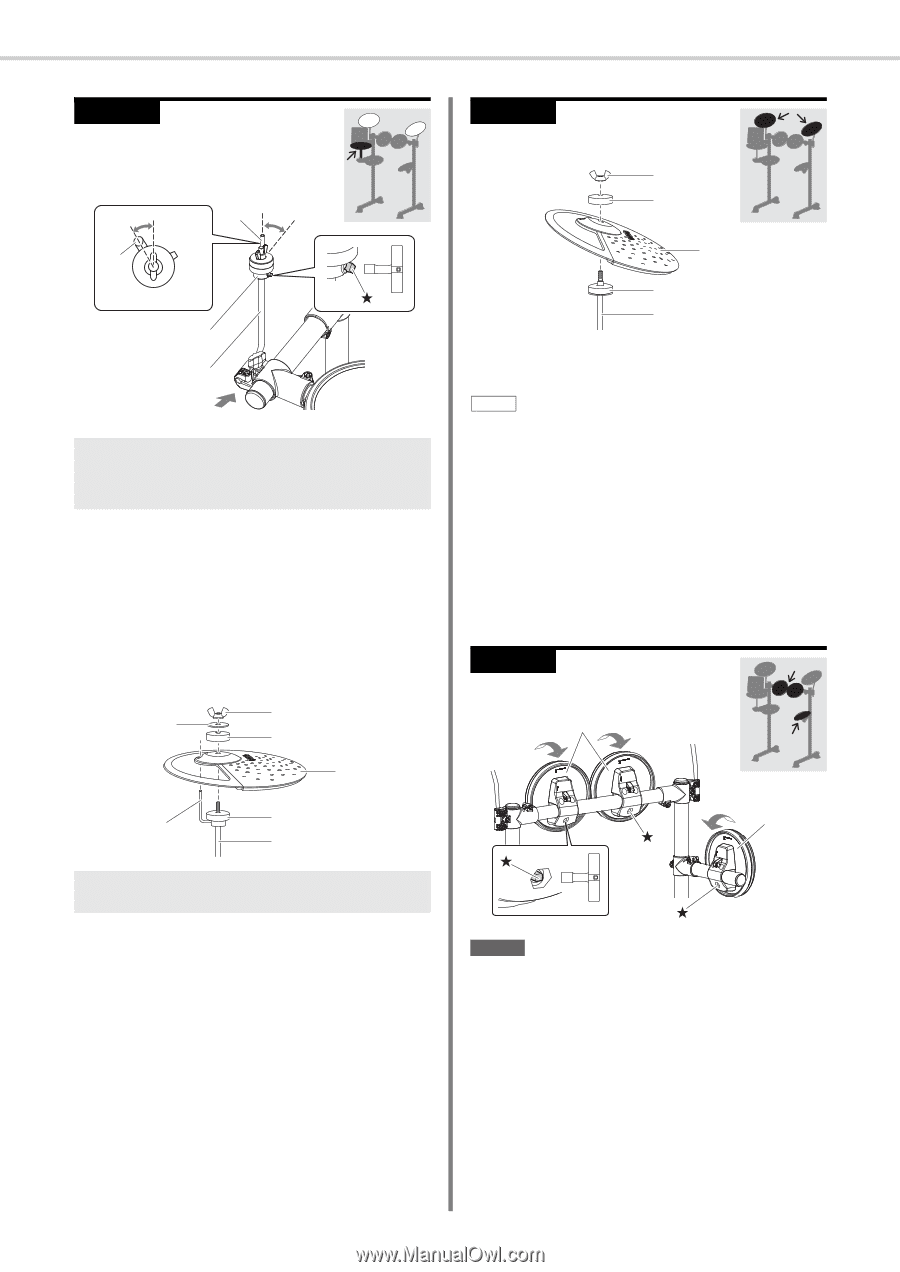
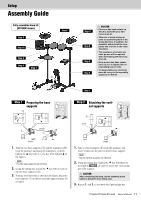
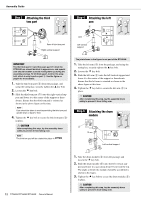
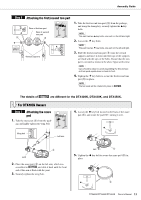
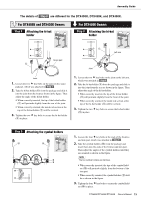
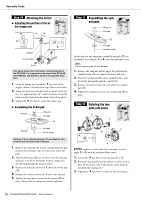
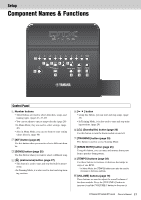
Assembly Guide Step 10 Attaching the hi-hat Adjusting the position of the hihat stopper pin 30° Pin 30° Pin Front Stopper Hi-hat holder Front This figure shows the hi-hat holder correctly inserted in the DTX450K. It is inserted from the front in the DTX400K and DTX430K, and therefore, faces in the opposite direction. 1. Using the tuning key, loosen the key bolt on the stopper, which is located at the top of the hi-hat holder. 2. Adjust the position of the pin until, as shown in the fig- ure, it is approximately 30° counter-clockwise from the front-rear direction of the kit when viewed from above. 3. Tighten the key bolt to secure the stopper pin. Assembling the hi-hat pad Washer Wing nut Felt pad !2 Stopper Felt pad Hi-hat holder All three of the cymbal/hi-hat pads (!2) are identical. One of these is to be used as the hi-hat pad. 1. Remove the wing nut, the washer, and the upper felt pad from the hi-hat holder. (Do not remove the lower felt pad.) 2. Take the hi-hat pad (!2; one of three) from the package and place it on the hi-hat holder with the stopper pin also passing through the hole provided. 3. Replace the felt pad removed in 1. above the hi-hat pad (!2). 4. Replace the washer removed in 1. above the felt pad. 5. Tighten the wing nut to secure the hi-hat pad (!2) in place. Ensure that the wing nut is firmly tightened. Step 11 Assembling the cymbal pads Wing nut Felt pad !2 Felt pad Cymbal holder In this step, the two remaining cymbal/hi-hat pads (!2) are assembled. Accordingly, 1. to 4. must be performed twice. NOTE The two cymbal pads (!2) are identical. 1. Remove the wing nut and the upper felt pad from the cymbal holder. (Do not remove the lower felt pad.) 2. Place the cymbal pad (!2) on the cymbal holder, with the holder passing through the central hole. 3. Replace the felt pad removed in 1. above the cymbal pad (!2). 4. Tighten the wing nut to secure the cymbal pad (!2) in place. Step 12 Rotating the tom pads into place y e Step 12 applies to each of the three tom pads. Accord- ingly, 1. to 3. must be performed three times. 1. Loosen the key bolt on the tom pad (e or y). 2. Rotate the tom pad to a position where it will be easy to play. (If necessary, refer to the picture of the properly assembled kit on page 11.) 3. Tighten the key bolt to secure the tom pad in place. 16 DTX400K/DTX430K/DTX450K Owner's Manual
-
 1
1 -
2
-
3
-
4
-
5
-
6
-
7
-
8
-
9
-
10
-
 11
11 -
 12
12 -
 13
13 -
 14
14 -
 15
15 -
 16
16 -
 17
17 -
 18
18 -
 19
19 -
 20
20 -
 21
21 -
22
-
23
-
24
-
25
-
26
-
27
-
28
-
29
-
30
-
31
-
32
-
33
-
34
-
35
-
36
-
37
-
38
-
39
-
40
-
41
-
42
-
43
-
44
-
45
-
46
-
47
-
48
-
49
-
50
-
51
-
52
-
53
-
54
-
55
-
56
-
57
-
58
-
59
-
60
-
61
-
62
-
63
-
64
-
65
-
66
-
67
-
68
 |
 |