Yamaha N-100 Owner's Manual - Page 27
Attach C to B., AB AB
 |
View all Yamaha N-100 manuals
Add to My Manuals
Save this manual to your list of manuals |
Page 27 highlights
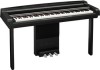
ENGLISH 1-3 Open the key cover, then raise the keyboard side of A until it leans against the wall. Be careful not to allow the A to fall or slip. Also, insert the soft cloth between the A and the wall to protect the unit from being damaged by hitting the wall or any other object. 2. Attach C to B. Keyboard Stand Assembly CAUTION Please do not touch the speaker net (cloth cover) or the speaker underneath it. A A CAUTION • Do not place the A with the front side facing down. • Do not lay the A upside-down on the floor. 2-1 Remove the plastic groove cover from B. B 2-2 Stand B upside down on the floor and support it with your hands. B N-100 Owner's Manual 27
-
 1
1 -
2
-
3
-
4
-
5
-
6
-
7
-
8
-
9
-
10
-
11
-
12
-
13
-
14
-
15
-
16
-
17
-
18
-
19
-
20
-
21
-
 22
22 -
 23
23 -
 24
24 -
 25
25 -
 26
26 -
 27
27 -
 28
28 -
 29
29 -
 30
30 -
 31
31 -
 32
32 -
33
-
34
-
35
-
36
-
37
-
38
-
39
-
40
-
41
-
42
 |
 |

Keyboard Stand Assembly
N-100
Owner’s Manual
ENGLISH
27
1-3
Open the key cover, then raise the keyboard side
of A until it leans against the wall.
Be careful not to allow the A to fall or slip.
Also, insert the soft cloth between the A and the
wall to protect the unit from being damaged by
hitting the wall or any other object.
CAUTION
• Do not place the A with the front side facing
down.
• Do not lay the A upside-down on the floor.
2.
Attach C to B.
CAUTION
Please do not touch the speaker net (cloth cover) or
the speaker underneath it.
2-1
Remove the plastic groove cover from B.
2-2
Stand B upside down on the floor and support it
with your hands.
A
A
B
B