2012 Dodge Challenger User Guide SRT8 - Page 86
2012 Dodge Challenger Manual

Page 86 highlights
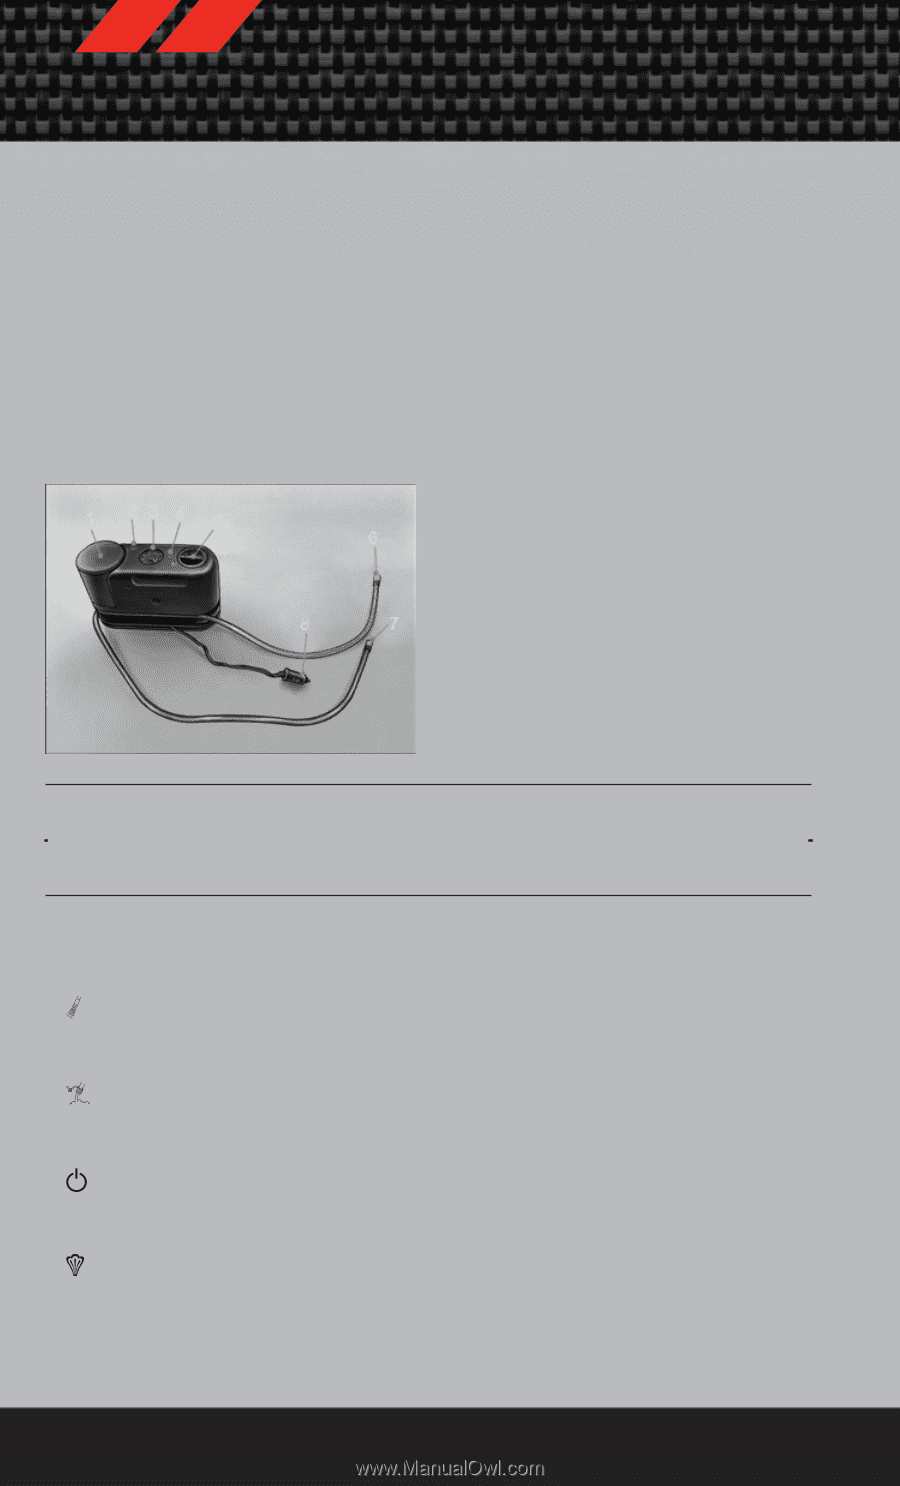
WHAT TO DO IN EMERGENCIES TIREFIT KIT • Small punctures up to 1∕4 in (6 mm) in the tire tread can be sealed with TIREFIT. Foreign objects (e.g., screws or nails) should not be removed from the tire. TIREFIT can be used in outside temperatures down to approximately -4°F (-20°C). • This kit will provide a temporary tire seal, allowing you to drive your vehicle up to 100 miles (160 km) with a maximum speed of 55 mph (88 km/h). TIREFIT Storage • The TIREFIT kit is located in the trunk. TIREFIT Kit Components And Operation 1. 2. 3. 4. Sealant Bottle Deflation Button Pressure Gauge Power Button 5. 6. 7. 8. Mode Select Knob Sealant Hose (Clear) Air Pump Hose (Black) Power Plug Using The Mode Select Knob And Hoses • Your TIREFIT kit is equipped with the following symbols to indicate the air or sealant mode. Selecting Air Mode • Turn the Mode Select Knob (5) to this position for air pump operation only. Use the Black Air Pump Hose (7) when selecting this mode. Selecting Sealant Mode • Turn the Mode Select Knob (5) to this position to inject the TIREFIT Sealant and to inflate the tire. Use the Sealant Hose (clear hose) (6) when selecting this mode. Using The Power Button • Push and release the Power Button (4) once to turn On the TIREFIT kit. Push and release the Power Button (4) again to turn Off the TIREFIT kit. Using The Deflation Button • Press the Deflation Button (2) to reduce the air pressure in the tire if it becomes over-inflated. 84
-
 1
1 -
2
-
3
-
4
-
5
-
6
-
7
-
8
-
9
-
10
-
11
-
12
-
13
-
14
-
15
-
16
-
17
-
18
-
19
-
20
-
21
-
22
-
23
-
24
-
25
-
26
-
27
-
28
-
29
-
30
-
31
-
32
-
33
-
34
-
35
-
36
-
37
-
38
-
39
-
40
-
41
-
42
-
43
-
44
-
45
-
46
-
47
-
48
-
49
-
50
-
51
-
52
-
53
-
54
-
55
-
56
-
57
-
58
-
59
-
60
-
61
-
62
-
63
-
64
-
65
-
66
-
67
-
68
-
69
-
70
-
71
-
72
-
73
-
74
-
75
-
76
-
77
-
78
-
79
-
80
-
 81
81 -
 82
82 -
 83
83 -
 84
84 -
 85
85 -
 86
86 -
 87
87 -
 88
88 -
 89
89 -
 90
90 -
 91
91 -
92
-
93
-
94
-
95
-
96
-
97
-
98
-
99
-
100
-
101
-
102
-
103
-
104
-
105
-
106
-
107
-
108
-
109
-
110
-
111
-
112
-
113
-
114
-
115
-
116
-
117
-
118
-
119
-
120
-
121
-
122
-
123
-
124
 |
 |