1997 Honda Accord Owner's Manual - Page 27
1997 Honda Accord Manual
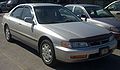
Page 27 highlights
Child Safety 4. Allow the belt to slowly feed back into the retractor. You should hear a clicking noise that indicates the locking mechanism has engaged. 5. After the belt has retracted fully, pull up on the shoulder portion to remove any slack. 6. Push and pull on the child seat to verify that it is held firmly in place. If not, unlatch the seat belt, allow it to retract fully, and repeat these steps. To unlatch the seat belt, push the red PRESS button on the buckle. Guide the belt across to the door pillar. If the belt doesn't retract easily, pull it out and check for twists or kinks. Using Child Restraints with Tethers 111 mm (4.4 in) 306 mm (12.0 in) Canadian Models Select the attachment point you want to use and remove the plug with a small flat-tipped screwdriver or fingernail file. Install the tether hardware that came with the child seat. Tighten to: 22 N.m (2.2 kgf.m, 16 lbf.ft) If you are not sure how to install the bracket, have it installed by your authorized Honda dealer. If you need an anchor plate and mounting hardware, contact your Honda dealer. 310 mm (12.2 in) Your Honda has three attachment points for tether-style child seat. They are located on the rear shelf. U.S. Models Use the dimensions in the above illustration to locate the attachment point you want to use. Cut a 7/8 inch (22 mm) diameter hole in the rear shelf. Driver and Passenger Safety
-
 1
1 -
2
-
3
-
4
-
5
-
6
-
7
-
8
-
9
-
10
-
11
-
12
-
13
-
14
-
15
-
16
-
17
-
18
-
19
-
20
-
21
-
 22
22 -
 23
23 -
 24
24 -
 25
25 -
 26
26 -
 27
27 -
 28
28 -
 29
29 -
 30
30 -
 31
31 -
 32
32 -
33
-
34
-
35
-
36
-
37
-
38
-
39
-
40
-
41
-
42
-
43
-
44
-
45
-
46
-
47
-
48
-
49
-
50
-
51
-
52
-
53
-
54
-
55
-
56
-
57
-
58
-
59
-
60
-
61
-
62
-
63
-
64
-
65
-
66
-
67
-
68
-
69
-
70
-
71
-
72
-
73
-
74
-
75
-
76
-
77
-
78
-
79
-
80
-
81
-
82
-
83
-
84
-
85
-
86
-
87
-
88
-
89
-
90
-
91
-
92
-
93
-
94
-
95
-
96
-
97
-
98
-
99
-
100
-
101
-
102
-
103
-
104
-
105
-
106
-
107
-
108
-
109
-
110
-
111
-
112
-
113
-
114
-
115
-
116
-
117
-
118
-
119
-
120
-
121
-
122
-
123
-
124
-
125
-
126
-
127
-
128
-
129
-
130
-
131
-
132
-
133
-
134
-
135
-
136
-
137
-
138
-
139
-
140
-
141
-
142
-
143
-
144
-
145
-
146
-
147
-
148
-
149
-
150
-
151
-
152
-
153
-
154
-
155
-
156
-
157
-
158
-
159
-
160
-
161
-
162
-
163
-
164
-
165
-
166
-
167
-
168
-
169
-
170
-
171
-
172
-
173
-
174
-
175
-
176
-
177
-
178
-
179
-
180
-
181
-
182
-
183
-
184
-
185
-
186
-
187
-
188
-
189
-
190
-
191
-
192
-
193
-
194
-
195
-
196
-
197
-
198
-
199
-
200
-
201
-
202
-
203
-
204
-
205
-
206
-
207
-
208
-
209
-
210
-
211
-
212
-
213
-
214
-
215
-
216
-
217
-
218
-
219
-
220
-
221
-
222
-
223
-
224
-
225
-
226
-
227
-
228
-
229
-
230
-
231
-
232
-
233
-
234
-
235
-
236
-
237
-
238
-
239
-
240
-
241
-
242
-
243
-
244
-
245
-
246
-
247
-
248
-
249
-
250
-
251
-
252
-
253
-
254
-
255
-
256
-
257
-
258
-
259
-
260
-
261
-
262
-
263
-
264
-
265
-
266
-
267
-
268
-
269
-
270
-
271
-
272
-
273
-
274
-
275
-
276
-
277
-
278
-
279
-
280
 |
 |
