2010 Kawasaki Vulcan 900 Classic LT Owners Manual
2010 Kawasaki Vulcan 900 Classic LT Manual

2010 Kawasaki Vulcan 900 Classic LT manual content summary:
- 2010 Kawasaki Vulcan 900 Classic LT | Owners Manual - Page 1
- 2010 Kawasaki Vulcan 900 Classic LT | Owners Manual - Page 2
- 2010 Kawasaki Vulcan 900 Classic LT | Owners Manual - Page 3
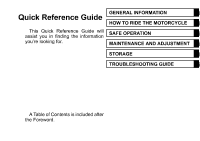
Quick Reference Guide This Quick Reference Guide will assist you in finding the information you're looking for. GENERAL INFORMATION HOW TO RIDE THE MOTORCYCLE SAFE OPERATION MAINTENANCE AND ADJUSTMENT STORAGE TROUBLESHOOTING GUIDE j j j j j j A Table of Contents is included after the Foreword. - 2010 Kawasaki Vulcan 900 Classic LT | Owners Manual - Page 4
- 2010 Kawasaki Vulcan 900 Classic LT | Owners Manual - Page 5
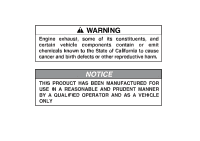
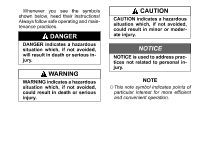
Whenever you see the symbols shown below, heed their instructions! Always follow safe operating and maintenance practices. CAUTION CAUTION indicates a hazardous situation which, if not avoided, could result in minor or moderate injury. DANGER DANGER - 2010 Kawasaki Vulcan 900 Classic LT | Owners Manual - Page 6
. This manual offers many safe riding tips, but its purpose is not to provide instruction in all trouble-free life for your motorcycle, give it the proper care and maintenance described in this manual. For those who would like more detailed information on their Kawasaki Motorcycle, a Service Manual - 2010 Kawasaki Vulcan 900 Classic LT | Owners Manual - Page 7
This manual should be considered a permanent part of the motorcycle and should remain However, there may be minor differences between the actual product and illustrations and text in this manual. All products are subject to change without prior notice or obligation. KAWASAKI HEAVY INDUSTRIES, LTD - 2010 Kawasaki Vulcan 900 Classic LT | Owners Manual - Page 8
TABLE OF CONTENTS SPECIFICATIONS...SERIAL NUMBER LOCATIONS ...LOCATION OF PARTS ...LOCATION OF LABELS...LOADING INFORMATION ...GENERAL INFORMATION ...Meter Instruments ...Speedometer: ...Digital Display ...Fuel Gauge: ...RESET Button/MODE button: ...Warning/Indicator Lights: ...Keys ...Ignition - 2010 Kawasaki Vulcan 900 Classic LT | Owners Manual - Page 9
...Wheels ...Battery...Headlight Beam...Fuses ...General Lubrication...Cleaning Your Motorcycle ...Bolt and Nut Tightening...STORAGE ...TROUBLESHOOTING GUIDE...OWNER SATISFACTION ...REPORTING SAFETY DEFECTS ...ENVIRONMENTAL PROTECTION ...MAINTENANCE RECORD ...LABEL INFORMATION ... 111 113 115 116 - 2010 Kawasaki Vulcan 900 Classic LT | Owners Manual - Page 10
8 SPECIFICATIONS SPECIFICATIONS DIMENSIONS Overall Length Overall Width Overall Height Wheelbase Road Clearance Curb Mass ENGINE Type Displacement Bore × Stroke Compression Ratio Starting System Cylinder Numbering Method Firing Order SOHC, V-type 2-cylinder, 4-stroke, liquid-cooled 903 cm³ (55.1 cu - 2010 Kawasaki Vulcan 900 Classic LT | Owners Manual - Page 11
SPECIFICATIONS 9 Carburetion System Ignition System Ignition Timing (Electronically advanced) Spark Plugs Lubrication System Engine Oil Type: Digital fuel injection system (DFI) Battery and coil (transistorized ignition) 3° BTDC @1 000 r/min (rpm) ∼ 39° BTDC @5 400 r/min (rpm) NGK CPR7EA-9 Forced - 2010 Kawasaki Vulcan 900 Classic LT | Owners Manual - Page 12
10 SPECIFICATIONS Overall Drive Ratio Gear Ratio 1st 2nd 3rd 4th 5th FRAME Castor Trail Tire Size: Rim Size: Fuel Tank Capacity ELECTRICAL EQUIPMENT Battery 12 V 10 Ah Front Rear Front Rear 32° 160 mm (6.3 in.) 130/90-16 M/C 67H 180/70-15 M/C 76H J16 M/C × MT3.00 J15 M/C × MT4.50 20 L (5.3 US gal) - 2010 Kawasaki Vulcan 900 Classic LT | Owners Manual - Page 13
SPECIFICATIONS 11 Headlight Tail/Brake Light 12 V 60/55 W 12 V 5/21 W Specifications subject to change without notice. - 2010 Kawasaki Vulcan 900 Classic LT | Owners Manual - Page 14
12 SERIAL NUMBER LOCATIONS SERIAL NUMBER LOCATIONS The engine and frame serial numbers are used to register the motorcycle. They are the only means of identifying your particular machine from others of the same model type. These serial numbers may be needed by your dealer when ordering parts. In - 2010 Kawasaki Vulcan 900 Classic LT | Owners Manual - Page 15
LOCATION OF PARTS 13 LOCATION OF PARTS 1. 2. 3. 4. Clutch Lever Clutch Lever Adjuster Meter Instruments Brake Fluid Reservoir (Front) 5. Brake Lever Adjuster 6. Front Brake Lever 7. Left Handlebar Switches 8. Indicator Lights 9. Fuel Tank Cap 10. Right Handlebar Switches 11. Throttle Grip - 2010 Kawasaki Vulcan 900 Classic LT | Owners Manual - Page 16
14 LOCATION OF PARTS 12. 13. 14. 15. 16. 17. 18. Front Fork Headlight Turn Signal Light Horn Windshield Spark Plugs Battery 19. 20. 21. 22. 23. 24. 25. Saddlebag Brake Disc Brake Caliper Wheel Radiator Shift Pedal Oil Level Gauge 26. 27. 28. 29. 30. 31. 32. Side Stand Switch Side Stand Fuse - 2010 Kawasaki Vulcan 900 Classic LT | Owners Manual - Page 17
LOCATION OF PARTS 15 33. 34. 35. 36. 37. Tail/Brake Light Seat Tool Kit Case/Tool Kit Air Cleaner Element Fuel Tank 38. Steering Lock 39. Mufflers 40. Idle Speed Adjusting Screw 41. Rear Brake Pedal 42. Rear Brake Light Switch 43. Brake Fluid Reservoir (Rear) - 2010 Kawasaki Vulcan 900 Classic LT | Owners Manual - Page 18
16 LOCATION OF LABELS LOCATION OF LABELS 1. *2. 3. 4. Daily Safety Checks Fuel Level Brake Fluid (Front) Brake Fluid (Rear) (For further information of label, refer to the "LABEL INFORMATION" chapter.) *: only on California model - 2010 Kawasaki Vulcan 900 Classic LT | Owners Manual - Page 19
LOCATION OF LABELS 17 *5. 6. 7. 8. Vacuum Hose Routing Diagram Battery Position/Danger Tire and Load Data Vehicle Emission Control Information (For further information of label, refer to the "LABEL INFORMATION" chapter.) *: only on California model - 2010 Kawasaki Vulcan 900 Classic LT | Owners Manual - Page 20
18 LOCATION OF LABELS 9. Noise Emission Control Information 10. Weight and Manufacture (For further information of label, refer to the "LABEL INFORMATION" chapter.) - 2010 Kawasaki Vulcan 900 Classic LT | Owners Manual - Page 21
may result in an unsafe riding condition. Before you ride the motorcycle, make sure it is not overloaded and that you have followed these instructions. With the exception of genuine Kawasaki Parts and Accessories, Kawasaki has no control over the design or application of accessories. In some cases - 2010 Kawasaki Vulcan 900 Classic LT | Owners Manual - Page 22
still while the motorcycle is in motion and not interfere with the operation of the motorcycle. Do not carry animals on your motorcycle. 2. You should instruct any passenger before riding to keep his feet on the passenger footpegs and hold on to the operator or seat strap. Do not carry a passenger - 2010 Kawasaki Vulcan 900 Classic LT | Owners Manual - Page 23
LOADING INFORMATION 21 affected any lighting components, road clearance, banking capability (i.e., lean angle), control operation, wheel travel, front fork movement, or any other aspect of the motorcycle's operation. 7. Weight attached to the handlebar or front fork will increase the mass of the - 2010 Kawasaki Vulcan 900 Classic LT | Owners Manual - Page 24
22 GENERAL INFORMATION GENERAL INFORMATION Meter Instruments A. Speedometer B. Digital Display C. Fuel Level Indicator Light D. Coolant Temperature Warning Light E. Fuel Gauge F. Oil Pressure Warning Light G. Fuel Injection Warning Light H. MODE Button I. RESET Button J. Neutral Indicator Light K. - 2010 Kawasaki Vulcan 900 Classic LT | Owners Manual - Page 25
GENERAL INFORMATION 23 Speedometer: The speedometer shows the speed of the vehicle. Digital Display The digital display located in the speedometer face is used to display the odometer, trip meter, and clock. Pushing the MODE button shifts the display through the following three modes: ODO, TRIP and - 2010 Kawasaki Vulcan 900 Classic LT | Owners Manual - Page 26
24 GENERAL INFORMATION display starts flashing. Push the MODE button to advance the minutes. żPushing the MODE button momentarily advances the hour or minute step by step. Pushing and holding the button advance the hour or minute continuously. żThe clock works normally from the back-up power while - 2010 Kawasaki Vulcan 900 Classic LT | Owners Manual - Page 27
GENERAL INFORMATION 25 Odometer The odometer shows the total distance in kilometers (miles) that the vehicle has been ridden. This meter cannot be reset. żThe data is maintained even if the battery is disconnected. żWhen the figures come to 999999, they are stopped and locked. NOTE Trip Meters - 2010 Kawasaki Vulcan 900 Classic LT | Owners Manual - Page 28
26 GENERAL INFORMATION Fuel Gauge: The fuel gauge shows the amount of fuel in the fuel tank. When the needle comes near the E (empty) position, refuel at the earliest opportunity. When vehicle stands with Side Stand, Fuel Gauge cannot show the amount of fuel in the fuel tank exactly. Stand upright - 2010 Kawasaki Vulcan 900 Classic LT | Owners Manual - Page 29
ignition key is turned to "ON" and goes off soon after ensuring that its circuit functions properly. The warning light also goes on whenever the troubles occur in digital fuel injection system (DFI). If the warning light comes on, have the DFI system checked by an authorized Kawasaki dealer. : The - 2010 Kawasaki Vulcan 900 Classic LT | Owners Manual - Page 30
28 GENERAL INFORMATION tank exactly. Stand upright the vehicle to check the fuel level. Keys This motorcycle has a combination key, which is used for the ignition switch, steering lock, and fuel tank cap. Blank keys are available at your Kawasaki dealers. Ask your dealer to make any additional - 2010 Kawasaki Vulcan 900 Classic LT | Owners Manual - Page 31
GENERAL INFORMATION 29 Ignition Switch The ignition switch is located at the left side behind the rear cylinder. This is a three-position, key-operated switch. The key can be removed from the switch when it is in the OFF or P (Park) position. A. B. C. D. Ignition Switch OFF ON P (Park) - 2010 Kawasaki Vulcan 900 Classic LT | Owners Manual - Page 32
30 GENERAL INFORMATION OFF ON Engine off. All electrical circuits off. Engine on. All electrical equipment can be used. without the motorcycle running for a long time (one hour), the battery may become totally discharged. Engine off. Taillight and P (Park) licence plate light on. All other - 2010 Kawasaki Vulcan 900 Classic LT | Owners Manual - Page 33
the position. engine stop switch to the Refer to the Starting the Engine section of the "How to Ride the Motorcycle" chapter for starting instructions. żAlthough NOTE the engine stop switch stops the engine, it does not turn off all the electrical circuits. Ordinarily, the ignition switch should - 2010 Kawasaki Vulcan 900 Classic LT | Owners Manual - Page 34
32 GENERAL INFORMATION Left Handlebar Switches Dimmer Switch: High or low beam can be selected with the dimmer switch. When the ), the headlight is on high beam ( high beam indicator light is lit. ) High beam...( ) Low beam...( Turn Signal Switch: When the turn signal switch is turned ) or right ( - 2010 Kawasaki Vulcan 900 Classic LT | Owners Manual - Page 35
GENERAL INFORMATION 33 Brake Lever Adjusters There is an adjuster on the brake lever. The adjuster has 5 positions so that the released lever position can be adjusted to suit the operator's hands. Push the lever forward and turn the adjuster to align the number with the arrow mark on the lever - 2010 Kawasaki Vulcan 900 Classic LT | Owners Manual - Page 36
34 GENERAL INFORMATION Fuel Tank Cap To open the fuel tank cap, insert the ignition key into the fuel tank cap and turn the key to the right. To close the cap, push it down into place with the key inserted. The key can be removed by turning it to the left to the original position. żThe fuel tank - 2010 Kawasaki Vulcan 900 Classic LT | Owners Manual - Page 37
GENERAL INFORMATION 35 Fuel Tank Avoid filling the tank in the rain or where heavy dust is blowing so that the fuel does not get contaminated. WARNING Gasoline is extremely flammable and can be explosive under certain conditions, creating the potential for serious burns. Turn the ignition switch " - 2010 Kawasaki Vulcan 900 Classic LT | Owners Manual - Page 38
regulation. Fuel Requirement: Fuel Type Use clean, fresh unleaded gasoline with a minimum Antiknock Index of 90. The Antiknock Index is posted on service station pumps. The octane rating of a gasoline is a measure of its resistance to detonation or "knocking". The Antiknock Index is an average - 2010 Kawasaki Vulcan 900 Classic LT | Owners Manual - Page 39
. Gasoline quality is important. Fuels of low quality or not meeting standard industry specifications may result in unsatisfactory performance. Operating problems that result from the use of poor quality or nonrecommended fuel may not be covered under your warranty. Fuels Containing Oxygenates - 2010 Kawasaki Vulcan 900 Classic LT | Owners Manual - Page 40
unleaded gasoline and methanol (wood alcohol) whenever possible, and never use "gasohol" containing more than 5% methanol. Fuel system damage and performance problems may result. Gasoline/Ether Blends - The most common ether is methyl tertiary butyl ether (MTBE). You may use gasoline containing up - 2010 Kawasaki Vulcan 900 Classic LT | Owners Manual - Page 41
"gasohol" in the fuel system. Before storage it is recommended that you drain all fuel from the fuel system. See the Storage section in this manual. Side Stand The motorcycle is equipped with a side stand. A. Side Stand żWhen using the side stand, turn the handlebar to the left. Whenever the side - 2010 Kawasaki Vulcan 900 Classic LT | Owners Manual - Page 42
40 GENERAL INFORMATION żThe NOTE Seat Seat Removal To remove the seat, insert the ignition key into the seat lock, and turn the key to the right. motorcycle is equipped with a side stand switch. This switch is designed so that the engine does not start if the transmission is in gear and the side - 2010 Kawasaki Vulcan 900 Classic LT | Owners Manual - Page 43
GENERAL INFORMATION 41 Seat Installation To install the seat, insert the projection of the front on the seat into the receptacle on the frame. • A. Hook B. Holder the front and rear ends of the • Pull seat to make sure they are securely A. Projection B. Receptacle locked. the hook of the - 2010 Kawasaki Vulcan 900 Classic LT | Owners Manual - Page 44
is located under the seat. The kit contains tools that can be helpful in making roadside repairs, adjustments, and some maintenance procedures explained in this manual. Keep the tool kit in this case. Remove the seat. Open the tool kit case cover by pulling the knob. Helmet-Hook Helmet can be - 2010 Kawasaki Vulcan 900 Classic LT | Owners Manual - Page 45
GENERAL INFORMATION 43 Windshield The windshield can be adjusted within 50 mm (1.9 in.) in height to suit the rider's preference. Loosen both the upper and lower bolts on each lower side of the windshield and move it up or down. After adjusting, tighten all the bolts securely. A. Helmet-Hook A. - 2010 Kawasaki Vulcan 900 Classic LT | Owners Manual - Page 46
44 GENERAL INFORMATION Special Warning on the Use of Saddlebags When preparing to ride this motorcycle, always check the saddlebags for secure mounting in their respective brackets. Be certain the saddlebags are securely bolted on their brackets by attempting to pull them from the brackets. Make - 2010 Kawasaki Vulcan 900 Classic LT | Owners Manual - Page 47
GENERAL INFORMATION 45 WARNING The sudden detachment or loss of a saddlebag could distract or alarm the motorcycle rider, and the consequent loss of attention to road and traffic conditions could cause loss of control and a serious accident. Also the sudden change of vehicle balance resulting from - 2010 Kawasaki Vulcan 900 Classic LT | Owners Manual - Page 48
46 GENERAL INFORMATION Saddlebags The saddlebags are provided at both sides of the rear wheel to carry baggage. To open/close the saddlebag: To open the saddlebag, grasp the lever of the buckle, and disconnect the buckle and then disattach the hook buttons. To close the saddlebag, connect the - 2010 Kawasaki Vulcan 900 Classic LT | Owners Manual - Page 49
GENERAL INFORMATION 47 To remove the saddlebag: Open the saddlebag and take off the bolts inside the saddlebag. WARNING Overloading the motorcycle with cargo and/or passengers, and/or not balancing the weight of items carried in each saddlebag may cause adverse handling, loss of control and an - 2010 Kawasaki Vulcan 900 Classic LT | Owners Manual - Page 50
48 GENERAL INFORMATION WARNING Also reduce speed according to road or weather condition, etc. Failure to adjust the speed to compensate for added weight and other conditions may result in a loss of control and subsequent accident. Steering Lock The motorcycle is equipped with the steering lock at - 2010 Kawasaki Vulcan 900 Classic LT | Owners Manual - Page 51
GENERAL INFORMATION 49 WARNING Attempting to ride with the steering locked could cause an accident. Unlock the steering before starting the engine. Electric Accessory Connectors The electric power of the battery can be used through the electric accessory connectors regardless of ignition switch - 2010 Kawasaki Vulcan 900 Classic LT | Owners Manual - Page 52
50 GENERAL INFORMATION NOTICE Always install a fuse of 10 A or less in the electrical accessory circuit. The vehicle has one fuse (10 A) to protect the entire electrical system. If this fuse fails, the engine will not run. Do not connect more than 70 W of total load to the vehicle's electrical - 2010 Kawasaki Vulcan 900 Classic LT | Owners Manual - Page 53
BREAK-IN 51 BREAK-IN The first 1 600 km (1 000 mi) that the motorcycle is ridden is designated as the break-in period. If the motorcycle is not used carefully during this period, you may very well end up with a "broken down" instead of a "broken in" motorcycle after a few thousand kilometers. The - 2010 Kawasaki Vulcan 900 Classic LT | Owners Manual - Page 54
acceleration, and hard cornering. In addition to the above, at 1 000 km (600 mi) it is extremely important that the owner has the initial maintenance service performed by a competent mechanic following the procedures in the Service Manual. - 2010 Kawasaki Vulcan 900 Classic LT | Owners Manual - Page 55
HOW TO RIDE THE MOTORCYCLE 53 HOW TO RIDE THE MOTORCYCLE Starting the Engine in the position. • Check that the engine stop switch is • Turn the ignition key to ON. A. Ignition Switch B. ON Position A. Engine Stop Switch B. Starter Button - 2010 Kawasaki Vulcan 900 Classic LT | Owners Manual - Page 56
54 HOW TO RIDE THE MOTORCYCLE sure the transmission is in neu• Make tral. back to "ON" before starting the engine. the throttle grip completely • Leaving closed, push the starter button. NOTICE Do not operate the starter continuously for more than 5 seconds, or the starter will overheat and the - 2010 Kawasaki Vulcan 900 Classic LT | Owners Manual - Page 57
HOW TO RIDE THE MOTORCYCLE 55 engine can be started if the clutch lever is pulled and the side stand is fully up. NOTICE Do not let the engine idle longer than five minutes, or engine overheating and damage may occur. A. Clutch Lever B. Starter Lockout Switch - 2010 Kawasaki Vulcan 900 Classic LT | Owners Manual - Page 58
56 HOW TO RIDE THE MOTORCYCLE Jump Starting If your motorcycle battery is "run down", it should be removed and charged. If this is not practical, a 12 volt booster battery and jumper cables may be used to start the engine. DANGER Battery acid generates hydrogen gas which is flammable and explosive - 2010 Kawasaki Vulcan 900 Classic LT | Owners Manual - Page 59
HOW TO RIDE THE MOTORCYCLE 57 the tool kit case by un• Remove screwing the helmet-hook mounting screws. a jumper cable from the • Connect positive (+) terminal of the booster battery to the positive (+) terminal of the motorcycle battery. A. Screw B. Tool Kit Case A. Motorcycle Battery Positive - 2010 Kawasaki Vulcan 900 Classic LT | Owners Manual - Page 60
58 HOW TO RIDE THE MOTORCYCLE another jumper cable from • Connect the negative (í) terminal of the booster battery to your motorcycle shift pedal or other unpainted metal surface. Do not use the negative (í) terminal of the battery. WARNING Batteries contain sulfuric acid that can cause burns and - 2010 Kawasaki Vulcan 900 Classic LT | Owners Manual - Page 61
. the engine has started, discon• After nect the jumper cables. Disconnect the negative (í) cable from the motorcycle first. Reinstall the parts removed. A. Seat Lock Cable B. Guide żAfter installing the tool kit case, run NOTE the seat lock cable and wires along the - 2010 Kawasaki Vulcan 900 Classic LT | Owners Manual - Page 62
very slowly. As the clutch starts to engage, open • the throttle a little more, giving the engine just enough fuel to keep it from stalling. A. Harness B. Guide A. Shift Pedal - 2010 Kawasaki Vulcan 900 Classic LT | Owners Manual - Page 63
HOW TO RIDE THE MOTORCYCLE 61 żThe NOTE Shifting Gears motorcycle is equipped with a side stand switch. This switch is designed so that the engine does not start if the transmission is in gear and the side stand is down. the throttle while pulling in the • Close clutch lever. into the next - 2010 Kawasaki Vulcan 900 Classic LT | Owners Manual - Page 64
62 HOW TO RIDE THE MOTORCYCLE the throttle part way, while re• Open leasing the clutch lever. żThe transmission is equipped with a NOTE positive neutral finder. When the motorcycle is standing still, the transmission cannot be shifted past neutral from 1st gear. To use the positive neutral - 2010 Kawasaki Vulcan 900 Classic LT | Owners Manual - Page 65
HOW TO RIDE THE MOTORCYCLE 63 Vehicle speed when shifting Shifting up 1st ĺ 2nd 2nd ĺ 3rd 3rd ĺ 4th 4th ĺ 5th km/h (mph) 20 (12) 30 (19) 40 (25) 50 (31) Shifting down 5th ĺ 4th 4th ĺ 3rd 3rd ĺ 2nd 2nd ĺ 1st km/h (mph) 40 (25) 30 (19) 20 (12) 15 (9) Braking • • • Close the throttle completely, - 2010 Kawasaki Vulcan 900 Classic LT | Owners Manual - Page 66
64 HOW TO RIDE THE MOTORCYCLE A. Front Brake Lever A. Rear Brake Pedal - 2010 Kawasaki Vulcan 900 Classic LT | Owners Manual - Page 67
. Shift the transmission into neutral. Turn the ignition key to "OFF". Support the motorcycle on a firm, level surface with the side stand. Lock Two of the most common causes of throttle failure are: 1. An improperly serviced or clogged air cleaner may allow dirt and dust to enter the throttle body - 2010 Kawasaki Vulcan 900 Classic LT | Owners Manual - Page 68
switch after stopping the motorcycle. Parking the transmission into neutral • Shift and turn the ignition key to "OFF". the motorcycle on a firm, • Support level surface with the side stand. NOTICE Do not park on a soft or steeply inclined surface, or the motorcycle may fall over. parking inside - 2010 Kawasaki Vulcan 900 Classic LT | Owners Manual - Page 69
HOW TO RIDE THE MOTORCYCLE 67 WARNING The muffler and exhaust pipe are very hot while the engine is running and just after the engine stops. This can ignite a fire, resulting in property damage or severe personal injury. Do not idle or park your vehicle in an area where flammable materials such as - 2010 Kawasaki Vulcan 900 Classic LT | Owners Manual - Page 70
68 HOW TO RIDE THE MOTORCYCLE the • Lock theft. steering to help prevent Catalytic Converter This motorcycle is equipped with a catalytic converter in the exhaust system. Platinum and Rhodium in the converter react with carbon monoxide and hydrocarbons to convert them into carbon dioxide and - 2010 Kawasaki Vulcan 900 Classic LT | Owners Manual - Page 71
HOW TO RIDE THE MOTORCYCLE 69 WARNING The muffler and exhaust pipe are very hot while the engine is running and just after the engine stops. This can ignite a fire, resulting in property damage or severe personal injury. Do not idle or park your vehicle in an area where flammable materials such as - 2010 Kawasaki Vulcan 900 Classic LT | Owners Manual - Page 72
70 SAFE OPERATION SAFE OPERATION Safe Riding Technique The points given below are applicable for everyday motorcycle use and should be carefully observed for safe and effective vehicle operation. For safety, eye protection and a helmet are strongly recommended. Gloves and suitable footwear should - 2010 Kawasaki Vulcan 900 Classic LT | Owners Manual - Page 73
SAFE OPERATION 71 of control, especially when riding in wet conditions or on loose roadway surfaces, when the ability to maneuver will be reduced. When going up steep slopes, shift to a lower gear so that there is plenty of power to spare rather than overloading the engine. When applying the brakes - 2010 Kawasaki Vulcan 900 Classic LT | Owners Manual - Page 74
72 SAFE OPERATION Do not downshift at too high an r/min (rpm) to avoid damage to the engine from overrevving. Avoiding unnecessary weaving is important to the safety of both the rider and other motorists. - 2010 Kawasaki Vulcan 900 Classic LT | Owners Manual - Page 75
SAFE OPERATION 73 Daily Safety Checks Check the following items each day before you ride. The time required is minimal, and habitual performance of these checks will help ensure you a safe, reliable ride. If any irregularities are found during these checks, refer to the Maintenance and Adjustment - 2010 Kawasaki Vulcan 900 Classic LT | Owners Manual - Page 76
74 SAFE OPERATION Front Rear Up to 180 kg (397 lb) 200 kPa (2.00 kgf/cm², 28 psi) Load Up to 97.5 kg (215 lb) 200 kPa (2.00 kgf/cm², 28 psi) Load 97.5 ∼ 180 kg (215 ∼ 397 lb) Load 225 kPa (2.25 kgf/cm², 32 psi) Install the air valve cap. Nuts, bolts, fasteners .. Check that steering and suspension - 2010 Kawasaki Vulcan 900 Classic LT | Owners Manual - Page 77
SAFE OPERATION 75 Side stand ...Returns to its fully up position by spring tension. Return spring not weak or not damaged. Refer to the "Daily Safety Checks" caution label attached to the back of seat. - 2010 Kawasaki Vulcan 900 Classic LT | Owners Manual - Page 78
76 SAFE OPERATION Additional Considerations for High Speed Operation WARNING Handling characteristics of a motorcycle at high speeds may vary from those you are familiar with at legal highway speeds. Do not attempt high speed operation unless you have received sufficient training and have the - 2010 Kawasaki Vulcan 900 Classic LT | Owners Manual - Page 79
SAFE OPERATION 77 Coolant:To avoid overheating, check that the coolant level is at the upper level line. Electrical Equipment: Make sure that the headlight, tail/brake light, turn signals, horn, etc., all work properly. Miscellaneous: Make sure that all nuts and bolts are tight and that all safety - 2010 Kawasaki Vulcan 900 Classic LT | Owners Manual - Page 80
78 MAINTENANCE AND ADJUSTMENT MAINTENANCE AND ADJUSTMENT The maintenance and adjustments outlined in this chapter must be carried out and must be done in accordance with the Periodic Maintenance Chart to keep the motorcycle in good running condition. The initial maintenance is vitally important and - 2010 Kawasaki Vulcan 900 Classic LT | Owners Manual - Page 81
MAINTENANCE AND ADJUSTMENT 79 EMISSION CONTROL INFORMATION To protect the environment in which we all live, Kawasaki has incorporated crankcase emission (1) and exhaust emission (2) control systems in compliance with applicable regulations of the United States Environmental Protection Agency and - 2010 Kawasaki Vulcan 900 Classic LT | Owners Manual - Page 82
that your motorcycle will continue to have low emission levels. This Owner's Manual contains those maintenance recommendations for your motorcycle. Those items identified by the that the recommended maintenance is carried out according to the instructions in this Owner's Manual at your own expense. - 2010 Kawasaki Vulcan 900 Classic LT | Owners Manual - Page 83
maintenance record for your motorcycle. To assist you in keeping this record, we have provided space on pages 160 through 165 of this manual where an authorized Kawasaki dealer, or someone equally competent, can record the maintenance. You should also retain copies of maintenance work orders, bills - 2010 Kawasaki Vulcan 900 Classic LT | Owners Manual - Page 84
82 MAINTENANCE AND ADJUSTMENT TAMPERING WITH NOISE CONTROL SYSTEM PROHIBITED: Federal law prohibits the following acts or the causing thereof: (1) the removal or rendering inoperative by any person other than for purposes of maintenance, repair, or replacement, of any device or element of design - 2010 Kawasaki Vulcan 900 Classic LT | Owners Manual - Page 85
MAINTENANCE AND ADJUSTMENT 83 Periodic Maintenance Chart 1. Periodic Inspection (Engine Related Items) Frequency Whichever comes first *Odometer Reading km × 1 000 (mile × 1 000) See Page Operation (Engine Items) Valve clearance inspect Throttle control system (play, smooth return, no drag) - 2010 Kawasaki Vulcan 900 Classic LT | Owners Manual - Page 86
84 MAINTENANCE AND ADJUSTMENT Frequency Whichever comes first *Odometer Reading km × 1 000 (mile × 1 000) See Page Operation (Engine Items) Fuel hoses K installation condition - inspect Coolant level - inspect Coolant leak - inspect Radiator hose damage - inspect Radiator hoses installation - 2010 Kawasaki Vulcan 900 Classic LT | Owners Manual - Page 87
MAINTENANCE AND ADJUSTMENT 85 Frequency Whichever comes first *Odometer Reading km × 1 000 (mile × 1 000) See Page Operation (Engine Items) Air suction system damage - inspect Evaporative emission control system function (California model only) Every 1 6 12 18 24 30 36 (0.6) (3.75) (7.5) (11. - 2010 Kawasaki Vulcan 900 Classic LT | Owners Manual - Page 88
86 MAINTENANCE AND ADJUSTMENT 2. Periodic Inspection (Chassis Related Items) Frequency Whichever comes first *Odometer Reading km × 1 000 (mile × 1 000) See Page Operation (Chassis Items) Clutch and drive train: Clutch operation (play, engagement, disengagement) inspect K K Drive belt deflection - 2010 Kawasaki Vulcan 900 Classic LT | Owners Manual - Page 89
MAINTENANCE AND ADJUSTMENT 87 Frequency Whichever comes first *Odometer Reading km × 1 000 (mile × 1 000) See Page Operation (Chassis Items) Wheels/tires damage - inspect Tire tread wear, abnormal wear inspect K Wheel bearings damage - inspect Spoke tightness and rim runout - inspect Brake - 2010 Kawasaki Vulcan 900 Classic LT | Owners Manual - Page 90
88 MAINTENANCE AND ADJUSTMENT Frequency Whichever comes first *Odometer Reading km × 1 000 (mile × 1 000) See Page Operation (Chassis Items) Brake pad wear inspect # K Brake hose installation condition - inspect Brake fluid level inspect Brake operation (effectiveness, play, drag) - inspect Brake - 2010 Kawasaki Vulcan 900 Classic LT | Owners Manual - Page 91
MAINTENANCE AND ADJUSTMENT 89 Frequency Whichever comes first *Odometer Reading km × 1 000 (mile × 1 000) See Page Operation (Chassis Items) Suspensions: Front forks/rear shock absorber operation K (damping and smooth stroke) - inspect Front forks/rear shock K absorber oil leak inspect K K K - 2010 Kawasaki Vulcan 900 Classic LT | Owners Manual - Page 92
90 MAINTENANCE AND ADJUSTMENT Frequency Whichever comes first *Odometer Reading km × 1 000 (mile × 1 000) See Page Operation (Chassis Items) K K Uni-trak rocker arm bearings - lubricate Uni-trak tie rods bearings - lubricate Every 1 6 12 18 24 30 36 (0.6) (3.75) (7.5) (11.25) (15) (18.75) (22 - 2010 Kawasaki Vulcan 900 Classic LT | Owners Manual - Page 93
MAINTENANCE AND ADJUSTMENT 91 Frequency Whichever comes first *Odometer Reading km × 1 000 (mile × 1 000) See Page Operation (Chassis Items) Side stand switch operation - inspect Engine stop switch operation - inspect Chassis: Chassis parts lubricate Bolts and nuts tightness - inspect Every - 2010 Kawasaki Vulcan 900 Classic LT | Owners Manual - Page 94
92 MAINTENANCE AND ADJUSTMENT 3. Periodic Replacement Frequency Whichever comes first 1 (0.6) *Odometer Reading km × 1 000 (mile × 1 000) See Page 12 (7.5) 24 (15) 36 (22.5) 48 (30) 111 Operation (Chassis Items) K Air cleaner element # - replace Engine oil # - change K Oil filter - replace K Fuel - 2010 Kawasaki Vulcan 900 Classic LT | Owners Manual - Page 95
(22.5) 48 (30) Operation (Chassis Items) K Rubber parts of master cylinder and caliper - replace Every 4 years K Spark plug - replace • • • • • - 107 K : Should be serviced by an authorized Kawasaki dealer. * : For higher odometer readings, repeat at the frequency interval established here - 2010 Kawasaki Vulcan 900 Classic LT | Owners Manual - Page 96
seizure, accident, and injury. Check the oil level before each ride and change the oil according to the periodic maintenance chart in the owner's manual. • drain down. Check the engine oil level through the oil level gauge. With the motorcycle held level, the oil level should come up between - 2010 Kawasaki Vulcan 900 Classic LT | Owners Manual - Page 97
MAINTENANCE AND ADJUSTMENT 95 NOTICE If the engine oil gets extremely low or if the oil pump does not function properly or oil passages are clogged, the warning light in the speedometer will light. If this light stays on when the engine speed is above the idle speed, stop the engine immediately and - 2010 Kawasaki Vulcan 900 Classic LT | Owners Manual - Page 98
96 MAINTENANCE AND ADJUSTMENT Oil and/or Oil Filter Change Warm up the engine thoroughly, and then stop it. Place an oil pan beneath the engine. Remove the engine oil drain plug. • • • WARNING Motor oil is a toxic substance. Dispose of used oil properly. Contact your local authorities for - 2010 Kawasaki Vulcan 900 Classic LT | Owners Manual - Page 99
MAINTENANCE AND ADJUSTMENT 97 • Remove the regulator/rectifire bolt. • Remove the bracket. A. Regulator/Rectifire B. Bolt A. Bracket B. Bolt the oil filter cartridge and re• Remove place it with a new one. - 2010 Kawasaki Vulcan 900 Classic LT | Owners Manual - Page 100
98 MAINTENANCE AND ADJUSTMENT żIf NOTE a torque wrench or required Kawasaki special tool is not available, this item should be serviced by a Kawasaki dealer. A. Packing the engine oil drain plug with • Install a new gasket and tighten it to the specified torque. A. Cartridge a thin film of oil - 2010 Kawasaki Vulcan 900 Classic LT | Owners Manual - Page 101
MAINTENANCE AND ADJUSTMENT 99 the oil level and for oil leak• Check age. • Be sure to install the parts removed. Tightening Torque Engine Drain Plug: 20 N·m (2.0 kgf·m, 14.5 ft·lb) Cartridge: 18 N·m (1.8 kgf·m, 13 ft·lb) Regulator/Rectifire Bolts: 6.9 N·m (0.7 kgf·m, 61 in·lb) Recommended Engine - 2010 Kawasaki Vulcan 900 Classic LT | Owners Manual - Page 102
100 MAINTENANCE AND ADJUSTMENT Cooling System Radiator and Cooling Fin Check the radiator fins for obstruction by insects or mud. Clean off any obstructions with a stream of low-pressure water. WARNING NOTE Keep your hands and clothing away from the fan blades at all times. żDo not add any - 2010 Kawasaki Vulcan 900 Classic LT | Owners Manual - Page 103
MAINTENANCE AND ADJUSTMENT 101 NOTICE Using high-pressure water, as from a car wash facility, could damage the radiator fins and impair the radiator's effectiveness. Do not obstruct or deflect airflow through the radiator by installing unauthorized accessories in front of the radiator or behind the - 2010 Kawasaki Vulcan 900 Classic LT | Owners Manual - Page 104
102 MAINTENANCE AND ADJUSTMENT a period of time, the cooling system accumulates rust and scale in the water jacket and radiator. This will clog up the coolant passages, and considerably reduce the efficiency of the cooling system. NOTICE If hard water is used in the system, it causes scale - 2010 Kawasaki Vulcan 900 Classic LT | Owners Manual - Page 105
anti-rust properties. When it is diluted excessively, it loses its anti-corrosion property. Dilute a permanent type of antifreeze in accordance with the instructions of the manufacturer. the coolant level through the • Check coolant level gauge. The coolant level should be between the F (Full) and - 2010 Kawasaki Vulcan 900 Classic LT | Owners Manual - Page 106
104 MAINTENANCE AND ADJUSTMENT the amount of coolant is insuffi• If cient, add coolant. • Remove the reservoir tank cover. • • Coolant Filling Remove the seat. Remove the left side cover by removing the screw. A. Reservoir Tank Cover B. Bolt A. Screw B. Tool Kit Case - 2010 Kawasaki Vulcan 900 Classic LT | Owners Manual - Page 107
MAINTENANCE AND ADJUSTMENT 105 the cap from the reservoir • Open tank, and add coolant through the filler opening to the F (Full) mark. żWhen installing the left side cover, be NOTE sure to insert the projections of the left side cover to each holes. A. Reserve Tank B. Reserve Tank Cap the cap - 2010 Kawasaki Vulcan 900 Classic LT | Owners Manual - Page 108
106 MAINTENANCE AND ADJUSTMENT correct mixture ratio by the addition of antifreeze concentrate as soon as possible. Drive Belt In order for the belt and belt pulleys to function properly, check the drive belt in accordance with the Periodic Maintenance Chart. Belt check and adjustment should be - 2010 Kawasaki Vulcan 900 Classic LT | Owners Manual - Page 109
be replaced in accordance with the Periodic Maintenance Chart. Spark plug removal should be done by a competent mechanic following the instructions in the Service Manual. Spark Plug Standard Plug Plug Gap Tightening Torque NGK CPR7EA-9 0.8 ∼ 0.9 mm (0.032 ∼ 0.036 in.) 18 N·m (1.8 kgf·m, 13 ft·lb - 2010 Kawasaki Vulcan 900 Classic LT | Owners Manual - Page 110
108 MAINTENANCE AND ADJUSTMENT Evaporative Emission Control System (California model only) This system routes fuel vapors from the fuel system into the running engine or stores the vapors in a canister when the engine is stopped. Although no adjustments are required, a thorough visual inspection - 2010 Kawasaki Vulcan 900 Classic LT | Owners Manual - Page 111
each valve should be checked and adjusted in accordance with the Periodic Maintenance Chart. Inspection and adjustment should be done by a competent mechanic following the instructions in the Service Manual. - 2010 Kawasaki Vulcan 900 Classic LT | Owners Manual - Page 112
, engine power is greatly reduced, or there are abnormal engine noise. Air suction valve removal and inspection should be done by a competent mechanic following the instructions in the Service Manual. - 2010 Kawasaki Vulcan 900 Classic LT | Owners Manual - Page 113
element consists of a wet paper filter, which can not be cleaned. In dusty, rainy, or on muddy conditions, the air cleaner element should be serviced more frequently than the recommended interval. Element Removal Remove the bolts of the air cleaner cover located on the right-side of the engine - 2010 Kawasaki Vulcan 900 Classic LT | Owners Manual - Page 114
112 MAINTENANCE AND ADJUSTMENT the air cleaner screw and • Remove the air cleaner. If any part of the element is damaged, the element must be replaced. WARNING If dirt or dust is allowed to pass through into the fuel injection system, the throttle may stick or become inoperable resulting in a - 2010 Kawasaki Vulcan 900 Classic LT | Owners Manual - Page 115
MAINTENANCE AND ADJUSTMENT 113 Throttle Control System Check the throttle grip play, in accordance with the Periodic Maintenance Chart, and adjust the throttle grip play. Throttle Grip The throttle grip controls the butterfly valves in the throttle body. If the throttle grip has excessive play due - 2010 Kawasaki Vulcan 900 Classic LT | Owners Manual - Page 116
upper ends of the throttle cables, further adjustment of the throttle cables should be done by a competent mechanic following the instructions in the Service Manual. WARNING Operation with an improperly adjusted, incorrectly routed, or damaged cables could result in an unsafe riding condition. Be - 2010 Kawasaki Vulcan 900 Classic LT | Owners Manual - Page 117
MAINTENANCE AND ADJUSTMENT 115 Idle Speed The idle adjustment should be performed in accordance with the Periodic Maintenance Chart or whenever the idle speed is disturbed. Adjustment Start the engine, and warm it up thoroughly. Wait until the idle speed drops before making the following - 2010 Kawasaki Vulcan 900 Classic LT | Owners Manual - Page 118
116 MAINTENANCE AND ADJUSTMENT and close the throttle a few • Open times to make sure that the idle Clutch Due to friction plate wear and clutch cable stretch over a long period of use, the clutch must be adjusted in accordance with the Periodic Maintenance Chart. • speed does not change. - 2010 Kawasaki Vulcan 900 Classic LT | Owners Manual - Page 119
MAINTENANCE AND ADJUSTMENT 117 Inspection Check that the clutch lever has 2 ∼ 3 mm (0.08 ∼ 0.12 in.) of play as shown in the figure. • Adjustment Turn the adjuster so that the clutch lever will have 2 ∼ 3 mm (0.08 ∼ 0.12 in.) of play. • WARNING Too much cable play can prevent clutch - 2010 Kawasaki Vulcan 900 Classic LT | Owners Manual - Page 120
118 MAINTENANCE AND ADJUSTMENT it cannot be done, use the nuts at • If the middle of the clutch cable. does not slip and that it releases properly. żFor minor corrections, use the adjuster at the clutch lever. A. Locknut B. Clutch Cable żAfter the adjustment is made, start the engine and check - 2010 Kawasaki Vulcan 900 Classic LT | Owners Manual - Page 121
MAINTENANCE AND ADJUSTMENT 119 Brakes Brake Wear Inspection Inspect the brakes for wear. For each front and rear disc brake caliper, if the thickness of either pad is less than 1 mm (0.04 in), replace both pads in the caliper as a set. Pad replacement should be done by an authorized Kawasaki dealer - 2010 Kawasaki Vulcan 900 Classic LT | Owners Manual - Page 122
120 MAINTENANCE AND ADJUSTMENT Fluid Level Inspection The brake fluid level in the front brake fluid reservoir must be kept above the line (lower level line) next to the gauge and that in the rear brake fluid reservoir (located near the brake pedal) must be kept between the upper and lower level - 2010 Kawasaki Vulcan 900 Classic LT | Owners Manual - Page 123
MAINTENANCE AND ADJUSTMENT 121 the fluid level in either reservoir is • If lower than the lower level line, check for fluid leaks in the brake lines, and fill the reservoir to the upper level line. Inside the front brake fluid reservoir is a stepped line showing the upper level line. For the rear - 2010 Kawasaki Vulcan 900 Classic LT | Owners Manual - Page 124
122 MAINTENANCE AND ADJUSTMENT Fluid Change Have the brake fluid changed by an authorized Kawasaki dealer. Front and Rear Brakes Disc and disc pad wear is automatically compensated for and has no effect on the brake lever or pedal action. So there are no parts that require adjustment on the front - 2010 Kawasaki Vulcan 900 Classic LT | Owners Manual - Page 125
MAINTENANCE AND ADJUSTMENT 123 Brake Light Switches When either the front or rear brake is applied, the brake light goes on. The front brake light switch requires no adjustment, but the rear brake light switch should be adjusted in accordance with the Periodic Maintenance Chart. Inspection Turn the - 2010 Kawasaki Vulcan 900 Classic LT | Owners Manual - Page 126
124 MAINTENANCE AND ADJUSTMENT Adjustment To adjust the rear brake light switch, move the switch up or down by turning the adjusting nut. • NOTICE To avoid damaging the electrical connections inside the switch, be sure that the switch body does not turn during adjustment. A. B. C. D. Rear Brake - 2010 Kawasaki Vulcan 900 Classic LT | Owners Manual - Page 127
MAINTENANCE AND ADJUSTMENT 125 Rear Shock Absorber The rear shock absorber can be adjusted by changing the spring preload for various riding and loading conditions. Spring Preload Adjustment The rear shock absorber spring preload adjuster has 7 positions. Remove the left side cover and reservoir - 2010 Kawasaki Vulcan 900 Classic LT | Owners Manual - Page 128
126 MAINTENANCE AND ADJUSTMENT żWhen NOTE removing the reservoir tank, hook the under part of the reservoir tank to the holder of the frame as shown in the figure. A. Spring Preload Adjuster B. Wrench Position Spring Action A. Under Part of Reservoir Tank B. Holder 1 2 3 4 5 6 7 - 2010 Kawasaki Vulcan 900 Classic LT | Owners Manual - Page 129
MAINTENANCE AND ADJUSTMENT 127 żThis NOTE Wheels Tires Payload and Tire Pressure Failure to maintain proper inflation pressures or observe payload limits for your tires may adversely affect handling and performance of your motorcycle and can result in loss of control. The maximum recommended load - 2010 Kawasaki Vulcan 900 Classic LT | Owners Manual - Page 130
128 MAINTENANCE AND ADJUSTMENT the air valve cap. • Remove Check the pressure often, using • an accuratetire gauge. sure that the air valve cap is • Make securely installed. żMeasure the tire pressure when the NOTE tires are cold (that is, when the motorcycle has not been ridden more than a mile - 2010 Kawasaki Vulcan 900 Classic LT | Owners Manual - Page 131
MAINTENANCE AND ADJUSTMENT 129 Tire Wear, Damage As the tire tread wears down, the tire becomes more susceptible to puncture and failure. An accepted estimate is that 90% of all tire failures occur during the last 10% of tread life (90% worn). So it is false economy and unsafe to use the tires - 2010 Kawasaki Vulcan 900 Classic LT | Owners Manual - Page 132
130 MAINTENANCE AND ADJUSTMENT Minimum Tread Depth Front Rear Under 130 km/h (80 mph) Over 130 km/h (80 mph) WARNING 1 mm (0.04 in.) 2 mm (0.08 in.) 3 mm (0.12 in.) inspect the tire for cracks • Visually and cuts, replacing the tire in case of bad damage. Swelling or high spots indicate internal - 2010 Kawasaki Vulcan 900 Classic LT | Owners Manual - Page 133
MAINTENANCE AND ADJUSTMENT 131 żMost counters may have their own regulations requiring a minimum tire thread depth; be sure to follow them. 130/90-16 M/C 67H • DUNLOP "D404FP" 180/70-15 M/C 76H • DUNLOP "D404" WARNING New tires are slippery and may cause loss of control and injury. A break-in - 2010 Kawasaki Vulcan 900 Classic LT | Owners Manual - Page 134
sealed type, and the sealing strip should not be removed at any time after the specified electrolyte has been installed in the battery for initial service. It is not necessary to check the battery electrolyte level or add distilled water. However, in order to maximize battery life and ensure that it - 2010 Kawasaki Vulcan 900 Classic LT | Owners Manual - Page 135
MAINTENANCE AND ADJUSTMENT 133 Self-discharge Approx. Number of Days From 100% Charged to 100% discharged Lead -Antimony Battery 40°C (104°F) 25°C (77°F) 0°C (32°F) 100 Days 200 Days 550 Days Lead -Calcium Battery 300 Days 600 Days 950 Days Current Drain Days from DisDays from 100% 100 % charging - 2010 Kawasaki Vulcan 900 Classic LT | Owners Manual - Page 136
134 MAINTENANCE AND ADJUSTMENT Battery Sulfation A common cause of battery failure is sulfation. Sulfation occurs when the battery is left in a discharged condition for an extended time. Sulfate is a normal by product of the chemical reactions within a battery. But when continuous discharge allows - 2010 Kawasaki Vulcan 900 Classic LT | Owners Manual - Page 137
to reinstall the battery in the motorcycle (see Battery Installation). żIf NOTE you charge the sealed battery, never fail to observe the instructions shown on the label on the battery. • WARNING Lead is a toxic substance. Battery posts, terminals and related accessories contain lead and lead - 2010 Kawasaki Vulcan 900 Classic LT | Owners Manual - Page 138
136 MAINTENANCE AND ADJUSTMENT Battery Removal Remove the seat and tool kit case (see "Jump Starting" section in the " How to Ride the Motorcycle" chapter). Disconnect the wires from the battery, first from the (í) terminal and then the (+) terminal. • • the battery using a solution of • Clean - 2010 Kawasaki Vulcan 900 Classic LT | Owners Manual - Page 139
or wires should be routed as shown in the figure. żAfter installing the tool kit case, run the seat lock cable or wire along the guide. A. B. C. D. Seat Lock Cable Guide Hose Wires - 2010 Kawasaki Vulcan 900 Classic LT | Owners Manual - Page 140
138 MAINTENANCE AND ADJUSTMENT Headlight Beam Horizontal Adjustment The headlight beam is adjustable horizontally. If not properly adjusted horizontally, the beam will point to one side rather than straight ahead. Turn the horizontal adjusting screw on the headlight rim in or out until the beam - 2010 Kawasaki Vulcan 900 Classic LT | Owners Manual - Page 141
MAINTENANCE AND ADJUSTMENT 139 Fuses The fuses are arranged in the fuse box located behind left side cover. The main fuse is mounted on the starter relay behind right side cover. If a fuse fails during operation, inspect the electrical system to determine the cause, and then replace it with a new - 2010 Kawasaki Vulcan 900 Classic LT | Owners Manual - Page 142
140 MAINTENANCE AND ADJUSTMENT the seat. • Remove Remove left side cover (see • "Cooling the System" section in this chapter). • Remove the screw A. Screw A. Fuse Box B. Spare Fuse - 2010 Kawasaki Vulcan 900 Classic LT | Owners Manual - Page 143
MAINTENANCE AND ADJUSTMENT 141 out the right side cover and then • Pull inspect the main fuse. installing the right side cover, • When be sure to insert the projections of the right side cover. A. Main Fuse A. Projections B. Right Side Cover - 2010 Kawasaki Vulcan 900 Classic LT | Owners Manual - Page 144
142 MAINTENANCE AND ADJUSTMENT WARNING Substituting fuses can cause wiring to overheat, catch fire and/or fail. Do not use any substitute for the standard fuse. Replace the blown fuse with a new one of the correct capacity, as specified on the junction box and main fuse. A. Normal B. Failed - 2010 Kawasaki Vulcan 900 Classic LT | Owners Manual - Page 145
MAINTENANCE AND ADJUSTMENT 143 General Lubrication Lubricate the points shown below, with either motor oil or regular grease, in accordance with the Periodic Maintenance Chart or whenever the vehicle has been operated under wet or rainy conditions. Before lubricating each part, clean off any rusty - 2010 Kawasaki Vulcan 900 Classic LT | Owners Manual - Page 146
144 MAINTENANCE AND ADJUSTMENT ż(K) Throttle Inner Cable Upper Ends (K): Should be serviced by an authorized Kawasaki dealer. Cleaning Your Motorcycle General Precautions Frequent and proper care of your Kawasaki motorcycle will enhance its appearance, optimize overall performance, - 2010 Kawasaki Vulcan 900 Classic LT | Owners Manual - Page 147
MAINTENANCE AND ADJUSTMENT 145 brake fluid, and coolant • Gasoline, will damage the finish of painted and plastic surfaces: wash them off immediately. Avoid wire brushes, steel wool, and all other abrasive pads or brushes. Use care when washing the windshield, the headlight cover, and the - 2010 Kawasaki Vulcan 900 Classic LT | Owners Manual - Page 148
146 MAINTENANCE AND ADJUSTMENT • • A. Not position B. Correct position Washing Your Motorcycle Rinse your bike with cold water from a garden hose to remove any loose dirt. Mix a mild neutral detergent (designed for motorcycles or automobiles) and water in bucket. Use a soft cloth or sponge to wash - 2010 Kawasaki Vulcan 900 Classic LT | Owners Manual - Page 149
three months or as conditions require. Avoid surfaces with "satin" or "flat" finishes. Always use nonabrasive products and apply them according to the instructions on the container. Windshield and Other Plastic Parts After washing use a soft cloth to gently dry plastic parts. When dry, treat the - 2010 Kawasaki Vulcan 900 Classic LT | Owners Manual - Page 150
148 MAINTENANCE AND ADJUSTMENT NOTICE Plastic parts may deteriorate and break if they come in contact with chemical substances or household cleaning products such as gasoline, brake fluid, window cleaners, thread-locking agents, or other harsh chemicals. If a plastic part comes in contact with any - 2010 Kawasaki Vulcan 900 Classic LT | Owners Manual - Page 151
MAINTENANCE AND ADJUSTMENT 149 Vinyl parts should be washed with the rest of the motorcycle, then treated with a vinyl treatment. The sidewalls of tires and other rubber components should be treated with a rubber protectant to help prolong their useful life. WARNING Rubber protectants can be - 2010 Kawasaki Vulcan 900 Classic LT | Owners Manual - Page 152
150 MAINTENANCE AND ADJUSTMENT Bolt and Nut Tightening In accordance with the Periodic Maintenance Chart, it is very important to check the tightness of the bolts and nuts listed here. Also, check to see that each cotter pin is in place and in good condition. Please ask your authorized Kawasaki - 2010 Kawasaki Vulcan 900 Classic LT | Owners Manual - Page 153
MAINTENANCE AND ADJUSTMENT 151 14. Muffler Mounting Bolts 15. Brake Lever Holder Clamp Bolts 16. Pivot Shaft Bolt 17. Brake Pedal Mounting Bolts 18. Rear Shock Absorber Mounting Nuts - 2010 Kawasaki Vulcan 900 Classic LT | Owners Manual - Page 154
152 STORAGE STORAGE Preparation for Storage: Clean the entire vehicle thoroughly. Run the engine for about five minutes to warm the oil, shut it off and drain the engine oil. • • WARNING Motor oil is a toxic substance. Dispose of used oil properly. Contact your local authorities for approved - 2010 Kawasaki Vulcan 900 Classic LT | Owners Manual - Page 155
STORAGE 153 the fuel system by running the engine at idle speed until all fuel in the fuel • Empty system is used up (If left in for a long time, the fuel will break down and clog the fuel system). WARNING An air/oil mist may be forcibly ejected from the spark plug holes and could get into your - 2010 Kawasaki Vulcan 900 Classic LT | Owners Manual - Page 156
154 STORAGE plastic bags over the mufflers to prevent moisture from entering. • Tie Put • a cover over the motorcycle to keep dust and dirt from collecting on it. Preparation after Storage: Remove the plastic bags from the mufflers. Install the battery in the motorcycle and charge the battery - 2010 Kawasaki Vulcan 900 Classic LT | Owners Manual - Page 157
TROUBLESHOOTING GUIDE 155 TROUBLESHOOTING GUIDE Engine Does Not Start: Starter Motor Won't Turn Engine stop switch off Transmission not in neutral Fuse blown Battery leads do not make good electrical - 2010 Kawasaki Vulcan 900 Classic LT | Owners Manual - Page 158
dealer and to Kawasaki Motors Corp., U.S.A. If you have a problem concerning warranty or service, please take the following action: Contact the owner and/or service manager of your authorized Kawasaki dealer. Fully explain your problem and ask for assistance in resolving the situation. The OWNER of - 2010 Kawasaki Vulcan 900 Classic LT | Owners Manual - Page 159
receipt of your correspondence we will contact the dealership and work with them in resolving your problem. In order to provide a permanent record, all warranty and service resolutions take place only through WRITTEN correspondence. Please send your correspondence to:. CONSUMER RELATIONS KAWASAKI - 2010 Kawasaki Vulcan 900 Classic LT | Owners Manual - Page 160
that a safety defect exists in a group of vehicles, it may order a recall and remedy campaign. However, NHTSA cannot become involved in individual problems between you, your dealer, or Kawasaki Motors Corporation, U.S.A. To contact NHTSA, you may either call the Auto Safety Hotline toll-free at - 2010 Kawasaki Vulcan 900 Classic LT | Owners Manual - Page 161
ENVIRONMENTAL PROTECTION 159 ENVIRONMENTAL PROTECTION To protect our environment, properly discard used batteries, tires, engine oil, or other vehicle components that you might dispose of in the future. Consult your authorized Kawasaki dealer or local environmental waste agency for their proper - 2010 Kawasaki Vulcan 900 Classic LT | Owners Manual - Page 162
160 MAINTENANCE RECORD MAINTENANCE RECORD Owner Name...Address ...Phone Number ...Engine Number ...Vehicle Number...Selling Dealer Name ...Phone Number ...Warranty Start Date ...Note: Keep this information and a spare key in a secure location. Date Odometer Reading Maintenance Performed Dealer Name - 2010 Kawasaki Vulcan 900 Classic LT | Owners Manual - Page 163
MAINTENANCE RECORD 161 Date Odometer Reading Maintenance Performed Dealer Name Dealer Address - 2010 Kawasaki Vulcan 900 Classic LT | Owners Manual - Page 164
162 MAINTENANCE RECORD Date Odometer Reading Maintenance Performed Dealer Name Dealer Address - 2010 Kawasaki Vulcan 900 Classic LT | Owners Manual - Page 165
MAINTENANCE RECORD 163 Date Odometer Reading Maintenance Performed Dealer Name Dealer Address - 2010 Kawasaki Vulcan 900 Classic LT | Owners Manual - Page 166
164 MAINTENANCE RECORD Date Odometer Reading Maintenance Performed Dealer Name Dealer Address - 2010 Kawasaki Vulcan 900 Classic LT | Owners Manual - Page 167
MAINTENANCE RECORD 165 Date Odometer Reading Maintenance Performed Dealer Name Dealer Address - 2010 Kawasaki Vulcan 900 Classic LT | Owners Manual - Page 168
166 LABEL INFORMATION LABEL INFORMATION (1) - 2010 Kawasaki Vulcan 900 Classic LT | Owners Manual - Page 169
LABEL INFORMATION 167 (2) only on California model (3)/(4) - 2010 Kawasaki Vulcan 900 Classic LT | Owners Manual - Page 170
168 LABEL INFORMATION (5) only on California model - 2010 Kawasaki Vulcan 900 Classic LT | Owners Manual - Page 171
LABEL INFORMATION 169 (6) - 2010 Kawasaki Vulcan 900 Classic LT | Owners Manual - Page 172
170 LABEL INFORMATION (7) - 2010 Kawasaki Vulcan 900 Classic LT | Owners Manual - Page 173
LABEL INFORMATION 171 (8) - 2010 Kawasaki Vulcan 900 Classic LT | Owners Manual - Page 174
172 LABEL INFORMATION (8) only on California model - 2010 Kawasaki Vulcan 900 Classic LT | Owners Manual - Page 175
LABEL INFORMATION 173 (9) (10) - 2010 Kawasaki Vulcan 900 Classic LT | Owners Manual - Page 176
-
 1
1 -
 2
2 -
 3
3 -
 4
4 -
 5
5 -
 6
6 -
 7
7 -
8
-
9
-
10
-
11
-
12
-
13
-
14
-
15
-
16
-
17
-
18
-
19
-
20
-
21
-
22
-
23
-
24
-
25
-
26
-
27
-
28
-
29
-
30
-
31
-
32
-
33
-
34
-
35
-
36
-
37
-
38
-
39
-
40
-
41
-
42
-
43
-
44
-
45
-
46
-
47
-
48
-
49
-
50
-
51
-
52
-
53
-
54
-
55
-
56
-
57
-
58
-
59
-
60
-
61
-
62
-
63
-
64
-
65
-
66
-
67
-
68
-
69
-
70
-
71
-
72
-
73
-
74
-
75
-
76
-
77
-
78
-
79
-
80
-
81
-
82
-
83
-
84
-
85
-
86
-
87
-
88
-
89
-
90
-
91
-
92
-
93
-
94
-
95
-
96
-
97
-
98
-
99
-
100
-
101
-
102
-
103
-
104
-
105
-
106
-
107
-
108
-
109
-
110
-
111
-
112
-
113
-
114
-
115
-
116
-
117
-
118
-
119
-
120
-
121
-
122
-
123
-
124
-
125
-
126
-
127
-
128
-
129
-
130
-
131
-
132
-
133
-
134
-
135
-
136
-
137
-
138
-
139
-
140
-
141
-
142
-
143
-
144
-
145
-
146
-
147
-
148
-
149
-
150
-
151
-
152
-
153
-
154
-
155
-
156
-
157
-
158
-
159
-
160
-
161
-
162
-
163
-
164
-
165
-
166
-
167
-
168
-
169
-
170
-
171
-
172
-
173
-
174
-
175
-
176
 |
 |