1998 Lincoln Continental Owner's Manual - Page 57
1998 Lincoln Continental Manual
Page 57 highlights
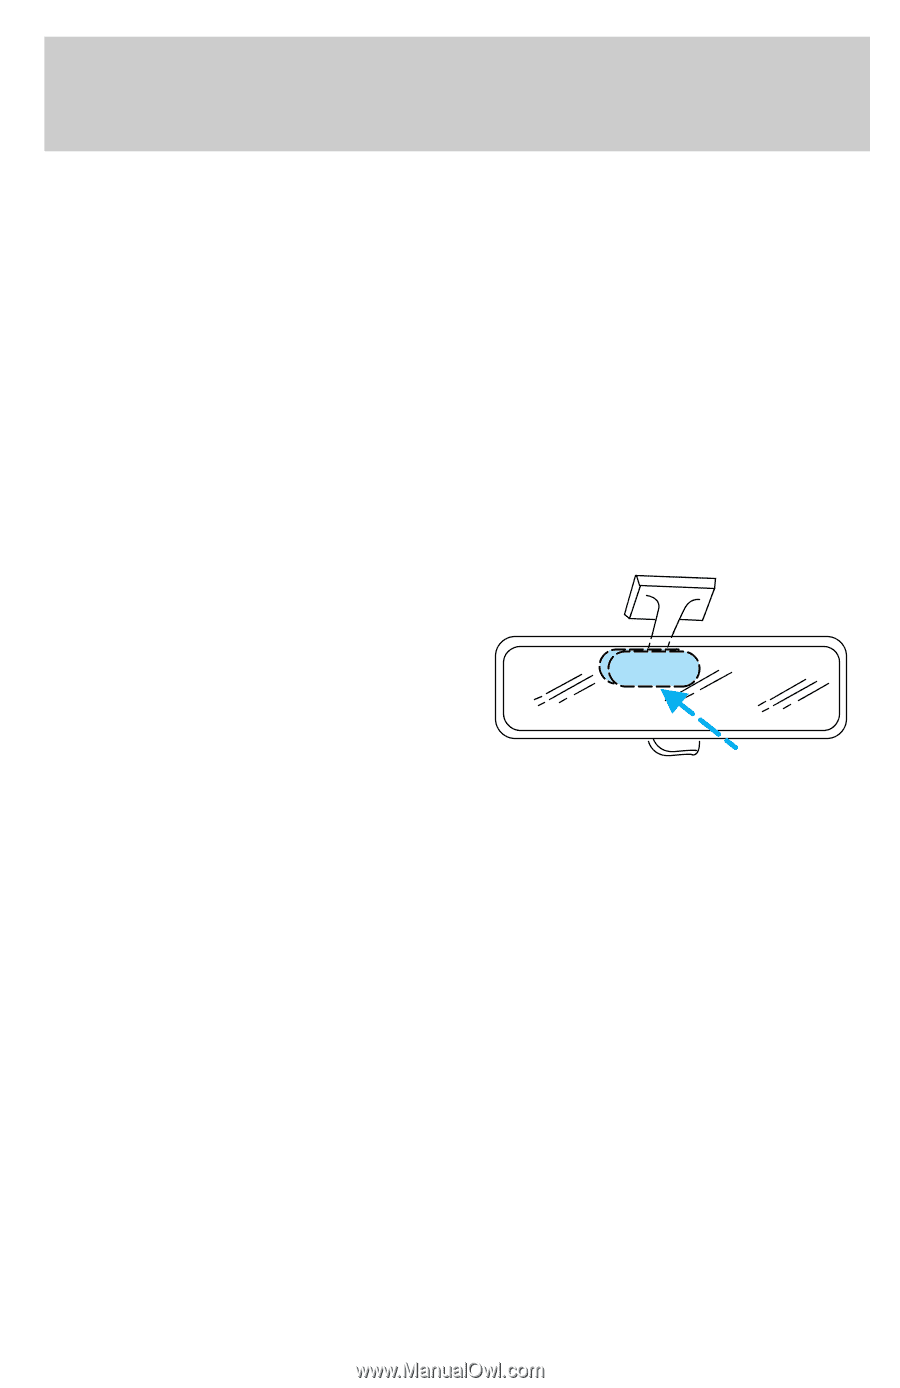
Controls and features 5. Release the switch, then slowly press it down again. Press the switch repeatedly until the correct zone setting for your geographic location is displayed on the upper right corner of the mirror. 6. To exit the zone setting mode, release pressure from the switch for greater than two seconds. Compass calibration adjustment Perform this adjustment in an open area free from steel structures and high voltage lines. For optimum calibration, turn off all electrical accessories (heater/air conditioning, wipers, etc.) and make sure all vehicle doors are shut. 1. Start the vehicle. 2. Locate the compass module mounted on the base of mirror. 3. Insert an appropriate diameter rod (paperclip) into the left switch access hole underneath the compass module. 4. Gently press the switch for 1 to 2 seconds until CAL and a direction are displayed on the upper right corner of the mirror. (To exit CAL before performing a compass adjustment, turn the ignition to OFF.) 5. Release pressure from the switch. 6. Slowly drive the vehicle in a circle (less than 5 km/h [3 mph]) until the CAL indicator turns off. This will take up to five circles to complete calibration. 7. The compass is now calibrated. The compass display will remain on for approximately 40-45 minutes after the ignition key is removed. The battery saver will then shut off the display. AUTOMATIC DIMMING INSIDE REAR VIEW MIRROR The electronic day/night mirror will change from the normal state to the non-glare state when bright lights (glare) reach the mirror. When the mirror detects bright light from front or behind, it will automatically adjust to minimize glare. 57
-
 1
1 -
2
-
3
-
4
-
5
-
6
-
7
-
8
-
9
-
10
-
11
-
12
-
13
-
14
-
15
-
16
-
17
-
18
-
19
-
20
-
21
-
22
-
23
-
24
-
25
-
26
-
27
-
28
-
29
-
30
-
31
-
32
-
33
-
34
-
35
-
36
-
37
-
38
-
39
-
40
-
41
-
42
-
43
-
44
-
45
-
46
-
47
-
48
-
49
-
50
-
51
-
 52
52 -
 53
53 -
 54
54 -
 55
55 -
 56
56 -
 57
57 -
 58
58 -
 59
59 -
 60
60 -
 61
61 -
 62
62 -
63
-
64
-
65
-
66
-
67
-
68
-
69
-
70
-
71
-
72
-
73
-
74
-
75
-
76
-
77
-
78
-
79
-
80
-
81
-
82
-
83
-
84
-
85
-
86
-
87
-
88
-
89
-
90
-
91
-
92
-
93
-
94
-
95
-
96
-
97
-
98
-
99
-
100
-
101
-
102
-
103
-
104
-
105
-
106
-
107
-
108
-
109
-
110
-
111
-
112
-
113
-
114
-
115
-
116
-
117
-
118
-
119
-
120
-
121
-
122
-
123
-
124
-
125
-
126
-
127
-
128
-
129
-
130
-
131
-
132
-
133
-
134
-
135
-
136
-
137
-
138
-
139
-
140
-
141
-
142
-
143
-
144
-
145
-
146
-
147
-
148
-
149
-
150
-
151
-
152
-
153
-
154
-
155
-
156
-
157
-
158
-
159
-
160
-
161
-
162
-
163
-
164
-
165
-
166
-
167
-
168
-
169
-
170
-
171
-
172
-
173
-
174
-
175
-
176
 |
 |