2002 Mazda Tribute Owner's Manual - Page 59
2002 Mazda Tribute Manual

Page 59 highlights
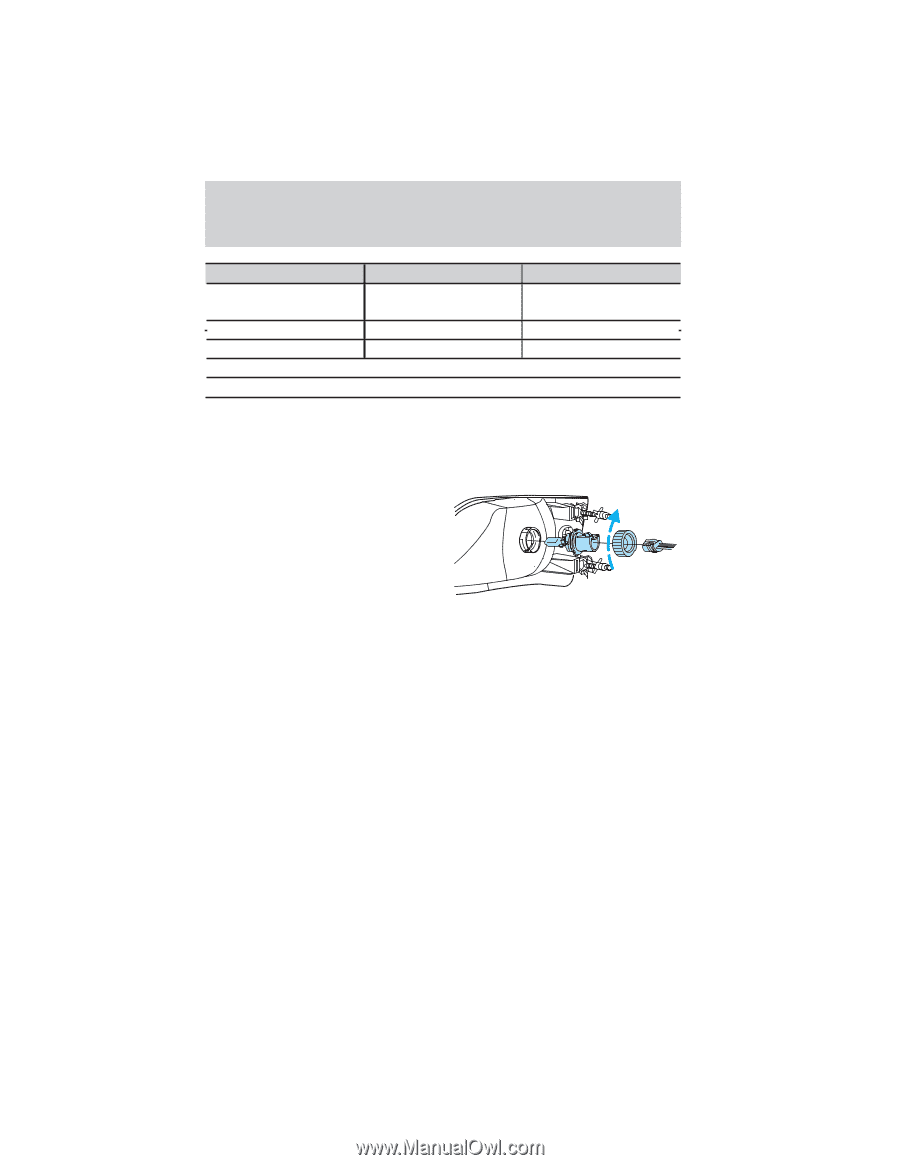
Lights Function Number of bulbs Trade number Front door courtesy 1 168 lamp Map lamps 2 168 (T10) Ashtray lamp 1 161 All replacement bulbs are clear in color except where noted. To replace all instrument panel lights - see your dealer. Replacing headlamp bulbs 1. Make sure that the headlamp control is in the OFF position. 2. Open the hood. 3. Disconnect the electrical connector from the bulb by pulling rearward. 4. Remove the rubber boot from the lamp assembly by pulling on one of the tabs. 5. Squeeze the retainer spring together releasing it from bulb hooks and rotate it away from the bulb. 6. Without turning, carefully pull bulb out of headlamp assembly. Handle a halogen headlamp bulb carefully and keep out of children's reach. Grasp the bulb only by its plastic base and do not touch the glass. The oil from your hands could cause the bulb to break the next time the headlamps are operated. NOTE: If the bulb is accidentally touched, it should be cleaned with rubbing alcohol before being used. 7. Insert the glass end of the new bulb into the headlamp assembly. When the bulb's three metal tabs are aligned with the grooves in the plastic base, push the bulb into the lamp assembly until the bulb's metal base contacts the rear of the lamp assembly. 8. Rotate the retainer spring over the bulb plastic base and secure it on the bulb hooks. 9. Install rubber boot on the lamp assembly. 10. Connect the electrical connector into the rear of the plastic base until it "snaps." 59
-
 1
1 -
2
-
3
-
4
-
5
-
6
-
7
-
8
-
9
-
10
-
11
-
12
-
13
-
14
-
15
-
16
-
17
-
18
-
19
-
20
-
21
-
22
-
23
-
24
-
25
-
26
-
27
-
28
-
29
-
30
-
31
-
32
-
33
-
34
-
35
-
36
-
37
-
38
-
39
-
40
-
41
-
42
-
43
-
44
-
45
-
46
-
47
-
48
-
49
-
50
-
51
-
52
-
53
-
 54
54 -
 55
55 -
 56
56 -
 57
57 -
 58
58 -
 59
59 -
 60
60 -
 61
61 -
 62
62 -
 63
63 -
 64
64 -
65
-
66
-
67
-
68
-
69
-
70
-
71
-
72
-
73
-
74
-
75
-
76
-
77
-
78
-
79
-
80
-
81
-
82
-
83
-
84
-
85
-
86
-
87
-
88
-
89
-
90
-
91
-
92
-
93
-
94
-
95
-
96
-
97
-
98
-
99
-
100
-
101
-
102
-
103
-
104
-
105
-
106
-
107
-
108
-
109
-
110
-
111
-
112
-
113
-
114
-
115
-
116
-
117
-
118
-
119
-
120
-
121
-
122
-
123
-
124
-
125
-
126
-
127
-
128
-
129
-
130
-
131
-
132
-
133
-
134
-
135
-
136
-
137
-
138
-
139
-
140
-
141
-
142
-
143
-
144
-
145
-
146
-
147
-
148
-
149
-
150
-
151
-
152
-
153
-
154
-
155
-
156
-
157
-
158
-
159
-
160
-
161
-
162
-
163
-
164
-
165
-
166
-
167
-
168
-
169
-
170
-
171
-
172
-
173
-
174
-
175
-
176
-
177
-
178
-
179
-
180
-
181
-
182
-
183
-
184
-
185
-
186
-
187
-
188
-
189
-
190
-
191
-
192
-
193
-
194
-
195
-
196
-
197
-
198
-
199
-
200
-
201
-
202
-
203
-
204
-
205
-
206
-
207
-
208
-
209
-
210
-
211
-
212
-
213
-
214
-
215
-
216
-
217
-
218
-
219
-
220
-
221
-
222
-
223
-
224
-
225
-
226
-
227
-
228
-
229
-
230
-
231
-
232
-
233
-
234
-
235
-
236
-
237
-
238
-
239
-
240
-
241
-
242
-
243
-
244
-
245
-
246
-
247
-
248
-
249
-
250
-
251
-
252
-
253
-
254
-
255
-
256
 |
 |