2015 Polaris Ranger Crew 570 EPS Owners Manual - Page 83
2015 Polaris Ranger Crew 570 EPS Manual

Page 83 highlights
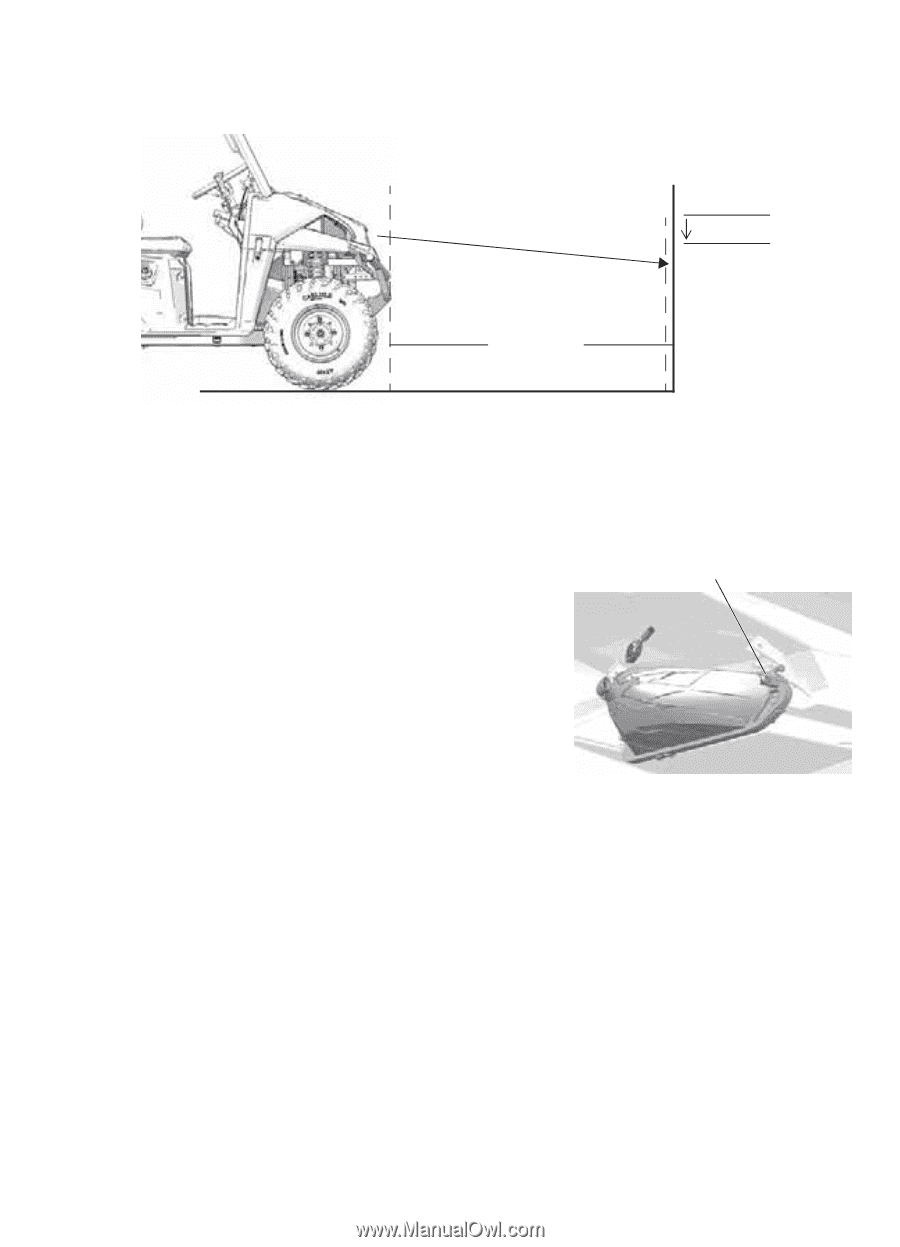
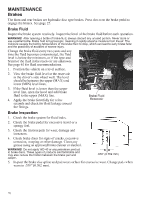
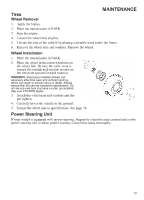
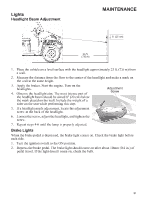
MAINTENANCE Lights Headlight Beam Adjustment X X 8" (20 cm) 25 ft. (7.6 m) 1. Place the vehicle on a level surface with the headlight approximately 25 ft. (7.6 m) from a wall. 2. Measure the distance from the floor to the center of the headlight and make a mark on the wall at the same height. 3. Apply the brakes. Start the engine. Turn on the Adjustment headlights. Screw 4. Observe the headlight aim. The most intense part of the headlight beam should be aimed 8" (20 cm) below the mark placed on the wall. Include the weight of a rider on the seat while performing this step. 5. If a headlight needs adjustment, locate the adjustment screw at the back of the headlight. 6. Loosen the screw, adjust the headlight, and tighten the screw. 7. Repeat steps 4-6 until the lamp is properly adjusted. Brake Lights When the brake pedal is depressed, the brake light comes on. Check the brake light before each ride. 1. Turn the ignition switch to the ON position. 2. Depress the brake pedal. The brake light should come on after about 10mm (0.4 in.) of pedal travel. If the light doesn't come on, check the bulb. 81
-
 1
1 -
2
-
3
-
4
-
5
-
6
-
7
-
8
-
9
-
10
-
11
-
12
-
13
-
14
-
15
-
16
-
17
-
18
-
19
-
20
-
21
-
22
-
23
-
24
-
25
-
26
-
27
-
28
-
29
-
30
-
31
-
32
-
33
-
34
-
35
-
36
-
37
-
38
-
39
-
40
-
41
-
42
-
43
-
44
-
45
-
46
-
47
-
48
-
49
-
50
-
51
-
52
-
53
-
54
-
55
-
56
-
57
-
58
-
59
-
60
-
61
-
62
-
63
-
64
-
65
-
66
-
67
-
68
-
69
-
70
-
71
-
72
-
73
-
74
-
75
-
76
-
77
-
 78
78 -
 79
79 -
 80
80 -
 81
81 -
 82
82 -
 83
83 -
 84
84 -
 85
85 -
 86
86 -
 87
87 -
 88
88 -
89
-
90
-
91
-
92
-
93
-
94
-
95
-
96
-
97
-
98
-
99
-
100
-
101
-
102
-
103
-
104
-
105
-
106
-
107
 |
 |