2009 Pontiac G3 Owner's Manual - Page 167
2009 Pontiac G3 Manual
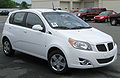
Page 167 highlights
Using the Auxiliary Input Jack The radio system has an auxiliary input jack located on the lower right side of the faceplate. This is not an audio output; do not plug the headphone set into the front auxiliary input jack. An external audio device such as an iPod, laptop computer, MP3 player, CD changer, etc. can be connected to the auxiliary input jack for use as another audio source. Drivers are encouraged to set up any auxiliary device while the vehicle is in P (Park). See Defensive Driving on page 4-2 for more information on driver distraction. To use a portable audio player, connect a 3.5 mm (1/8 inch) cable to the radio's front auxiliary input jack. When a device is connected, press the radio CD/AUX button to begin playing audio from the device over the vehicle speakers. Using an MP3 MP3/WMA CD-R Disc MP3 Format If you burn your own MP3/WMA disc on a personal computer: • Make sure the MP3/WMA files are recorded on a CD-R disc. • Do not mix standard audio and MP3/WMA files on one disc. • Make sure each MP3/WMA file has a .m3u or .wma extension, other file extensions might not work. • Files can be recorded with a variety of fixed or variable bit rates. Song title, artist name, and album are available for display by the radio when recorded using ID3 tags version 1 and 2. O (Power/Volume): Turn to adjust the volume. Additional volume adjustments may have to be made from the portable device if the volume is too quiet or too loud. CD/AUX (Auxiliary): Press to play a CD while a portable audio device is playing. Press CD/AUX a second time for the system to begin playing audio from the connected portable audio player. The portable audio device continues playing until it is turned off. • Make sure to finalize the disc when burning an MP3/WMA disc, using multiple sessions. It is usually better to burn the disc all at once. The player is able to read and play a maximum of 50 folders, five sessions, and 999 files. Long file names and folder names can use more disc memory space than necessary. To conserve space on the disc, minimize the length of the file and folder names. 3-51
-
 1
1 -
2
-
3
-
4
-
5
-
6
-
7
-
8
-
9
-
10
-
11
-
12
-
13
-
14
-
15
-
16
-
17
-
18
-
19
-
20
-
21
-
22
-
23
-
24
-
25
-
26
-
27
-
28
-
29
-
30
-
31
-
32
-
33
-
34
-
35
-
36
-
37
-
38
-
39
-
40
-
41
-
42
-
43
-
44
-
45
-
46
-
47
-
48
-
49
-
50
-
51
-
52
-
53
-
54
-
55
-
56
-
57
-
58
-
59
-
60
-
61
-
62
-
63
-
64
-
65
-
66
-
67
-
68
-
69
-
70
-
71
-
72
-
73
-
74
-
75
-
76
-
77
-
78
-
79
-
80
-
81
-
82
-
83
-
84
-
85
-
86
-
87
-
88
-
89
-
90
-
91
-
92
-
93
-
94
-
95
-
96
-
97
-
98
-
99
-
100
-
101
-
102
-
103
-
104
-
105
-
106
-
107
-
108
-
109
-
110
-
111
-
112
-
113
-
114
-
115
-
116
-
117
-
118
-
119
-
120
-
121
-
122
-
123
-
124
-
125
-
126
-
127
-
128
-
129
-
130
-
131
-
132
-
133
-
134
-
135
-
136
-
137
-
138
-
139
-
140
-
141
-
142
-
143
-
144
-
145
-
146
-
147
-
148
-
149
-
150
-
151
-
152
-
153
-
154
-
155
-
156
-
157
-
158
-
159
-
160
-
161
-
 162
162 -
 163
163 -
 164
164 -
 165
165 -
 166
166 -
 167
167 -
 168
168 -
 169
169 -
 170
170 -
 171
171 -
 172
172 -
173
-
174
-
175
-
176
-
177
-
178
-
179
-
180
-
181
-
182
-
183
-
184
-
185
-
186
-
187
-
188
-
189
-
190
-
191
-
192
-
193
-
194
-
195
-
196
-
197
-
198
-
199
-
200
-
201
-
202
-
203
-
204
-
205
-
206
-
207
-
208
-
209
-
210
-
211
-
212
-
213
-
214
-
215
-
216
-
217
-
218
-
219
-
220
-
221
-
222
-
223
-
224
-
225
-
226
-
227
-
228
-
229
-
230
-
231
-
232
-
233
-
234
-
235
-
236
-
237
-
238
-
239
-
240
-
241
-
242
-
243
-
244
-
245
-
246
-
247
-
248
-
249
-
250
-
251
-
252
-
253
-
254
-
255
-
256
-
257
-
258
-
259
-
260
-
261
-
262
-
263
-
264
-
265
-
266
-
267
-
268
-
269
-
270
-
271
-
272
-
273
-
274
-
275
-
276
-
277
-
278
-
279
-
280
-
281
-
282
-
283
-
284
-
285
-
286
-
287
-
288
-
289
-
290
-
291
-
292
-
293
-
294
-
295
-
296
-
297
-
298
-
299
-
300
-
301
-
302
-
303
-
304
-
305
-
306
-
307
-
308
-
309
-
310
-
311
-
312
-
313
-
314
-
315
-
316
-
317
-
318
-
319
-
320
-
321
-
322
-
323
-
324
-
325
-
326
-
327
-
328
-
329
-
330
-
331
-
332
-
333
-
334
-
335
-
336
-
337
-
338
-
339
-
340
-
341
-
342
-
343
-
344
-
345
-
346
-
347
-
348
 |
 |
