2009 Subaru Outback Owner's Manual - Page 108
2009 Subaru Outback Manual
Page 108 highlights
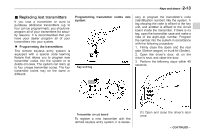
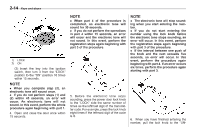
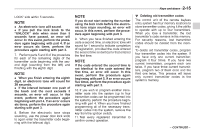
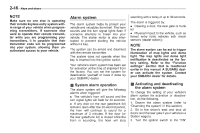
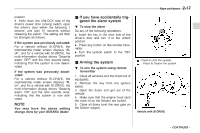
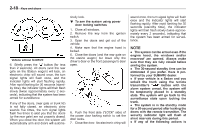
2-16 NOTE Keys and doors Make sure no one else is operating their remote keyless entry system within range of your vehicle when programming transmitters. If someone else were to operate their remote transmitter while you are programming your transmitters, it is possible that their transmitter code will be programmed into your system, allowing them unauthorized access to your vehicle. Alarm system The alarm system helps to protect your vehicle and valuables from theft. The horn sounds and the turn signal lights flash if someone attempts to break into your vehicle. The starter motor is also interrupted to prevent starting the vehicle without a key. The system can be armed and disarmed with the remote transmitter. The system does not operate when the key is inserted into the ignition switch. Your vehicle's alarm system has been set for activation at the time of shipment from the factory. You can set the system for deactivation yourself or have it done by your SUBARU dealer. sounding with a delay of up to 30 seconds. The alarm is triggered by: . Opening a door, the rear gate or trunk lid . Physical impact to the vehicle, such as forced entry (only vehicles with shock sensors (dealer option)) NOTE The alarm system can be set to trigger illumination of map lights and dome light. The map lights and dome light notification is deactivated as the factory setting. Refer to the "Function settings" section that is mentioned earlier in this manual. A SUBARU dealer can activate the system. Contact your SUBARU dealer for details. & System alarm operation The alarm system will give the following alarms when triggered: . The vehicle's horn will sound and the turn signal lights will flash for 30 seconds. . If any door (or the rear gate/trunk lid) remains open after the 30-second period, the horn will continue to sound for a maximum of 3 minutes. If the door (or the rear gate/trunk lid) is closed while the horn is sounding, the horn will stop & Activating and deactivating the alarm system To change the setting of your vehicle's alarm system for activation or deactivation, do the following. 1. Disarm the alarm system (refer to "Disarming the system" in this section). 2. Sit in the driver's seat and shut all doors (and the rear gate if your vehicle is a Station wagon). 3. Turn the ignition switch to the "ON"
-
 1
1 -
2
-
3
-
4
-
5
-
6
-
7
-
8
-
9
-
10
-
11
-
12
-
13
-
14
-
15
-
16
-
17
-
18
-
19
-
20
-
21
-
22
-
23
-
24
-
25
-
26
-
27
-
28
-
29
-
30
-
31
-
32
-
33
-
34
-
35
-
36
-
37
-
38
-
39
-
40
-
41
-
42
-
43
-
44
-
45
-
46
-
47
-
48
-
49
-
50
-
51
-
52
-
53
-
54
-
55
-
56
-
57
-
58
-
59
-
60
-
61
-
62
-
63
-
64
-
65
-
66
-
67
-
68
-
69
-
70
-
71
-
72
-
73
-
74
-
75
-
76
-
77
-
78
-
79
-
80
-
81
-
82
-
83
-
84
-
85
-
86
-
87
-
88
-
89
-
90
-
91
-
92
-
93
-
94
-
95
-
96
-
97
-
98
-
99
-
100
-
101
-
102
-
 103
103 -
 104
104 -
 105
105 -
 106
106 -
 107
107 -
 108
108 -
 109
109 -
 110
110 -
 111
111 -
 112
112 -
 113
113 -
114
-
115
-
116
-
117
-
118
-
119
-
120
-
121
-
122
-
123
-
124
-
125
-
126
-
127
-
128
-
129
-
130
-
131
-
132
-
133
-
134
-
135
-
136
-
137
-
138
-
139
-
140
-
141
-
142
-
143
-
144
-
145
-
146
-
147
-
148
-
149
-
150
-
151
-
152
-
153
-
154
-
155
-
156
-
157
-
158
-
159
-
160
-
161
-
162
-
163
-
164
-
165
-
166
-
167
-
168
-
169
-
170
-
171
-
172
-
173
-
174
-
175
-
176
-
177
-
178
-
179
-
180
-
181
-
182
-
183
-
184
-
185
-
186
-
187
-
188
-
189
-
190
-
191
-
192
-
193
-
194
-
195
-
196
-
197
-
198
-
199
-
200
-
201
-
202
-
203
-
204
-
205
-
206
-
207
-
208
-
209
-
210
-
211
-
212
-
213
-
214
-
215
-
216
-
217
-
218
-
219
-
220
-
221
-
222
-
223
-
224
-
225
-
226
-
227
-
228
-
229
-
230
-
231
-
232
-
233
-
234
-
235
-
236
-
237
-
238
-
239
-
240
-
241
-
242
-
243
-
244
-
245
-
246
-
247
-
248
-
249
-
250
-
251
-
252
-
253
-
254
-
255
-
256
-
257
-
258
-
259
-
260
-
261
-
262
-
263
-
264
-
265
-
266
-
267
-
268
-
269
-
270
-
271
-
272
-
273
-
274
-
275
-
276
-
277
-
278
-
279
-
280
-
281
-
282
-
283
-
284
-
285
-
286
-
287
-
288
-
289
-
290
-
291
-
292
-
293
-
294
-
295
-
296
-
297
-
298
-
299
-
300
-
301
-
302
-
303
-
304
-
305
-
306
-
307
-
308
-
309
-
310
-
311
-
312
-
313
-
314
-
315
-
316
-
317
-
318
-
319
-
320
-
321
-
322
-
323
-
324
-
325
-
326
-
327
-
328
-
329
-
330
-
331
-
332
-
333
-
334
-
335
-
336
-
337
-
338
-
339
-
340
-
341
-
342
-
343
-
344
-
345
-
346
-
347
-
348
-
349
-
350
-
351
-
352
-
353
-
354
-
355
-
356
-
357
-
358
-
359
-
360
-
361
-
362
-
363
-
364
-
365
-
366
-
367
-
368
-
369
-
370
-
371
-
372
-
373
-
374
-
375
-
376
-
377
-
378
-
379
-
380
-
381
-
382
-
383
-
384
-
385
-
386
-
387
-
388
-
389
-
390
-
391
-
392
-
393
-
394
-
395
-
396
-
397
-
398
-
399
-
400
-
401
-
402
-
403
-
404
-
405
-
406
-
407
-
408
-
409
-
410
-
411
-
412
-
413
-
414
-
415
-
416
-
417
-
418
-
419
-
420
-
421
-
422
-
423
-
424
-
425
-
426
-
427
-
428
-
429
-
430
-
431
-
432
-
433
-
434
-
435
-
436
-
437
-
438
-
439
-
440
-
441
-
442
-
443
-
444
-
445
-
446
-
447
 |
 |