2012 Yamaha Motorsports Stryker Owners Manual - Page 73
2012 Yamaha Motorsports Stryker Manual

Page 73 highlights
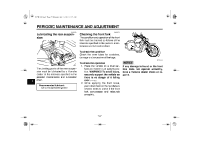
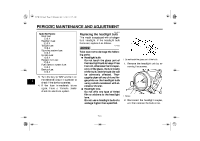
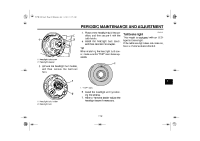
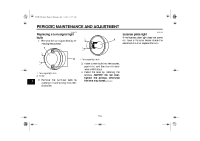
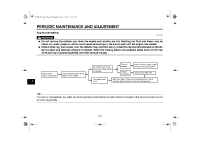
U27D11E0.book Page 32 Monday, July 11, 2011 11:15 AM PERIODIC MAINTENANCE AND ADJUSTMENT 4. Place a new headlight bulb into position, and then secure it with the bulb holder. 5. Install the headlight bulb cover, and then connect the coupler. TIP When installing the headlight bulb cover, make sure the "TOP" mark faces upwards. 1. Headlight bulb cover 2. Headlight coupler EAU24181 Tail/brake light This model is equipped with an LEDtype tail/brake light. If the tail/brake light does not come on, have a Yamaha dealer check it. 1 2 1 TOP 3. Unhook the headlight bulb holder, and then remove the burnt-out bulb. 1 1. "TOP" mark 7 2 1. Headlight bulb holder 2. Headlight bulb 6. Install the headlight unit by installing the screws. 7. Have a Yamaha dealer adjust the headlight beam if necessary. 7-32
-
 1
1 -
2
-
3
-
4
-
5
-
6
-
7
-
8
-
9
-
10
-
11
-
12
-
13
-
14
-
15
-
16
-
17
-
18
-
19
-
20
-
21
-
22
-
23
-
24
-
25
-
26
-
27
-
28
-
29
-
30
-
31
-
32
-
33
-
34
-
35
-
36
-
37
-
38
-
39
-
40
-
41
-
42
-
43
-
44
-
45
-
46
-
47
-
48
-
49
-
50
-
51
-
52
-
53
-
54
-
55
-
56
-
57
-
58
-
59
-
60
-
61
-
62
-
63
-
64
-
65
-
66
-
67
-
 68
68 -
 69
69 -
 70
70 -
 71
71 -
 72
72 -
 73
73 -
 74
74 -
 75
75 -
 76
76 -
 77
77 -
 78
78 -
79
-
80
-
81
-
82
-
83
-
84
-
85
-
86
-
87
-
88
-
89
-
90
-
91
-
92
-
93
-
94
-
95
-
96
-
97
-
98
-
99
-
100
 |
 |
