3Com 3C8227C User Guide - Page 24
Placing Units On Top of Each Other, Installing a Power Module, CAUTION
 |
UPC - 662705106267
View all 3Com 3C8227C manuals
Add to My Manuals
Save this manual to your list of manuals |
Page 24 highlights
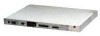
24 CHAPTER 2: INSTALLING THE ADVANCED RPS 6 Connect all cables. Placing Units On Top of Each Other CAUTION: Do not place the Advanced RPS alongside your SuperStack® units, as this can impede air flow through the Advanced RPS. You may stack up to eight of the allowable units (see Appendix C) in a free-standing stack or, if runners or a tray give extra support, on a rack-mounted Advanced RPS. The narrower units must be positioned at the top of the stack. If you are placing units one on top of the other, you must use the self-adhesive rubber pads supplied. Apply the pads to the underside of each unit, sticking one in the marked area at each corner. Place the units on top of each other, ensuring that the pads of the upper unit line up with the recesses of the lower unit. Installing a Power Module CAUTION: The Type 3 DC Power Module is for installation by suitably qualified service personnel only. Refer to the Type 3 Power Module Installation Guide. CAUTION: Never plug a hot power module into the Advanced RPS. You may damage the power module. Allow 10 minutes for the unit to cool down before inserting it into the power module slot. This will permit the surge control circuitry to reset. CAUTION: It is important that the power modules are cooled effectively. We strongly recommend installing the power modules as evenly as possible between the top and bottom slots of the Advanced RPS chassis. CAUTION: When removing a power module that has just been operating, beware of hot components. CAUTION: Do not operate the Advanced RPS continuously with any of the rear slots open. Replace the blanking plate to help prolong the life of your unit.
-
 1
1 -
2
-
3
-
4
-
5
-
6
-
7
-
8
-
9
-
10
-
11
-
12
-
13
-
14
-
15
-
16
-
17
-
18
-
 19
19 -
 20
20 -
 21
21 -
 22
22 -
 23
23 -
 24
24 -
 25
25 -
 26
26 -
 27
27 -
 28
28 -
 29
29 -
30
-
31
-
32
-
33
-
34
-
35
-
36
-
37
-
38
-
39
-
40
-
41
-
42
-
43
-
44
-
45
-
46
-
47
-
48
-
49
-
50
-
51
-
52
-
53
-
54
-
55
-
56
-
57
-
58
-
59
-
60
-
61
-
62
-
63
-
64
 |
 |
