3Com 3C8227C User Guide - Page 25
Power Supply and Fuses, Connecting the DC Cables
 |
UPC - 662705106267
View all 3Com 3C8227C manuals
Add to My Manuals
Save this manual to your list of manuals |
Page 25 highlights
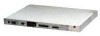
Power Supply and Fuses 25 CAUTION: If you need to replace a Power Module used in full redundancy configuration, remove the 'Y' cable connection from it before removing the module. Remember the cold power module will not supply power for about 5 seconds. You can "hot-insert" the Advanced RPS Power Modules in to the chassis, that is, you do not need to remove power from the chassis before you insert a power module. Refer to the Advanced RPS Type 3 Power Module Installation Guide and Advanced RPS Type 3 'Y' Cable Installation Guide. Details of the permissible combinations of modules and 3Com products are given in Appendix C and the user guide which accompanies the modules. To install a power module: CAUTION: The Type 3 DC Power Module is for installation by suitably qualified service personnel only. Refer to the Type 3 Power Module Installation Guide. 1 Take off the blanking plate by removing the fixing screws. Keep the blanking plate and screws in a safe place. If you remove the module at any time, you must replace the blanking plate. 2 Hold the power module so that any text on the front panel is upright, and insert it into the chassis, sliding the module into the runners. Push firmly to ensure the connectors are fully engaged. 3 Secure the module with the screws provided using a suitable tool. Power Supply and Fuses All power is supplied and fused from the Advanced RPS chassis. There are no user-replaceable fuses on the power module. Connecting the DC Cables The Advanced RPS and its modules can be "hot-connected" to SuperStack units, that is, you do not need to remove power from the chassis or other units to connect the cables.
-
 1
1 -
2
-
3
-
4
-
5
-
6
-
7
-
8
-
9
-
10
-
11
-
12
-
13
-
14
-
15
-
16
-
17
-
18
-
19
-
 20
20 -
 21
21 -
 22
22 -
 23
23 -
 24
24 -
 25
25 -
 26
26 -
 27
27 -
 28
28 -
 29
29 -
 30
30 -
31
-
32
-
33
-
34
-
35
-
36
-
37
-
38
-
39
-
40
-
41
-
42
-
43
-
44
-
45
-
46
-
47
-
48
-
49
-
50
-
51
-
52
-
53
-
54
-
55
-
56
-
57
-
58
-
59
-
60
-
61
-
62
-
63
-
64
 |
 |
