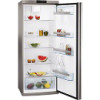
AEG DynamicAir Freestanding 59.5cm Refrigerator Stainless Steel S63300KDX0 Pro - Page 15
Levelling, Door reversibility
 |
View all AEG DynamicAir Freestanding 59.5cm Refrigerator Stainless Steel S63300KDX0 manuals
Add to My Manuals
Save this manual to your list of manuals |
Page 15 highlights
8.5 Levelling ENGLISH 15 Accurate levelling prevents the vibration and noise of the appliance during operation. To adjust the height of the appliance loosen or tighten the two adjustable front feet. 8.6 Door reversibility 3 2 1 7 6 8 5 4 To carry out the following operations, we suggest that this be made with another person that will keep a firm hold on the doors of the appliance during the operations. To change the opening direction of the door, do these steps: • Remove the plug from the power socket. • Tilt back the appliance carefully so that the compressor cannot touch the floor. • Remove the plinth (1). • Remove the cap (2) and position it on the opposite side. • Unscrew the hinge (3) and remove the door. • Unscrew the lower pin and the washers (3) • Position the pin and the washers (4) on the opposite side (5). • Unscrew the other hinge (5) • Unscrew the upper pin (6) and screw it on the opposite side. (7) • Refit the door. • Refit and screw both lower hinges. • Refit the plinth (8). •


