AIWA CDC-X227 Operating Instructions - Page 3
Theft Protection, Basic Operation, Audio And Clock, Adjustment - manual
 |
View all AIWA CDC-X227 manuals
Add to My Manuals
Save this manual to your list of manuals |
Page 3 highlights
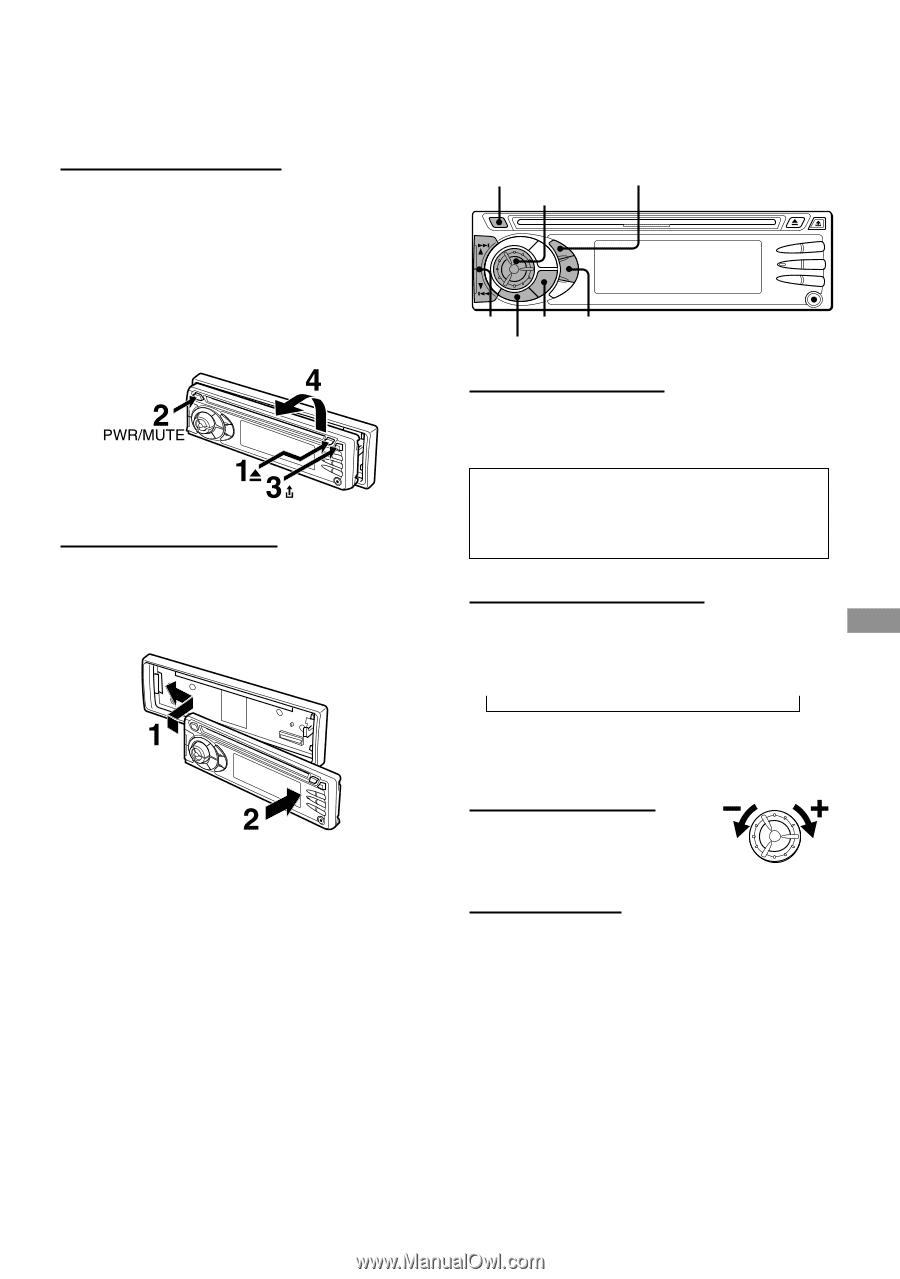
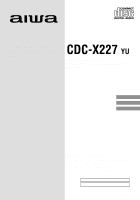
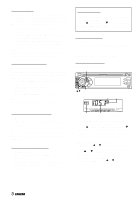
THEFT PROTECTION Take the front panel with you when leaving the car, and keep it in the supplied carrying case. Detaching the front panel Before detaching the front panel, remove the CD to prevent possible damage to the unit. 1 Press z to remove the CD. 2 Press and hold PWR/MUTE until the unit turns off. 3 Press %. (Hold the panel with one hand to prevent accidentally dropping it.) 4 Remove the panel. Attaching the front panel 1 Engage the left side of the front panel to the left catch on the unit. 2 Push the panel forward until it locks. Be sure not to press any buttons while you are attaching the panel. Note Do not touch the connector on the reverse side of the front panel. This could cause a poor or faulty connection. BASIC OPERATION, AUDIO AND CLOCK ADJUSTMENT PWR/MUTE SEL AUDIO CONTROL i/k DISP SRC BAND Turning the unit on/off • Press PWR/MUTE to turn on the unit. The unit also turns on when you insert a CD. • Press and hold PWR/MUTE until the unit turns off. Note Most operations described in this manual require the unit to be turned on before starting the operation, unless explicitly stated otherwise. Changing the source mode 1 Press SRC. Pressing SRC cycles through source modes in the following order: FM1 (FM2/FM3/AM1/AM2) → CD* → AUX ↑ * "CD" does not appear in the display when there is no CD in the unit. Adjusting the volume 1 Turn AUDIO CONTROL. VOL (volume) indicator flashes. Muting the sound 1 Press PWR/MUTE briefly. MUTE indicator flashes. To restore volume, briefly press PWR/MUTE again. ENGLISH ENGLISH 2
-
 1
1 -
 2
2 -
 3
3 -
 4
4 -
 5
5 -
 6
6 -
 7
7 -
 8
8
 |
 |