ASRock M3A780GXH/128M Quick Installation Guide - Page 25
English, 6.1.2 Installing Three CrossFireX, Ready Graphics, Cards
 |
View all ASRock M3A780GXH/128M manuals
Add to My Manuals
Save this manual to your list of manuals |
Page 25 highlights
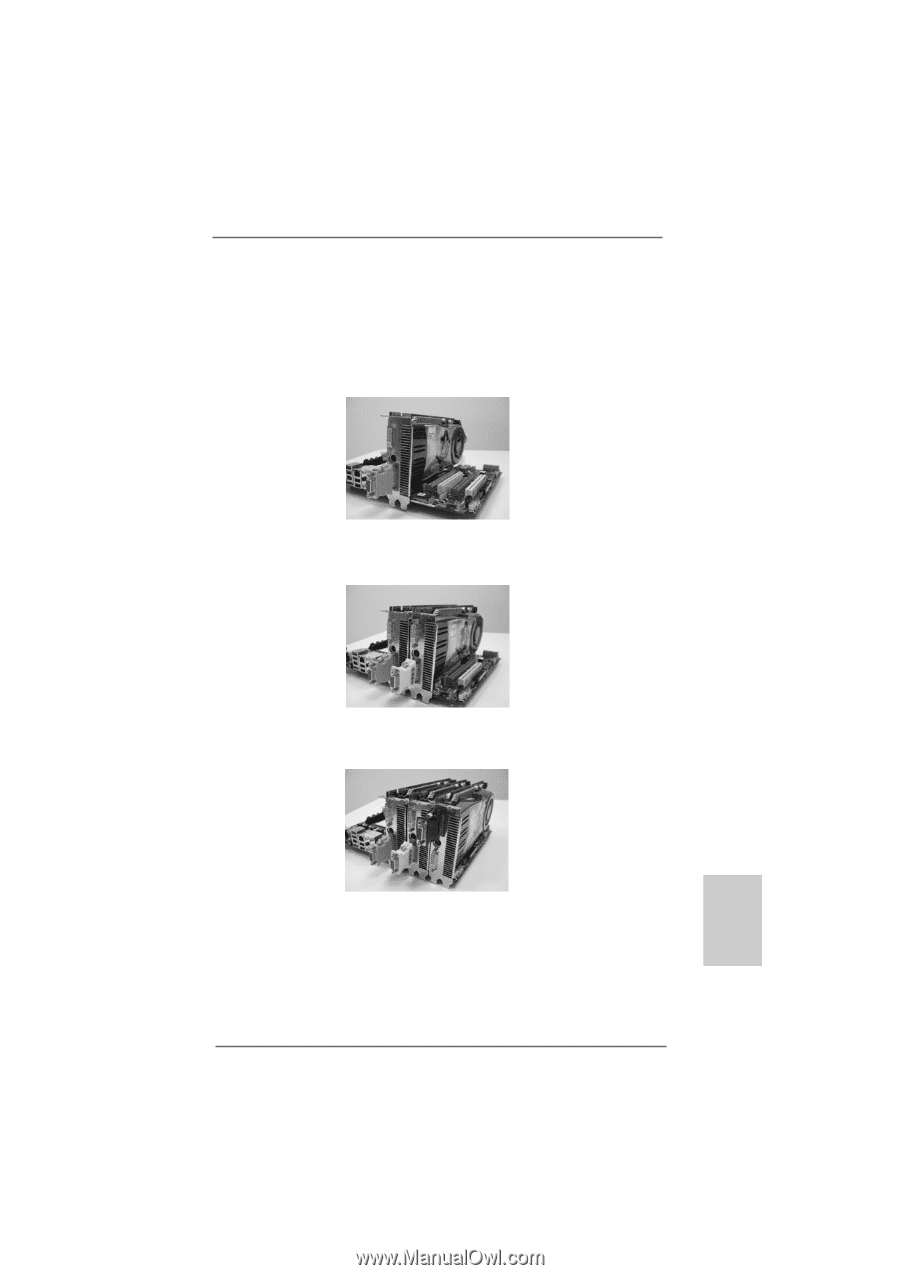
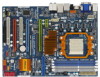
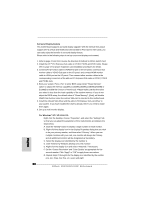
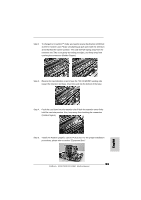
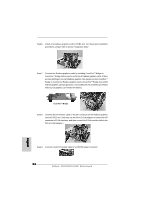
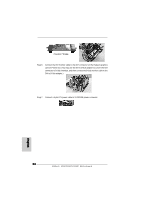
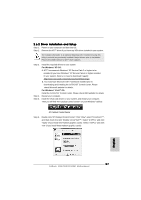
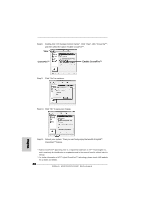
2.6.1.2 Installing Three CrossFireXTM-Ready Graphics Cards Step 1. Follow step 1 to 4 on page 22 and 23 to reverse the direction of ASRock SLI/XFire Switch Card. Step 2. Install one Radeon graphics card to PCIE2 slot. For the proper installation procedures, please refer to section "Expansion Slots". Step 3. Install one Radeon graphics card to PCIE3 slot. For the proper installation procedures, please refer to section "Expansion Slots". Step 4. Install one Radeon graphics card to PCIE4 slot. For the proper installation procedures, please refer to section "Expansion Slots". English Step 5. Use one CrossFireTM Bridge to connect Radeon graphics cards on PCIE2 and PCIE3 slots, and use the other CrossFireTM Bridge to connect Radeon graphics cards on PCIE3 and PCIE4 slots. (CrossFireTM Bridge is provided with the graphics card you purchase, not bundled with this motherboard. Please refer to your graphics card vendor for details.) 25 ASRock M3A780GXH/128M Motherboard
-
 1
1 -
2
-
3
-
4
-
5
-
6
-
7
-
8
-
9
-
10
-
11
-
12
-
13
-
14
-
15
-
16
-
17
-
18
-
19
-
 20
20 -
 21
21 -
 22
22 -
 23
23 -
 24
24 -
 25
25 -
 26
26 -
 27
27 -
 28
28 -
 29
29 -
 30
30 -
31
-
32
-
33
-
34
-
35
-
36
-
37
-
38
-
39
-
40
-
41
-
42
-
43
-
44
-
45
-
46
-
47
-
48
-
49
-
50
-
51
-
52
-
53
-
54
-
55
-
56
-
57
-
58
-
59
-
60
-
61
-
62
-
63
-
64
-
65
-
66
-
67
-
68
-
69
-
70
-
71
-
72
-
73
-
74
-
75
-
76
-
77
-
78
-
79
-
80
-
81
-
82
-
83
-
84
-
85
-
86
-
87
-
88
-
89
-
90
-
91
-
92
-
93
-
94
-
95
-
96
-
97
-
98
-
99
-
100
-
101
-
102
-
103
-
104
-
105
-
106
-
107
-
108
-
109
-
110
-
111
-
112
-
113
-
114
-
115
-
116
-
117
-
118
-
119
-
120
-
121
-
122
-
123
-
124
-
125
-
126
-
127
-
128
-
129
-
130
-
131
-
132
-
133
-
134
-
135
-
136
-
137
-
138
-
139
-
140
-
141
-
142
-
143
-
144
-
145
-
146
-
147
-
148
-
149
-
150
-
151
-
152
-
153
-
154
-
155
-
156
-
157
-
158
-
159
-
160
-
161
-
162
-
163
-
164
-
165
-
166
-
167
-
168
-
169
-
170
-
171
-
172
-
173
-
174
-
175
-
176
-
177
-
178
-
179
-
180
-
181
-
182
-
183
-
184
-
185
-
186
-
187
-
188
-
189
-
190
-
191
-
192
-
193
-
194
-
195
-
196
 |
 |