Aastra CM-16 CM-16 User Guide - Page 8
Installation
 |
View all Aastra CM-16 manuals
Add to My Manuals
Save this manual to your list of manuals |
Page 8 highlights
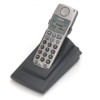
INSTALLATION Base Station Wall Mounting To wall mount the base station: • Locate the wall mounting strip located on the back side of the base station • Slide the strip out from the base station (Fig A) • Turn the strip around and secure firmly to the wall using the screws supplied (Fig B) • Plug the line cord into the jack on the unit • Slide the base station over the strip until it clicks into place (Fig C) Figure A Figure B Figure C The installation process is divided into three sections A, B, and C. If you follow the steps in order, the Handset and Base Unit will properly synchronize with the M1 2616 port. At this time per Figure 2, prepare the handset by placing the battery cover and the battery near the handset so you can connect it quickly in step B5. Configure the 2616 Port and wall jack If you have not already configured and verified a 2616 port, do so now. The Base Unit will not operate unless connected to a working M1 circuit and the handset won't work or even charge the battery properly unless the Base Unit is operational first. Base Unit Connections The Base Unit must be connected to a known working M1 port configured for a 2616 wired set. Where possible, verify the port and key assignments by using a 2616 set before connecting the CM-16 to that jack. Refer to Figure 1 and connect the components in this order. 1. Plug one end of the 6 conductor cord (supplied) to the Antenna Unit 2. Plug the other end of the 6 conductor cord into the jack on the Power Adapter Assembly In the next two steps certain LEDs on the Base Unit should light up, so watch for the appropriate LED response. Model CM-16 User Guide 5
-
 1
1 -
2
-
 3
3 -
 4
4 -
 5
5 -
 6
6 -
 7
7 -
 8
8 -
 9
9 -
 10
10 -
 11
11 -
 12
12 -
 13
13 -
14
-
15
-
16
-
17
-
18
-
19
-
20
-
21
-
22
-
23
-
24
-
25
-
26
-
27
-
28
-
29
-
30
-
31
-
32
-
33
-
34
 |
 |
