Acer AL707 User Guide - Page 10
Notes, How To Adjust A Setting
 |
View all Acer AL707 manuals
Add to My Manuals
Save this manual to your list of manuals |
Page 10 highlights
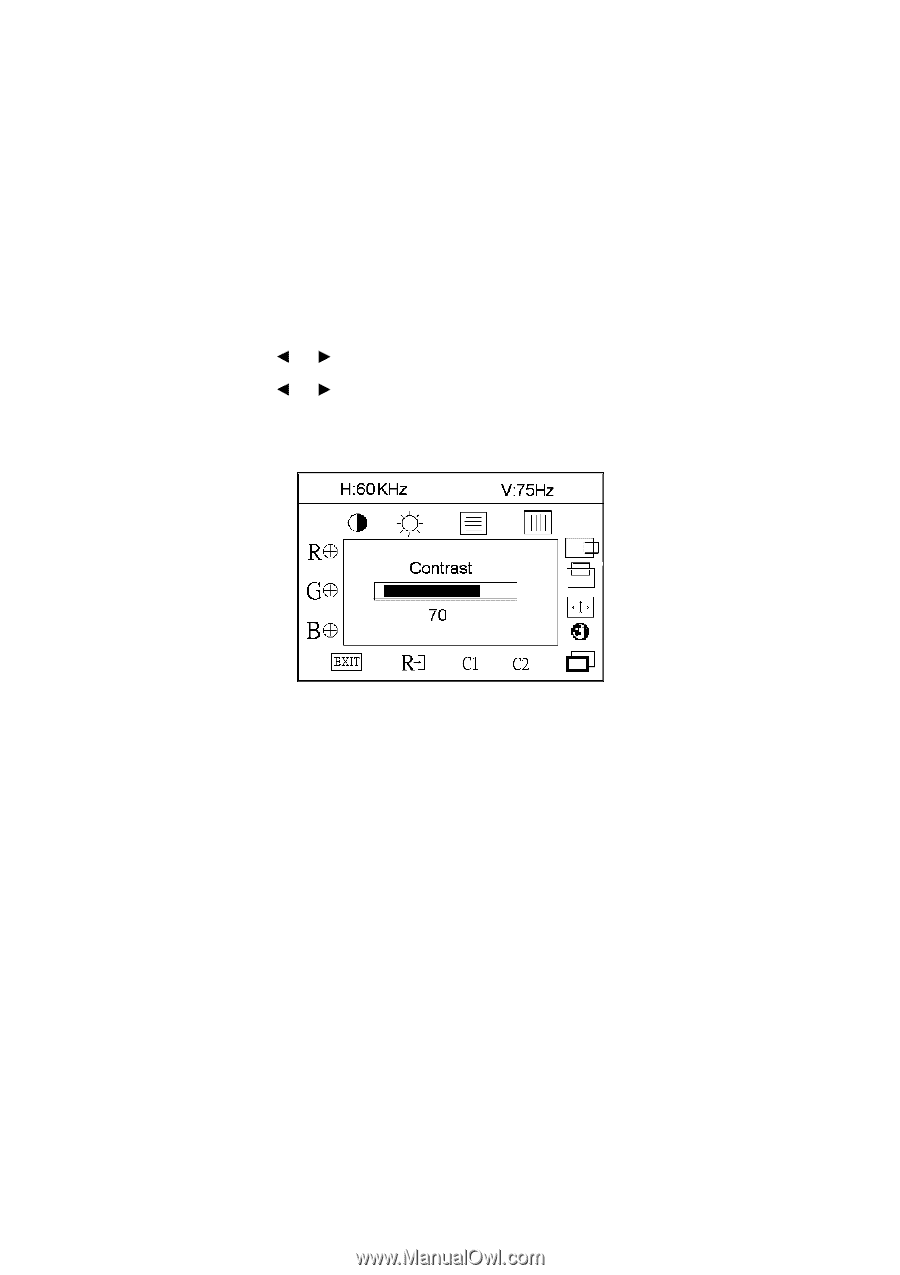
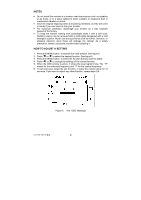
NOTES • Do not install the monitor in a location near heat sources such as radiators or air ducts, or in a place subject to direct sunlight, or excessive dust or mechanical vibration or shock. • Save the original shipping carton and packing materials, as they will come in handy if you ever have to ship your monitor. • For maximum protection, repackage your monitor as it was originally packed at the factory. • To keep the monitor looking new, periodically clean it with a soft cloth. Stubborn stains may be removed with a cloth lightly dampened with a mild detergent solution. Never use strong solvents such as thinner, benzene, or abrasive cleaners, since these will damage the cabinet. As a safety precaution, always unplug the monitor before cleaning it. HOW TO ADJUST A SETTING 1. Press the MENU-button to activate the OSD window. See figure 5. 2. Press or to select the desired function. See figure 5. 3. Press the MENU-button to select the function that you want to adjust. 4. Press or to change the settings of the current function. 5. When the OSD window is active, it shows the input signal timing. The "H" stands for the horizontal frequency and "V" for the vertical frequency. 6. To exit and save, select the exit function, or leave the monitor alone for 10 seconds. If you want to adjust any other function, repeat steps 2-4. Figure 5 The OSD Message 41L1700-786-1B 英文 9
-
 1
1 -
2
-
3
-
4
-
 5
5 -
 6
6 -
 7
7 -
 8
8 -
 9
9 -
 10
10 -
 11
11 -
 12
12 -
 13
13 -
 14
14 -
 15
15 -
16
-
17
-
18
-
19
 |
 |