Acer AcerPower Sc Power Sc User's Guide - Page 60
Acer AcerPower Sc Manual
 |
View all Acer AcerPower Sc manuals
Add to My Manuals
Save this manual to your list of manuals |
Page 60 highlights
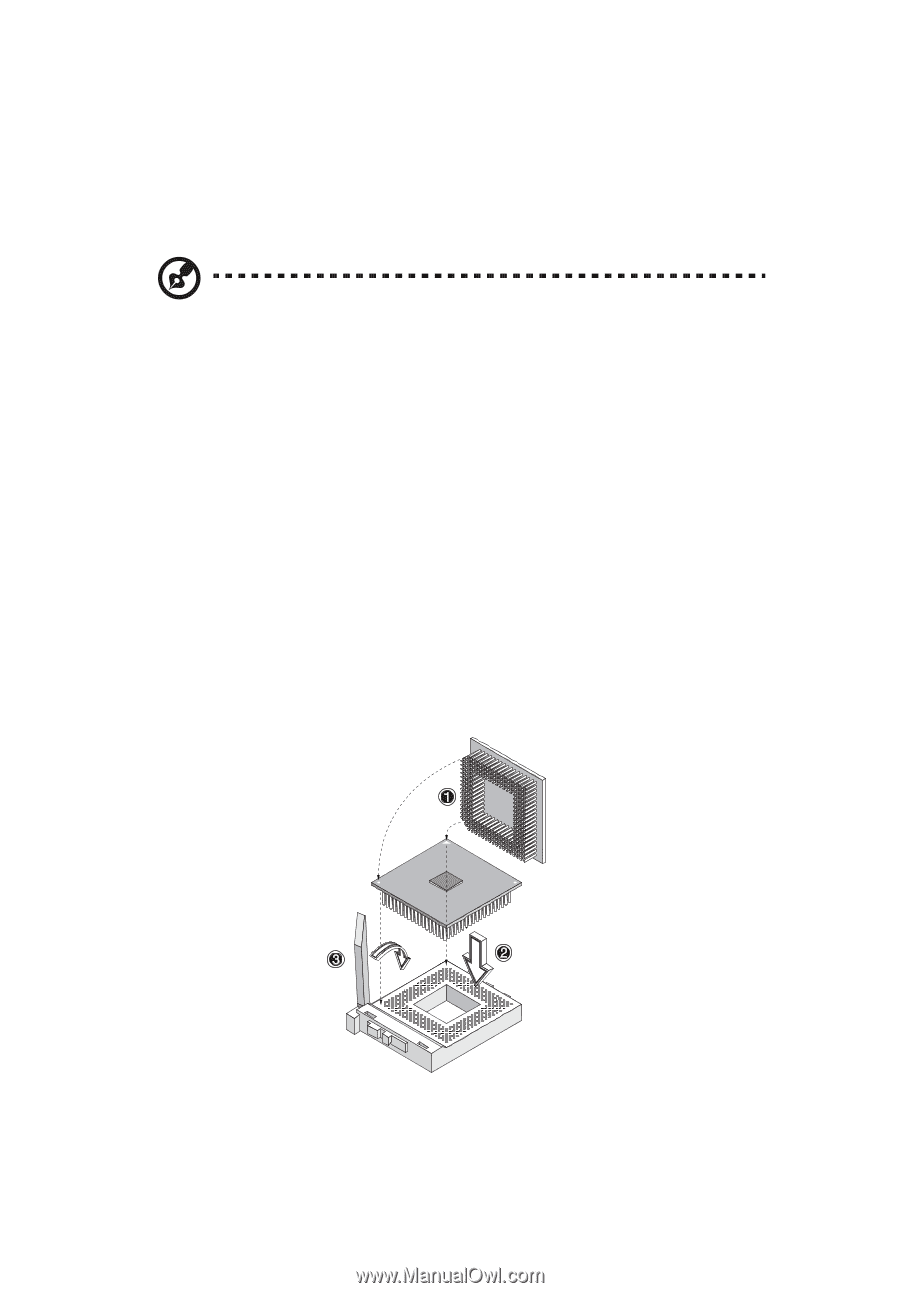
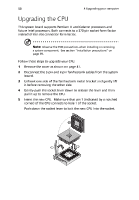
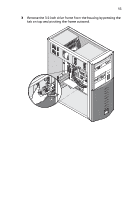
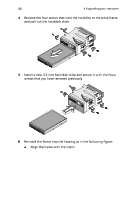
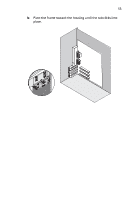
50 4 Upgrading your computer Upgrading the CPU This system board supports Pentium III and Celeron processors and future Intel processors. Both connects to a 370-pin socket form factor instead of the slot connector form factor. Note: Observe the ESD precautions when installing or removing a system component. See section "Installation precautions" on page 39. Follow these steps to upgrade your CPU: 1 2 3 4 5 Remove the cover as shown on page 41. Disconnect the 3-pin and 2-pin fan/heatsink cables from the system board. Unhook one side of the fan/heatsink metal bracket and gently lift it before removing the other side. Gently push the socket lever down to release the lever and then pull it up to remove the CPU. Insert the new CPU. Make sure that pin 1 (indicated by a notched corner) of the CPU connects to hole 1 of the socket. Push down the socket lever to lock the new CPU into the socket.
-
 1
1 -
2
-
3
-
4
-
5
-
6
-
7
-
8
-
9
-
10
-
11
-
12
-
13
-
14
-
15
-
16
-
17
-
18
-
19
-
20
-
21
-
22
-
23
-
24
-
25
-
26
-
27
-
28
-
29
-
30
-
31
-
32
-
33
-
34
-
35
-
36
-
37
-
38
-
39
-
40
-
41
-
42
-
43
-
44
-
45
-
46
-
47
-
48
-
49
-
50
-
51
-
52
-
53
-
54
-
 55
55 -
 56
56 -
 57
57 -
 58
58 -
 59
59 -
 60
60 -
 61
61 -
 62
62 -
 63
63 -
 64
64 -
 65
65 -
66
-
67
-
68
 |
 |