Acer Aspire 4520G Service Guide - Page 72
Removing the Thermal Module and System Fan, Removing the CPU
 |
View all Acer Aspire 4520G manuals
Add to My Manuals
Save this manual to your list of manuals |
Page 72 highlights
Removing the Thermal Module and System Fan 5. Unscrew the four spring screws and remove the two screws fastening the thermal module. 6. Disconnect the system fan cable as shown. 7. Remove the thermal module and system fan. Removing the CPU 8. Use a flat screwdriver to release the CPU lock (Turn counter clockwise). 9. Remove the CPU from the CPU socket carefully. 66 Chapter 3
-
 1
1 -
2
-
3
-
4
-
5
-
6
-
7
-
8
-
9
-
10
-
11
-
12
-
13
-
14
-
15
-
16
-
17
-
18
-
19
-
20
-
21
-
22
-
23
-
24
-
25
-
26
-
27
-
28
-
29
-
30
-
31
-
32
-
33
-
34
-
35
-
36
-
37
-
38
-
39
-
40
-
41
-
42
-
43
-
44
-
45
-
46
-
47
-
48
-
49
-
50
-
51
-
52
-
53
-
54
-
55
-
56
-
57
-
58
-
59
-
60
-
61
-
62
-
63
-
64
-
65
-
66
-
 67
67 -
 68
68 -
 69
69 -
 70
70 -
 71
71 -
 72
72 -
 73
73 -
 74
74 -
 75
75 -
 76
76 -
 77
77 -
78
-
79
-
80
-
81
-
82
-
83
-
84
-
85
-
86
-
87
-
88
-
89
-
90
-
91
-
92
-
93
-
94
-
95
-
96
-
97
-
98
-
99
-
100
-
101
-
102
-
103
-
104
-
105
-
106
 |
 |
66
Chapter 3
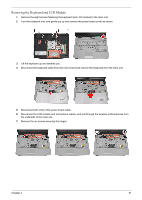
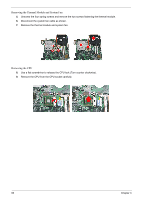
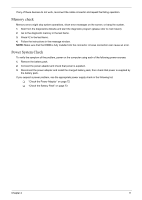
Removing the Thermal Module and System Fan
5.
Unscrew the four spring screws and remove the two screws fastening the thermal module.
6.
Disconnect the system fan cable as shown.
7.
Remove the thermal module and system fan.
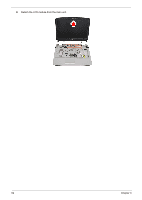
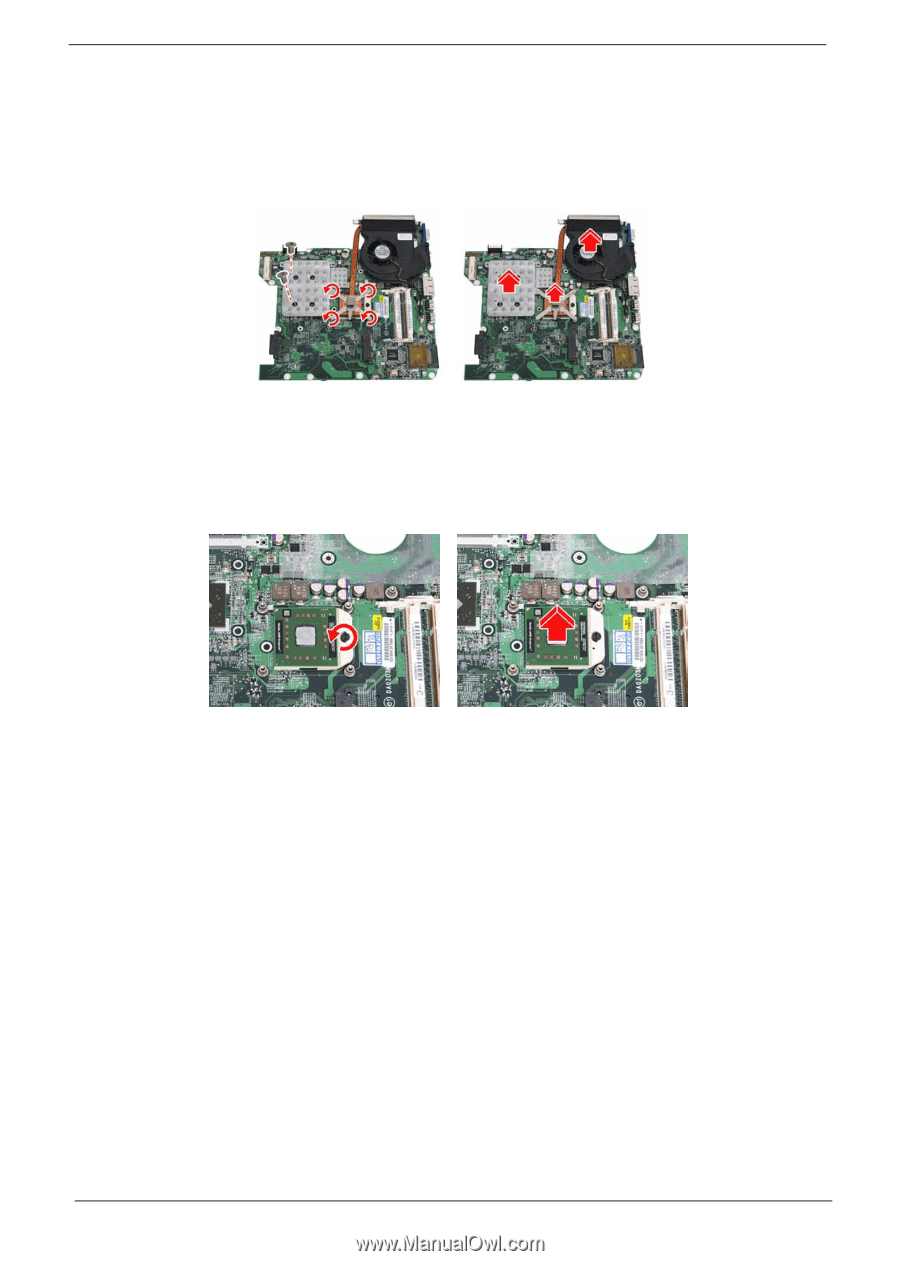
Removing the CPU
8.
Use a flat screwdriver to release the CPU lock (Turn counter clockwise).
9.
Remove the CPU from the CPU socket carefully.