Acer DV550 User Manual - Page 24
Configuration2 Menu
 |
View all Acer DV550 manuals
Add to My Manuals
Save this manual to your list of manuals |
Page 24 highlights
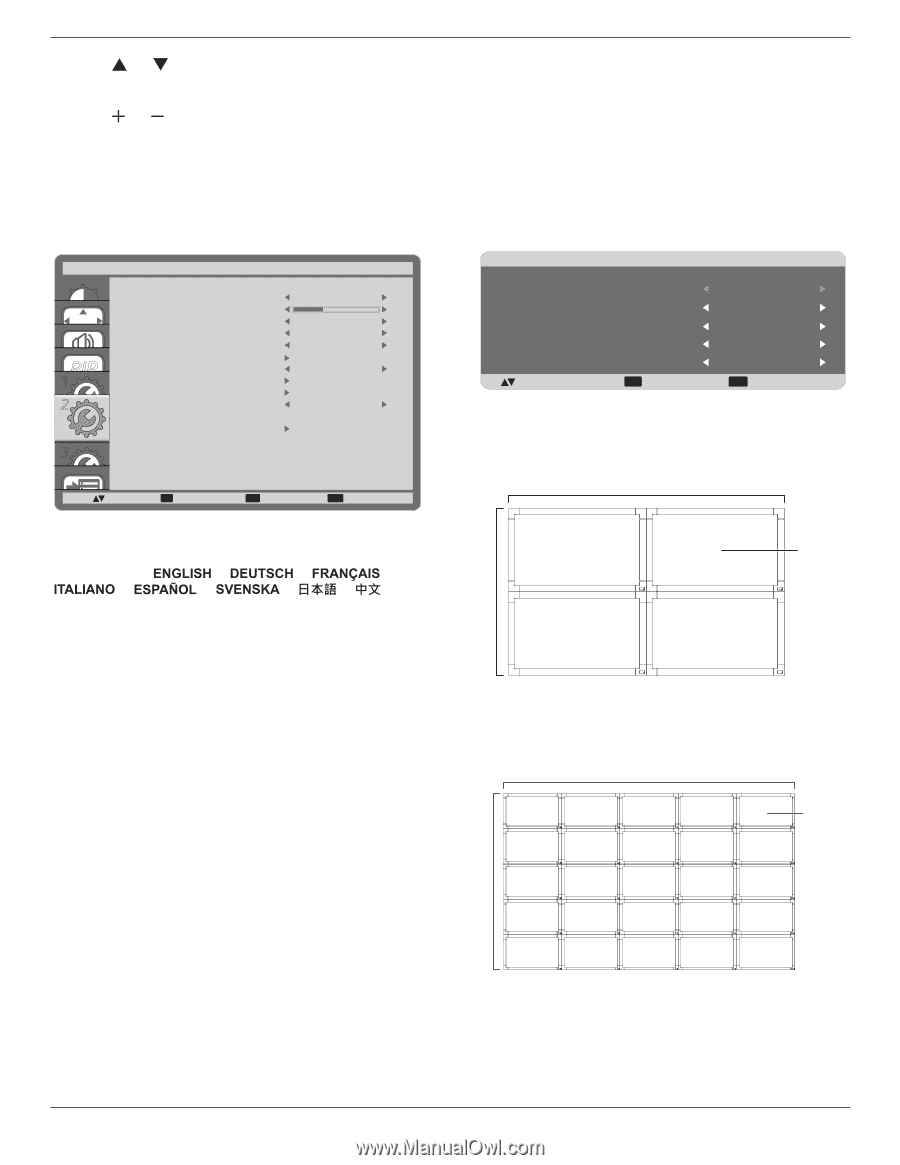
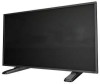
2. Press [ ] or [ ] button to toggle among the {YEAR}, {MONTH}, {DAY}, {HOUR}, {MINUTE}, and {DAYLIGHT SAVING TIME} settings. 3. Press [ ] or [ ] button to adjust all settings except {DAYLIGHT SAVING TIME}. CONFIGURATION1 RESET Reset all settings in the CONFIGURATION1 menu to factory preset values. 4.2.6. CONFIGURATION2 menu CONFIGURATION2 LANGUAGE OFF OSD TURN OFF 45 OSD H POSITION 50 OSD V POSITION 50 INFORMATION OSD 3 SEC. MONITOR INFORMATION PIP MONITOR ID 1 1 IR CONTROL TILING 2 POWER ON DELAY OFF CLOSED CAPTION CONFIGURATION2 RESET 3 :SEL SET :NEXT EXIT :RETURN MENU :EXIT MENU LANGUAGE Select the language used in the OSD menu. The options are: { { } / { } / { } / { } / { } / } / { } / { }. OSD TURN OFF Set the period of time the OSD menu stays on the screen. The options are: {5 ~ 120} seconds. OSD H POSITION Adjust the horizontal position of the OSD menu. OSD V POSITION Adjust the vertical position of the OSD menu. INFORMATION OSD Set the period of time the information OSD displayed on the upper right corner of the screen. The information OSD will display when input signal is changed. The information OSD will remain on the screen with {OFF} selection. The options are: {OFF, 3 SEC. ~ 10 SEC.}. MONITOR INFORMATION Displays the information about your display, including MODEL NAME and SERIAL. MONITOR ID Set the ID number for controlling the display via the RS232C connection. Each display must have a unique ID number when multiple sets of this display are connected. IR CONTROL Select the operation mode of the remote control unit when multiple displays are connected via the RS232C connection. DV420 /DV460 /DV550 • {NORMAL} - All displays can be operated normally by the remote control. • {LOCK} - Lock the remote control function of this display. To unlock, press and hold the [DISPLAY] button on the remote control for 5 (five) seconds. TILING With this function you can create a single large-screen matrix (video wall) that consists of up to 150 sets of this display (up to 15-set at the horizontal and 10 set at the vertical side). This function requires a daisy-chain connection. TILING H MONITORS V MONITORS POSITION FRAME COMP. ENABLE :SEL +-:ADJ EXIT :RETURN 1 1 1 OFF OFF MENU :EXIT MENU Example: 2 x 2 screen matrix (4 displays) H MONITORS = 2 displays V MONITORS = 2 displays H MONITORS V MONITORS 1 2 Position 34 V MONITORS Example: 5 x 5 screen matrix (25 displays) H MONITORS = 5 displays V MONITORS = 5 displays H MONITORS 1 23 4 5 6 7 8 9 10 11 12 13 14 15 16 17 18 19 20 21 22 23 24 25 Position • H MONITORS - Select the number of displays on the horizontal side. • V MONITORS - Select the number of displays on the vertical side. 17
-
 1
1 -
2
-
3
-
4
-
5
-
6
-
7
-
8
-
9
-
10
-
11
-
12
-
13
-
14
-
15
-
16
-
17
-
18
-
 19
19 -
 20
20 -
 21
21 -
 22
22 -
 23
23 -
 24
24 -
 25
25 -
 26
26 -
 27
27 -
 28
28 -
 29
29 -
30
-
31
-
32
-
33
-
34
-
35
-
36
-
37
 |
 |