Acer H277HK User Manual - Page 24
OSD Menu
 |
View all Acer H277HK manuals
Add to My Manuals
Save this manual to your list of manuals |
Page 24 highlights
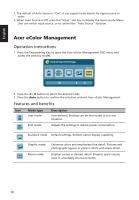
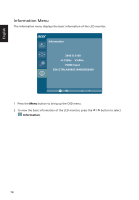
English 6 Brightness: Adjust the brightness from 0 to 100. Note: Adjusts the balance between light and dark shades. 7 Contrast: Adjust the contrast from 0 to 100. Note: Sets the degree of difference between light and dark areas. 8 Colour Temp is for user to adjust the colour temperature from blue light, warm, cool and user. The default value is warm. 9 Gamma mode is for user to adjust Tone of Liminance. The default value is 2.2 (Standard value for Windows) 10 sRGB mode is for user such as DSCs, printers, photographer to get better color matching representation with the peripheral device. 11 Super Sharpness technology can simulate high-resolution images by boosting the pixel density of the original source. It can make the image more sharper and clear. 12 6-axis Saturate: Adjust saturation of red, green, blue, yellow, magenta and cyan 6-axis Hue: Adjust hue for red, green, blue, yellow, magenta and cyan. OSD Menu The OSD menu is used for adjusting the OSD menu location and the timeout setting. OSD OSD Timeout 10 1 Press the Menu button to bring up the OSD menu. 2 Press the < / > button to select OSD and press the Menu button to enter the OSD menu. 3 Press the < / > button to adjust the OSD Timeout (10 ~ 120 seconds), the default is 10 seconds. 12
-
 1
1 -
2
-
3
-
4
-
5
-
6
-
7
-
8
-
9
-
10
-
11
-
12
-
13
-
14
-
15
-
16
-
17
-
18
-
 19
19 -
 20
20 -
 21
21 -
 22
22 -
 23
23 -
 24
24 -
 25
25 -
 26
26 -
 27
27
 |
 |