Acer PREDATOR X34 User Manual - Page 16
Monitor introduction, Connecting the cables, User Controls, External controls
 |
View all Acer PREDATOR X34 manuals
Add to My Manuals
Save this manual to your list of manuals |
Page 16 highlights
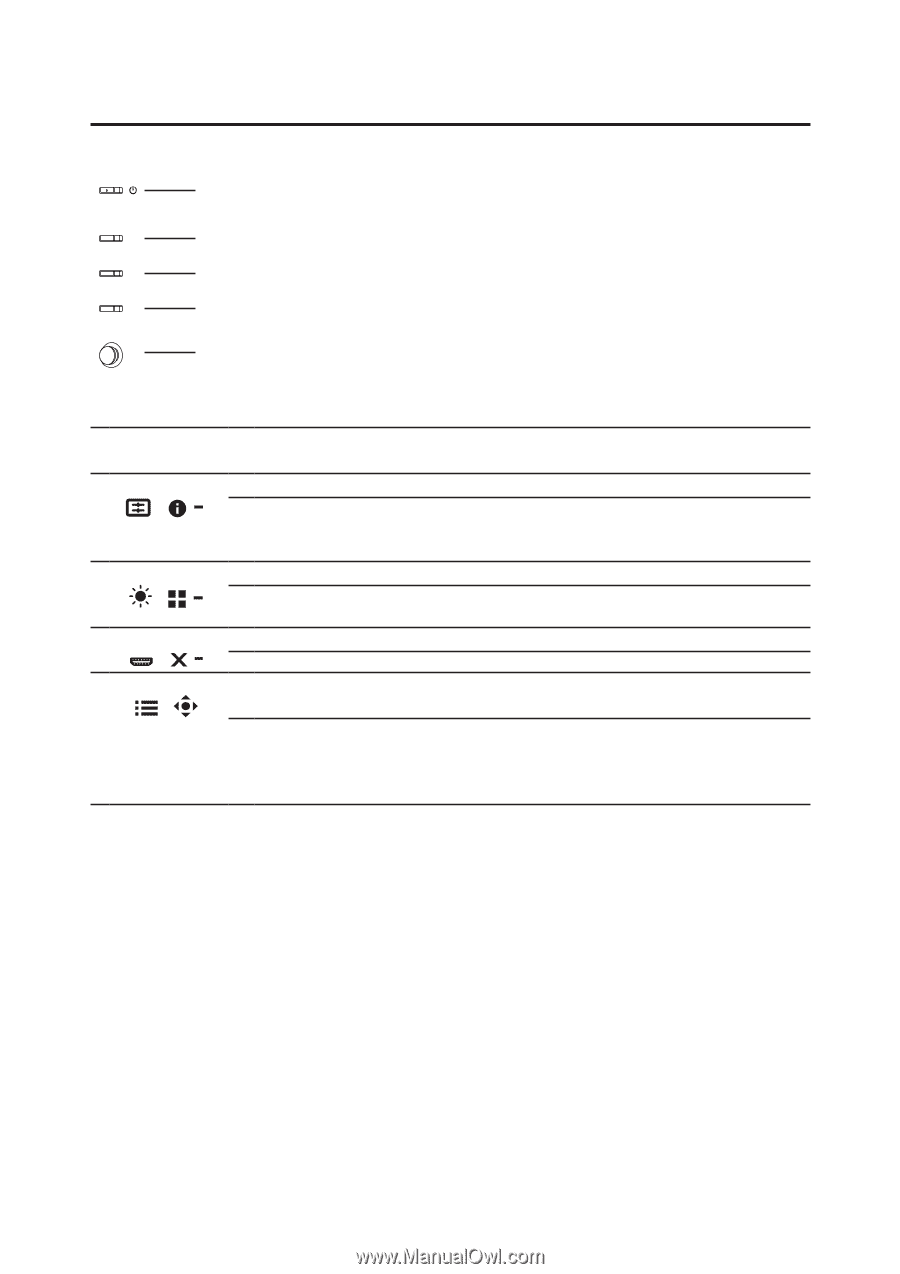
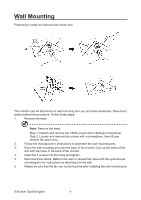
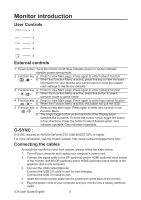
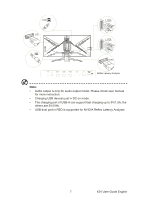
Monitor introduction User Controls 1 2 3 4 5 External controls 1 Power button Turns the monitor on/off. Blue indicates power on. Amber indicates standby/ power saving mode. 2 Function key a. Press to view Main page. Press again to enter hotkey1 function. / b. When the Function Menu is active, press this key to view the basic information for your monitor and current input or reset the custom color settings to the factory defaults. 3 Function key a. Press to view Main page. Press again to enter hotkey2 function. / b. When the Function Menu is active, press this button to select scenario mode or game mode. 4 Function key a. Press to view Main page. Press again to enter Input select function. / b. When the Function Menu is active, this button will quit the OSD. 5 Function key a. Press to view Main page. Press again to enter next function in the / Function Menu. b. The single toggle button on the backside of the Display bezel operates like a joystick. To move the cursor, simply toggle the button in four directions. Press the button to select desired option. Red indicates operable. Grey indicates inoperable. G-SYNC : G-SYNC requires an NVIDIA GeForce GTX 1080 BOOST GPU or higher. For more information, visit the nVidia® website: http://www.nvidia.com/page/home.html Connecting the cables To install the monitor on your host system, please follow the steps below: 1. Turn off your computer and unplug your computer's power cord. 2. Connect the signal cable to the DP (optional) and/or HDMI (optional) input socket of the monitor, and the DP (optional) and/or HDMI (optional) output socket of the graphics card on the computer. 3. Connect the USB Cable(Optional) Connect the USB 3.0 cable to port for fast-charging. Connect the USB 3.0 cable to port. 4. Insert the monitor power cable into the power port at the back of the monitor. 5. Plug the power cords of your computer and your monitor into a nearby electrical outlet. X34 User Guide English 6
-
 1
1 -
2
-
3
-
4
-
5
-
6
-
7
-
8
-
9
-
10
-
 11
11 -
 12
12 -
 13
13 -
 14
14 -
 15
15 -
 16
16 -
 17
17 -
 18
18 -
 19
19 -
 20
20 -
 21
21 -
22
-
23
-
24
-
25
-
26
-
27
-
28
-
29
-
30
-
31
 |
 |