Acer VG271US User Manual - Page 18
Installation
 |
View all Acer VG271US manuals
Add to My Manuals
Save this manual to your list of manuals |
Page 18 highlights
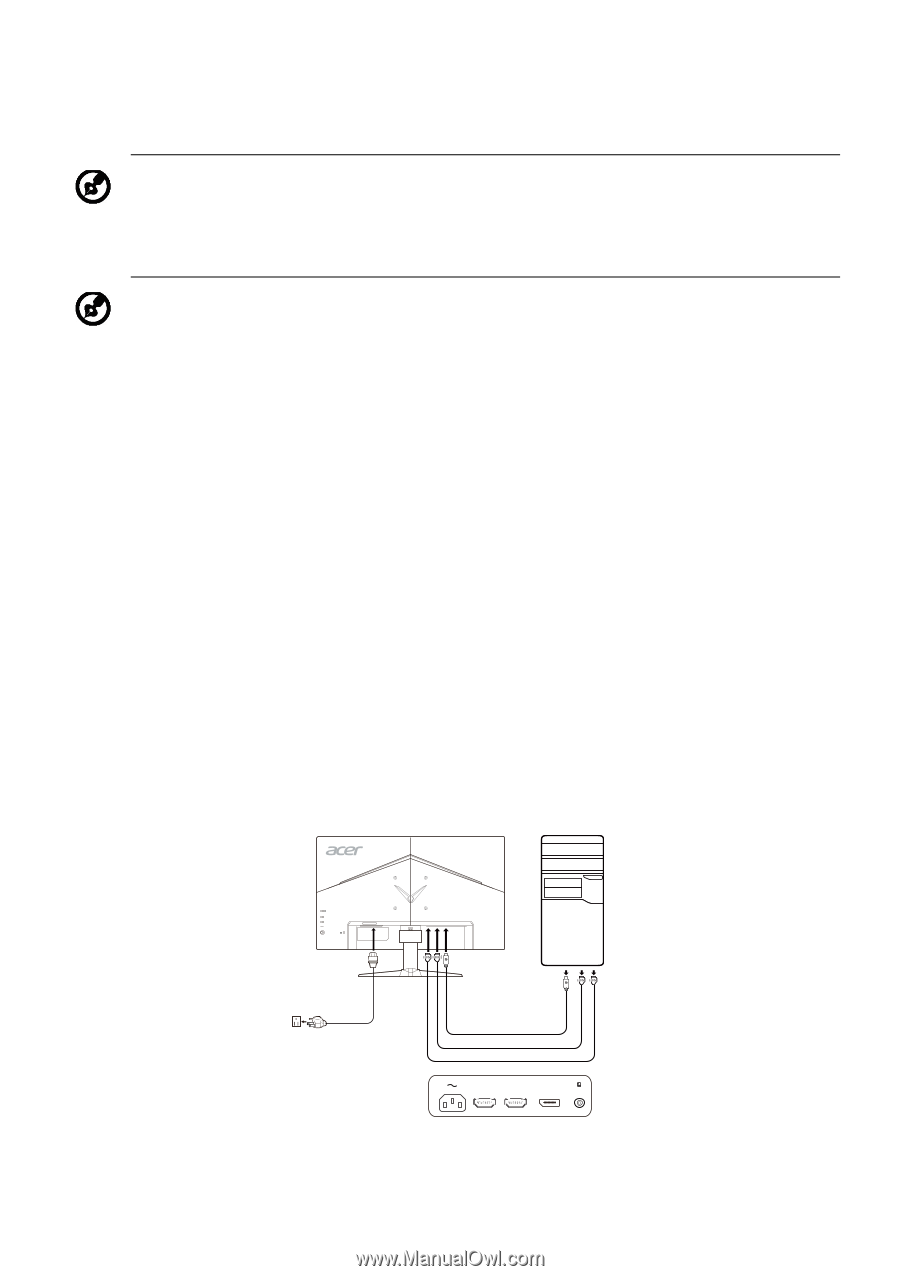
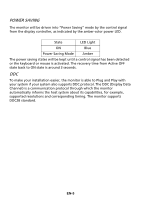
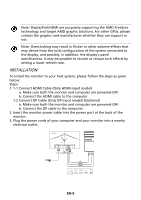
Note: DisplayPort/HDMI are purposely supporting the AMD FreeSync technology and target AMD graphic solutions. For other GPUs, please contact the graphic card manufactures whether they can support or not. Note: Overclocking may result in flicker or other adverse effects that may derive from the total configuration of the system connected to the display, and possibly, in addition, the display's panel specifications. It may be possible to resolve or reduce such effects by setting a lower refresh rate. INSTALLATION To install the monitor to your host system, please follow the steps as given below: Steps 1. 1-1 Connect HDMI Cable (Only HDMI-input model) a. Make sure both the monitor and computer are powered-OFF. b. Connect the HDMI cable to the computer. 1-2 Connect DP Cable (Only DP-input model) (Optional) a. Make sure both the monitor and computer are powered-OFF. b. Connect the DP cable to the computer. 2. Insert the monitor power cable into the power port at the back of the monitor. 3. Plug the power cords of your computer and your monitor into a nearby electrical outlet. DP HDMI HDMI HDMI 1 HDMI 2 DP EN-8
-
 1
1 -
2
-
3
-
4
-
5
-
6
-
7
-
8
-
9
-
10
-
11
-
12
-
 13
13 -
 14
14 -
 15
15 -
 16
16 -
 17
17 -
 18
18 -
 19
19 -
 20
20 -
 21
21 -
 22
22 -
 23
23 -
24
-
25
-
26
-
27
-
28
-
29
-
30
-
31
 |
 |