Adobe 18030211 User Guide - Page 10
Building an InDesign layout, Previewing for more accurate blacks, For On Screen - illustrator
 |
UPC - 718659432812
View all Adobe 18030211 manuals
Add to My Manuals
Save this manual to your list of manuals |
Page 10 highlights
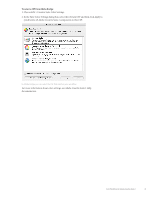
Building an InDesign layout Building an InDesign layout can include creating native content in InDesign, placing artwork from Photoshop or Illustrator, and saving the file. When a new document is created, the InDesign CS2 RGB and CMYK working spaces are assigned to the document as document profiles. When creating color content in InDesign CS2, everything built in CMYK automatically uses the document's CMYK profile. InDesign CS2 uses the same profiles as Photoshop CS2 and Adobe Illustrator CS2, so content with the same CMYK values appears the same in each application. Note: The CMYK policy, Preserve Numbers (Ignore Linked Profiles), ensures that all CMYK content uses the InDesign CMYK document profile. Using the same CMYK profile helps prevent unwanted CMYK color conversions that were possible when Color Management was selected in earlier versions of Adobe publishing applications. When you save a file, InDesign automatically embeds the document RGB and CMYK color profiles and the Preserve Numbers (Ignore Linked Profiles) CMYK policy. That way, any InDesign CS2 user will have the color data needed for accurate viewing and color conversions the next time the file is opened. Previewing for more accurate blacks The improved black preview feature in Adobe Creative Suite 2 lets you choose how to view and print black objects in Illustrator and InDesign. While you can still view 100% K objects as a dark, rich black (the default in earlier versions of InDesign and Illustrator when Color Management was turned off), you can now also choose to view black objects more accurately, seeing the difference between 100% K and rich black. Note: You can still see the difference between 100% K black and a rich black in Photoshop CS2. To preview blacks more accurately in Illustrator CS2 or InDesign CS2: 1. In the Preferences dialog box, choose Appearance of Black from the list on the left. 2. For On Screen, select either Display All Blacks Accurately or Display All Blacks as Rich Black. Note: Display All Blacks Accurately shows you the difference between 100% K and a rich black. If you keep the default selection, Display All Blacks as Rich Black, both blacks appear the same. In InDesign CS2, you can select how you want your blacks to appear on your monitor and when printed to RGB composite printers. Color Workflows for Adobe Creative Suite 2 8


