Alpine CDA-9886 User Manual - Page 21
Setup - ic off
 |
View all Alpine CDA-9886 manuals
Add to My Manuals
Save this manual to your list of manuals |
Page 21 highlights
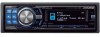
SETUP You can flexibly customize the unit to suit your own preferences and usage. From the SETUP menu, General Setting, Display Setting, etc., can be modified. SOURCE/ Rotary encoder BAND /ENT /ESC F/SETUP Use steps 1 to 5 to select one of the SETUP modes to modify. See the applicable section below for details about the selected SETUP item. 1 Press and hold F/SETUP for at least 2 seconds to activate the SETUP selection mode. 2 Turn the Rotary encoder to select the desired item, and then press /ENT. Bluetooth*1 HD Radio*4 General Display Bluetooth (e.g. Select General) XM*2/SIRIUS*3 *1 Displayed only when INT Mute is OFF and the mode is set to other than Bluetooth Audio. *2 Only when XM Radio is connected. For the XM Radio setting, refer to "SAT Radio Receiver (Optional)" (page 22). *3 Only when SIRIUS Radio is connected. For the XM Radio setting, refer to "SAT Radio Receiver (Optional)" (page 22). *4 Only when HD Radio is connected. 3 Turn the Rotary encoder to select a setting item, and then press /ENT. (e.g. Select AUX IN) Bluetooth: Bluetooth IN General: Birthday Set Clock Mode Clock Adjust*5 Calendar Play Mode Beep INT Mute*6 AUX+ Setup AUX+ Name*7 AUX IN GAIN*7 Digital AUX D.AUX Name*8 AUX IN AUX Name*9 Changer Name Power IC Language Set Demo Birthday Set Display: Dimmer Dimmer Level Font Select BGV Select Scroll Type Text Scroll Opening MSG Dimmer XM: XM ADF SIRIUS: Game Alert HD Radio: Station Call Digital Seek Station Call *5 Refer to "Setting the Time and Calendar" (page 8). *6 Displayed only when Bluetooth IN is OFF. *7 Displayed only when AUX+ is ON. *8 Displayed only when Digital AUX is ON. *9 Displayed only when AUX IN is ON. 4 Turn the Rotary encoder to change the setting, and then press /ENT. (e.g. Select AUX IN ON or AUX IN OFF) 5 Press and hold F/SETUP for at least 2 seconds to return to normal mode. • Pressing /ESC returns to the previous SETUP mode. • If no operation is performed for 60 seconds, SETUP is canceled. Bluetooth Setting Select Bluetooth from the setup main menu in step2 above. If an optional Bluetooth Box (KCE-300BT) is connected, you can place a hands-free call by a Bluetooth- equipped mobile phone. Make this setting when the Bluetooth Box (KCE-300BT) is connected and the Bluetooth function is used. For details, refer to the Owner's Manual of the optional Bluetooth Box (KCE-300BT). Setting the Bluetooth IN Connection Bluetooth IN ADAPTER / Bluetooth IN OFF (Initial Setting) Set ADAPTER when the Bluetooth Box is connected. • The PHONE/VOICE DIAL button can be used only when the optional Bluetooth Box (KCE-300BT) is connected. General Setting General is selected on the setup main menu in step 2. Birthday Opening Message Setting (Birthday Set) mm/dd By inputting your birthday details, a message can be displayed on that day. Turn the Rotary encoder to set "mm" (Month), and then press /ENT. Turn the Rotary encoder again to set "dd" (Date). Setting the Clock Display (Clock Mode) AM (Before noon) 12:00 (12-hour) (Initial setting) / 00:00 (24-hour) You can select the clock display type, 12-hour or 24-hour, depending on your preference. Setting of Calendar Display Pattern Switching (Calendar) dd/mm/yyyy / yyyy/mm/dd / mm/dd/yyyy (Initial setting) You can switch the calendar display pattern to be shown when the time is displayed. yyyy : shows the year mm : shows the month dd : shows the day ex. dd/mm/yyyy 25/12/2007 Playing MP3/WMA/AAC Data (Play Mode) CD-DA (Initial setting) / CDDA&MP3/WMA This unit can play back CDs containing both CD and MP3 /WMA/AAC data (created in Enhanced CD (CD Extra) format). However, in some situations, playback of an enhanced CD may be difficult. In this case, you can select playback of a single session only, containing the CD data. When a disc contains both CD and MP3/WMA/AAC data, playback starts from the CD data portion of the disc. CD-DA: Only the CD data in Session 1 can be played back. CDDA&MP3/WMA: CD data, MP3/WMA/AAC files in mixed mode, and multi-session discs can be played back. • Perform this setting before inserting a disc. If a disc has already been inserted, remove it first. (If you use an MP3 changer, you have to change discs.) 19-EN
-
 1
1 -
2
-
3
-
4
-
5
-
6
-
7
-
8
-
9
-
10
-
11
-
12
-
13
-
14
-
15
-
 16
16 -
 17
17 -
 18
18 -
 19
19 -
 20
20 -
 21
21 -
 22
22 -
 23
23 -
 24
24 -
 25
25 -
 26
26 -
27
-
28
-
29
-
30
-
31
-
32
-
33
-
34
-
35
-
36
-
37
-
38
-
39
-
40
-
41
-
42
-
43
-
44
-
45
-
46
-
47
-
48
-
49
-
50
-
51
-
52
-
53
-
54
-
55
-
56
-
57
-
58
-
59
-
60
-
61
-
62
-
63
-
64
-
65
-
66
-
67
-
68
-
69
-
70
-
71
-
72
-
73
-
74
-
75
-
76
-
77
-
78
-
79
-
80
-
81
-
82
-
83
-
84
-
85
-
86
-
87
-
88
-
89
-
90
-
91
-
92
-
93
-
94
-
95
-
96
-
97
-
98
-
99
-
100
-
101
-
102
-
103
-
104
-
105
-
106
-
107
-
108
-
109
-
110
-
111
-
112
-
113
-
114
-
115
-
116
-
117
-
118
-
119
-
120
-
121
-
122
-
123
-
124
-
125
-
126
-
127
-
128
-
129
-
130
-
131
-
132
-
133
-
134
-
135
-
136
-
137
-
138
-
139
-
140
-
141
-
142
-
143
-
144
-
145
-
146
-
147
-
148
-
149
-
150
-
151
-
152
 |
 |
