Alpine DPR-RDS1 Owner's Manual (english/french) - Page 3
Step 3: Install the DPR-RDS1 in the vehicle continued - ipod adapter
 |
UPC - 793276401755
View all Alpine DPR-RDS1 manuals
Add to My Manuals
Save this manual to your list of manuals |
Page 3 highlights
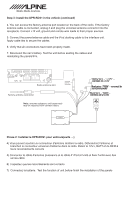
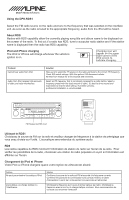
Step 3: Install the DPR-RDS1 in the vehicle (continued) 4. You can access the factory antenna port located on the back of the radio. If the factory antenna cable is connected, unplug it and plug the universal antenna connector into the receptacle. Connect +12 volt, ground and remote wire leads to their proper sources. 5. Connect the power/antenna cable and the iPod docking cable to the interface unit. Apply cable ties to secure the cables. 6. Verify that all connections have been properly made. 7. Reconnect the car's battery. Test the unit before seating the cables and reinstalling the panels/trim. Radio antenna port universal antenna connector factory antenna connector Note: antenna adapters sold separately may be required with certain radios. REM GND Yellow wire - "+12V" connect to +12V +12V Red wire - "REM" - connect to switched power Black wire - "GND" connect to ground Phase 2: Installez le DPR-RDS1 pour véhicule(suite ...) 4) Vous pouvez accéder au connecteur d'antenne derrière la radio. Débranchez l'antenne et branchez le connecteur universel d'antenne dans la radio. Reliez le 12V+, BATT et de REM à leurs raccordements corrects 5) Connectez le câble d'antenne /puissance et le câble d' iPod à l'unité et fixez l'unité avec des serres-câble 6) Inspectez que les raccordements sont corrects 7) Connectez la batterie. Test the function of unit before finish the installation of the panels
-
 1
1 -
 2
2 -
 3
3 -
 4
4
 |
 |
