Alpine UTE-62BT Owners Manual - Page 9
Getting Started - installation manual
 |
View all Alpine UTE-62BT manuals
Add to My Manuals
Save this manual to your list of manuals |
Page 9 highlights
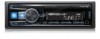
Getting Started CDE-163BT /SOURCE Rotary encoder /SETUP /ENTER e / UTE-62BT /SOURCE Rotary encoder /ENTER AUDIO/SETUP /DIM. Demonstration Function This unit will enter a demonstration mode to display its various functions. When Demo mode is set to ON, the unit starts the demonstration if there is no operation for 30 seconds. Turning the Demonstration mode Off There are two methods to close the demonstration mode. Method 1: When installing this unit in a car for the first time, the DEMO OFF screen will be displayed for 20 seconds after turning on the unit. Press ENTER within 20 seconds to put the demonstration mode into STANDBY*. Method 2: Setting DEMO MODE to STANDBY* or OFF*. * For details about STANDBY and OFF, please refer to "Demonstration" on page 26. Source Selection e / Note • The buttons on this Owner's Manual use CDE-163BT as an example. Accessory List • Head Unit 1 • Power Cable 1 • Microphone 1 • Mounting Sleeve 1 • Carrying Case 1 • Bracket Key 2 • Screw (M5 × 8 4 • Owner's Manual 1 set Press VSOURCE to change the source. TUNER SIRIUS XM*1 DISC*2 USB AUDIO/iPod*3 BT AUDIO*4 PANDORA*5 AUXILIARY*6 TUNER *1 Displayed only when a SiriusXM Tuner is connected. *2 CDE-163BT only. *3 Displayed only when the iPod/iPhone is connected. *4 Displayed only when BT IN is set to ON, refer to "Setting the Bluetooth Connection (BT IN)" on page 29. *5 Not displayed when ALPINE APP is set to OFF, refer to "Setting the communication mode with a Smartphone (ALPINE APP)" on page 28. *6 Refer to "Using the Front AUX Input Terminal" on page 23. Detaching and Attaching the Front Panel Detaching Turning Power On and Off Press t to turn on the unit. Note • The unit can be turned on by pressing any other button except * and e (Release). * Only for CDE-163BT. Press and hold t for at least 2 seconds to turn off the unit. Note • The first time power is turned on, the volume will start from level 0. Notes • The front panel may become hot in normal usage (especially the connector terminals on the back of the front panel). This is not a malfunction. • To protect the front panel, place it in the supplied carrying case. • When detaching the front panel, do not apply excessive force as it may result in malfunction. 9-EN
-
 1
1 -
2
-
3
-
 4
4 -
 5
5 -
 6
6 -
 7
7 -
 8
8 -
 9
9 -
 10
10 -
 11
11 -
 12
12 -
 13
13 -
 14
14 -
15
-
16
-
17
-
18
-
19
-
20
-
21
-
22
-
23
-
24
-
25
-
26
-
27
-
28
-
29
-
30
-
31
-
32
-
33
-
34
-
35
-
36
-
37
-
38
-
39
-
40
-
41
-
42
-
43
-
44
-
45
-
46
-
47
-
48
-
49
-
50
-
51
-
52
-
53
-
54
-
55
-
56
-
57
 |
 |
