Amana AGR5630BD Installation Instruction - Page 19
To Convert Oven Broil Burner LP Gas to Natural Gas
 |
View all Amana AGR5630BD manuals
Add to My Manuals
Save this manual to your list of manuals |
Page 19 highlights
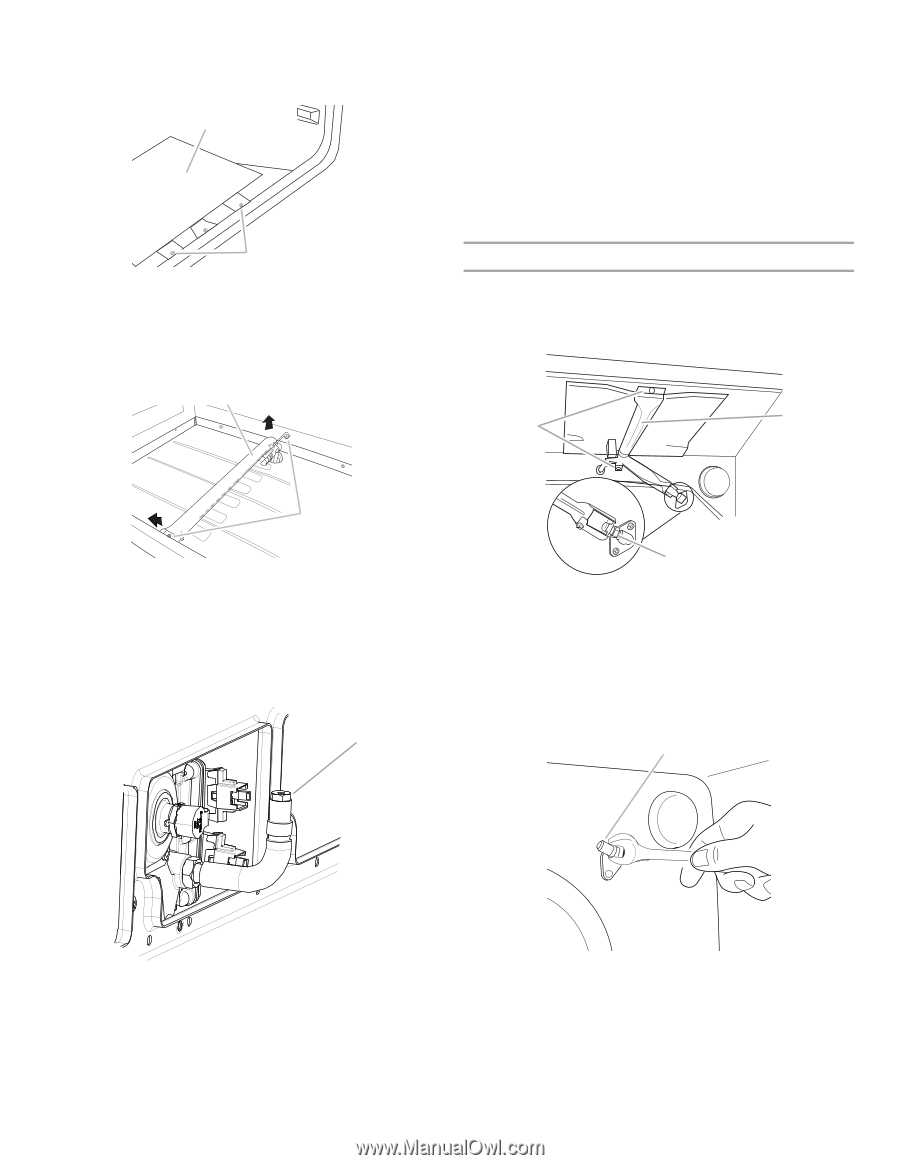
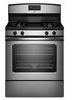
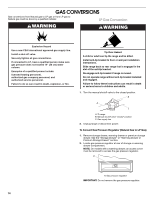
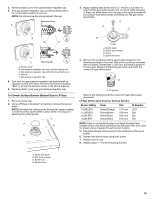
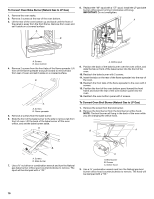
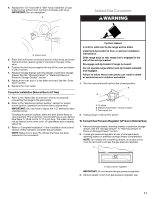
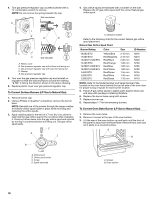
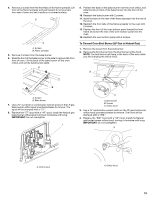
4. Remove 2 screws from the front tabs of the flame spreader. Lift front of the flame spreader and pull forward to remove tabs from rear of oven and set it aside on a covered surface. B A A. Screws B. Flame spreader 5. Remove 2 screws from the bake burner. 6. Slide the front of the bake burner to the side to remove tab from front of oven. Lift the back of the bake burner off the oven orifice, and set the bake burner aside. B 9. Position the back of the bake burner over the oven orifice, and slide the tab on front of the bake burner into the front of the oven. 10. Reattach the bake burner with 2 screws. 11. Insert the tabs on the rear of the flame spreader into the rear of the oven. 12. Reattach the front tabs of the flame spreader to the oven with 2 screws. 13. Position the front of the oven bottom panel toward the front frame and lower the rear of the oven bottom panel into the oven. 14. Reattach the oven bottom panel with 2 screws. To Convert Oven Broil Burner (LP Gas to Natural Gas) 1. Remove the screw from the broil burner. 2. Remove the broil burner from the broil burner orifice hood. NOTE: The broil burner will hang in the back of the oven while you are changing the orifice hood. B A A A. Screws B. Bake burner 7. Use a ³⁄₈" nut driver or combination wrench and turn the LP gas bake burner orifice spud counterclockwise to remove. The spud will be stamped with a "57." 8. Replace the "57" spud with a "49" spud. Install the Natural gas bake burner orifice spud, turning it clockwise until snug. IMPORTANT: Do not overtighten. A C A. Broil burner B. Screws C. Orifice hood 3. Use a ³⁄₈" combination wrench and turn the LP gas broil burner orifice hood counterclockwise to remove. The hood will be stamped with a "090." 4. Replace the "090" hood with a "53" hood. Install the Natural gas broiler burner orifice hood, turning it clockwise until snug. IMPORTANT: Do not overtighten. A x.xx A. Orifice spud A. Orifice hood 19
-
 1
1 -
2
-
3
-
4
-
5
-
6
-
7
-
8
-
9
-
10
-
11
-
12
-
13
-
 14
14 -
 15
15 -
 16
16 -
 17
17 -
 18
18 -
 19
19 -
 20
20
 |
 |