Ariens Pro Track 28 Owners Manual - Page 8
Assembly, Package Contents
 |
View all Ariens Pro Track 28 manuals
Add to My Manuals
Save this manual to your list of manuals |
Page 8 highlights
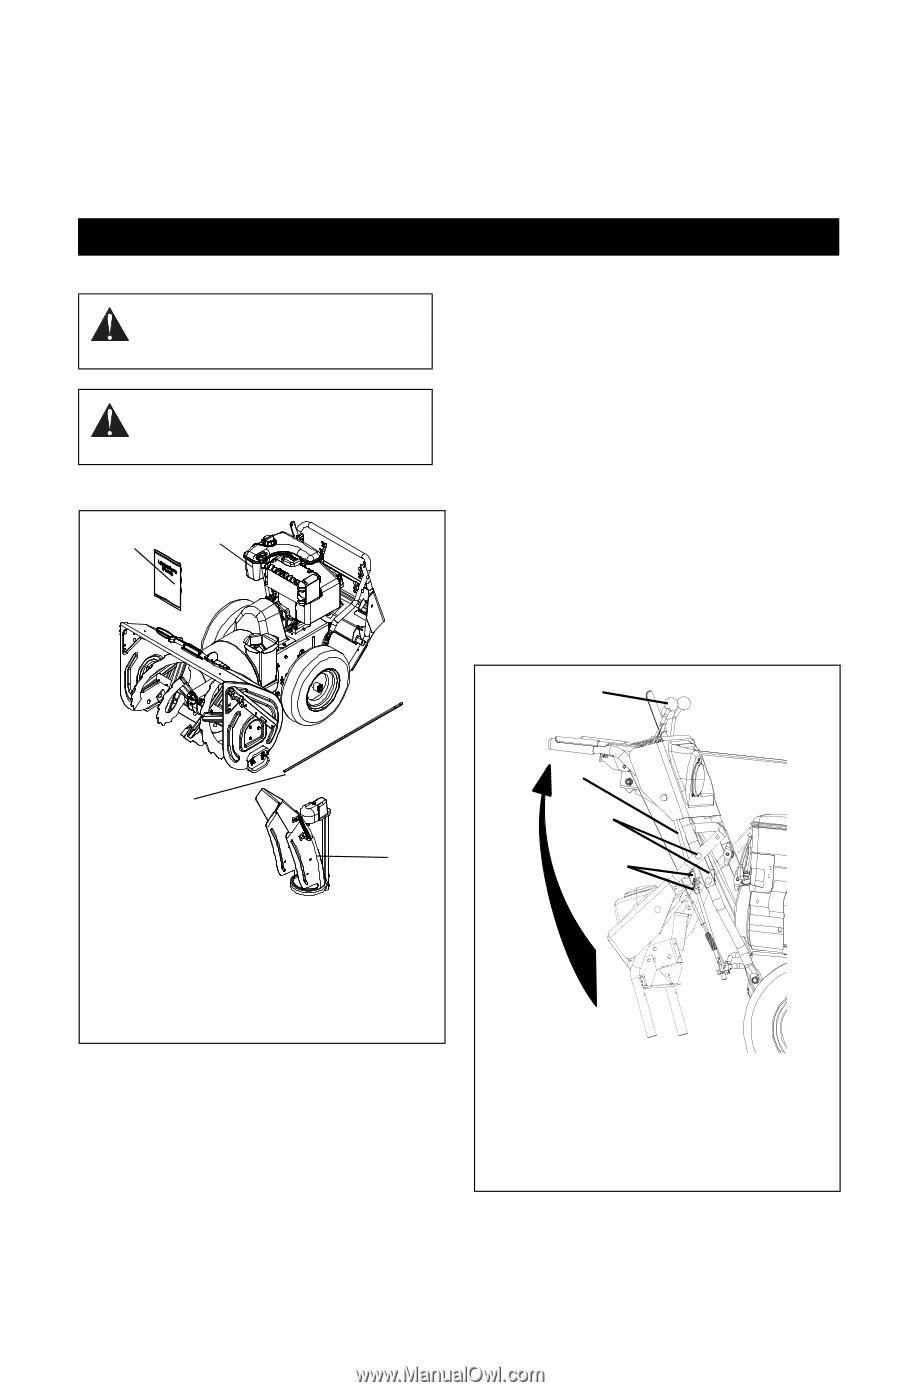
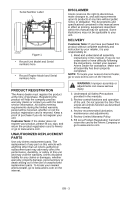
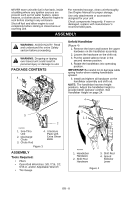
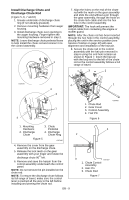
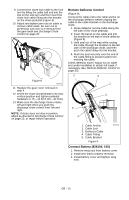
NEVER store unit with fuel in fuel tank, inside a building where any ignition sources are present such as hot water heaters, space heaters, or clothes dryers. Allow the engine to cool before storing in any enclosure. Shut off fuel and allow engine to cool completely before storing in closed area or covering unit. For extended storage, clean unit thoroughly. See Engine Manual for proper storage. Use only attachments or accessories designed for your unit. Check components frequently. If worn or damaged, replace with manufacturer's recommended parts. ASSEMBLY WARNING: AVOID INJURY. Read and understand the entire Safety section before proceeding. WARNING: Dropping or tipping over boxed unit could result in personal injury or damage to unit. PACKAGE CONTENTS 4 1 Unfold Handlebar (Figure 4) 1. Remove the lower and loosen the upper hardware on the handlebar assembly. 2. Loosen the hardware on the shift rod. 3. Put the speed selector lever in the second reverse position. 4. Rotate the handlebars into operating position. IMPORTANT: Be careful not to damage cable spring hooks when rotating handlebars upward. 5. Install and tighten all hardware on the handlebar assembly and shift rod. NOTE: The handlebar has two height positions. Adjust the handlebar height to provide better operator comfort. See Handlebar Height on page 24. 4 3 2 OS7020 1. Sno-Thro Unit 2. Discharge Chute 3. Chute Rod 4. Literature Pack with Extra Shear Bolts Figure 3 ASSEMBLY Tools Required: • Pliers • Open-End Wrenches: 3/8, 7/16, 1/2, 9/16 in. and/or Adjustable Wrench • Tire Gauge 3 1, 2 2 OS7030 1. Handlebar Hardware 2. Shift Rod Hardware 3. Shift Rod 4. Speed Selector Lever Figure 4 GB - 8
-
 1
1 -
2
-
 3
3 -
 4
4 -
 5
5 -
 6
6 -
 7
7 -
 8
8 -
 9
9 -
 10
10 -
 11
11 -
 12
12 -
 13
13 -
14
-
15
-
16
-
17
-
18
-
19
-
20
-
21
-
22
-
23
-
24
-
25
-
26
-
27
-
28
-
29
-
30
-
31
-
32
-
33
-
34
-
35
-
36
-
37
-
38
-
39
-
40
 |
 |