Asus CUR-DLS CUR-DLS User Manual - Page 73
Driver Installation
 |
View all Asus CUR-DLS manuals
Add to My Manuals
Save this manual to your list of manuals |
Page 73 highlights
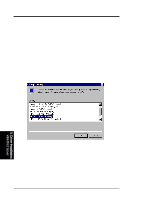
5. Motherboard Driver Installation 4. Type D:\LAN (for ASUS Driver Support CD) or A:\ (for floppy) in the dialog box and click OK. Then follow the prompts to complete installation. When the adapter is added you'll see a new adapter "Intel(R) PRO Adapter" listed in the Network adapters list. 5. Click Next to finish and configure any protocols as prompted. C. Existing System Installation 1. Double-click the Network icon in the Control Panel. 2. Select the Adapter tab. 3. Click Add. You'll see a list of adapters. 4. Don't select an adapter from this list. Instead, insert the PRO/100+ adapter diskette or ASUS Driver Support CD and click Have Disk. 5. Type D:\LAN (for CD) or A:\ (for floppy) in the dialog box and click OK. Then follow the prompts to complete installation. When the adapter is added you'll see a new adapter listed in the Network adapters list. 5. Driver Installation WinNT4.0 Server 6. Click OK to finish and configure any protocols as prompted. 7. Restart Windows NT when prompted. ASUS CUR-DLS User's Manual 73
-
 1
1 -
2
-
3
-
4
-
5
-
6
-
7
-
8
-
9
-
10
-
11
-
12
-
13
-
14
-
15
-
16
-
17
-
18
-
19
-
20
-
21
-
22
-
23
-
24
-
25
-
26
-
27
-
28
-
29
-
30
-
31
-
32
-
33
-
34
-
35
-
36
-
37
-
38
-
39
-
40
-
41
-
42
-
43
-
44
-
45
-
46
-
47
-
48
-
49
-
50
-
51
-
52
-
53
-
54
-
55
-
56
-
57
-
58
-
59
-
60
-
61
-
62
-
63
-
64
-
65
-
66
-
67
-
 68
68 -
 69
69 -
 70
70 -
 71
71 -
 72
72 -
 73
73 -
 74
74 -
 75
75 -
 76
76 -
 77
77 -
 78
78 -
79
-
80
-
81
-
82
-
83
-
84
-
85
-
86
-
87
-
88
-
89
-
90
-
91
-
92
-
93
-
94
-
95
-
96
-
97
-
98
-
99
-
100
-
101
-
102
-
103
-
104
-
105
-
106
-
107
-
108
-
109
-
110
 |
 |
