Asus ET2012AGTB User's Manual for English Edition - Page 31
Asus ET2012AGTB Manual
 |
View all Asus ET2012AGTB manuals
Add to My Manuals
Save this manual to your list of manuals |
Page 31 highlights
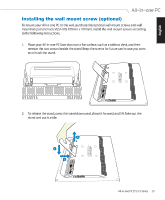
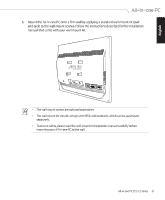
• The wall mount screws are optional accessories. • The wall mount kit should comply with VESA 100 standards, which can be purchased separately. • To ensure safety, please read the wall mount kit installation manual carefully before mounting your All-in-one PC to the wall. All-in-one PC ET2012 Series 31 English 5. Mount the All-in-one PC onto a firm wall by applying a standard wall mount kit (pad and rack) to the wall mount screws. Follow the instructions described in the installation manual that came with your wall mount kit.
-
 1
1 -
2
-
3
-
4
-
5
-
6
-
7
-
8
-
9
-
10
-
11
-
12
-
13
-
14
-
15
-
16
-
17
-
18
-
19
-
20
-
21
-
22
-
23
-
24
-
25
-
 26
26 -
 27
27 -
 28
28 -
 29
29 -
 30
30 -
 31
31 -
 32
32 -
 33
33 -
 34
34 -
 35
35 -
 36
36 -
37
-
38
-
39
-
40
-
41
-
42
-
43
-
44
 |
 |
English
31
All-in-one PC ET2012 Series
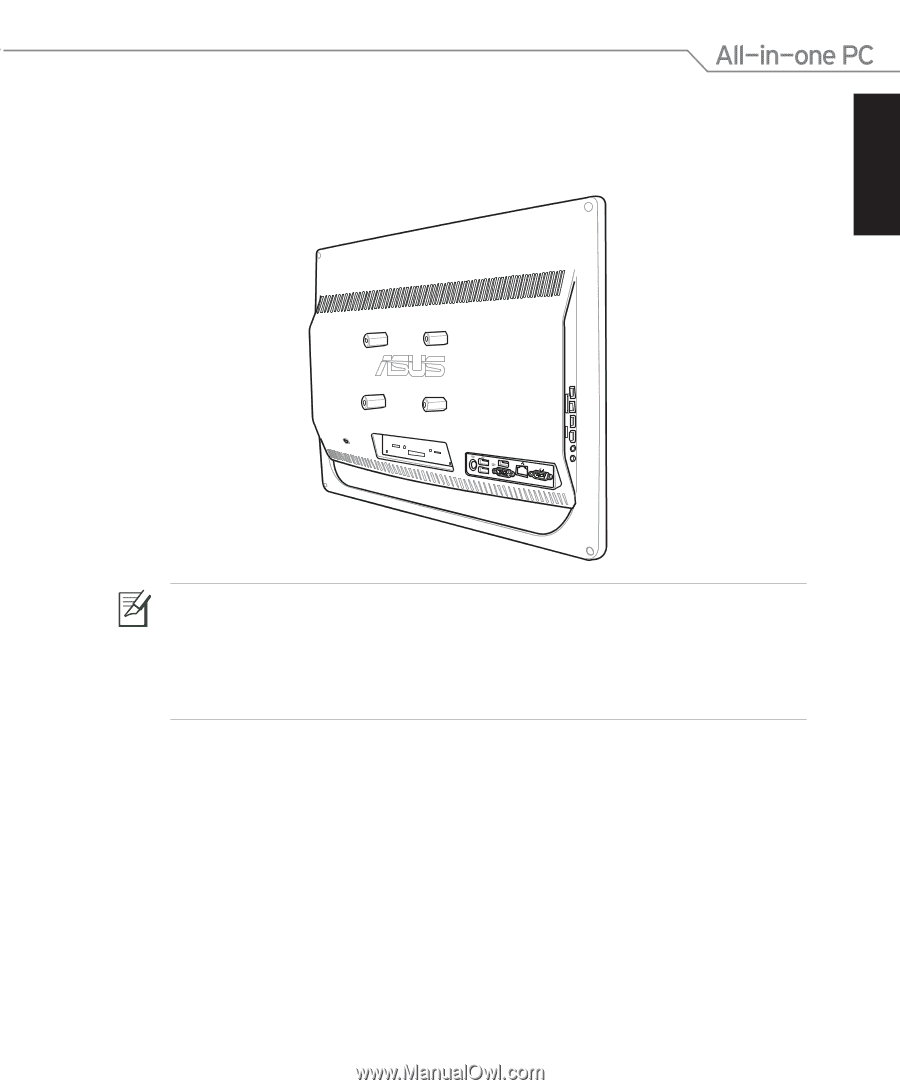
5.
Mount the All-in-one PC onto a Frm wall by applying a standard wall mount kit (pad
and rack) to the wall mount screws. ±ollow the instructions described in the installation
manual that came with your wall mount kit.
•
The wall mount screws are optional accessories.
•
The wall mount kit should comply with VESA 100 standards, which can be purchased
separately.
•
To ensure safety, please read the wall mount kit installation manual carefully before
mounting your All-in-one PC to the wall.