Asus Eee PC 1008HA User Manual - Page 13
Bottom Side, Do Not Put The Eee Pc On Your, Lap Or Other Parts Of The Body To Avoid Injury - reset
 |
View all Asus Eee PC 1008HA manuals
Add to My Manuals
Save this manual to your list of manuals |
Page 13 highlights
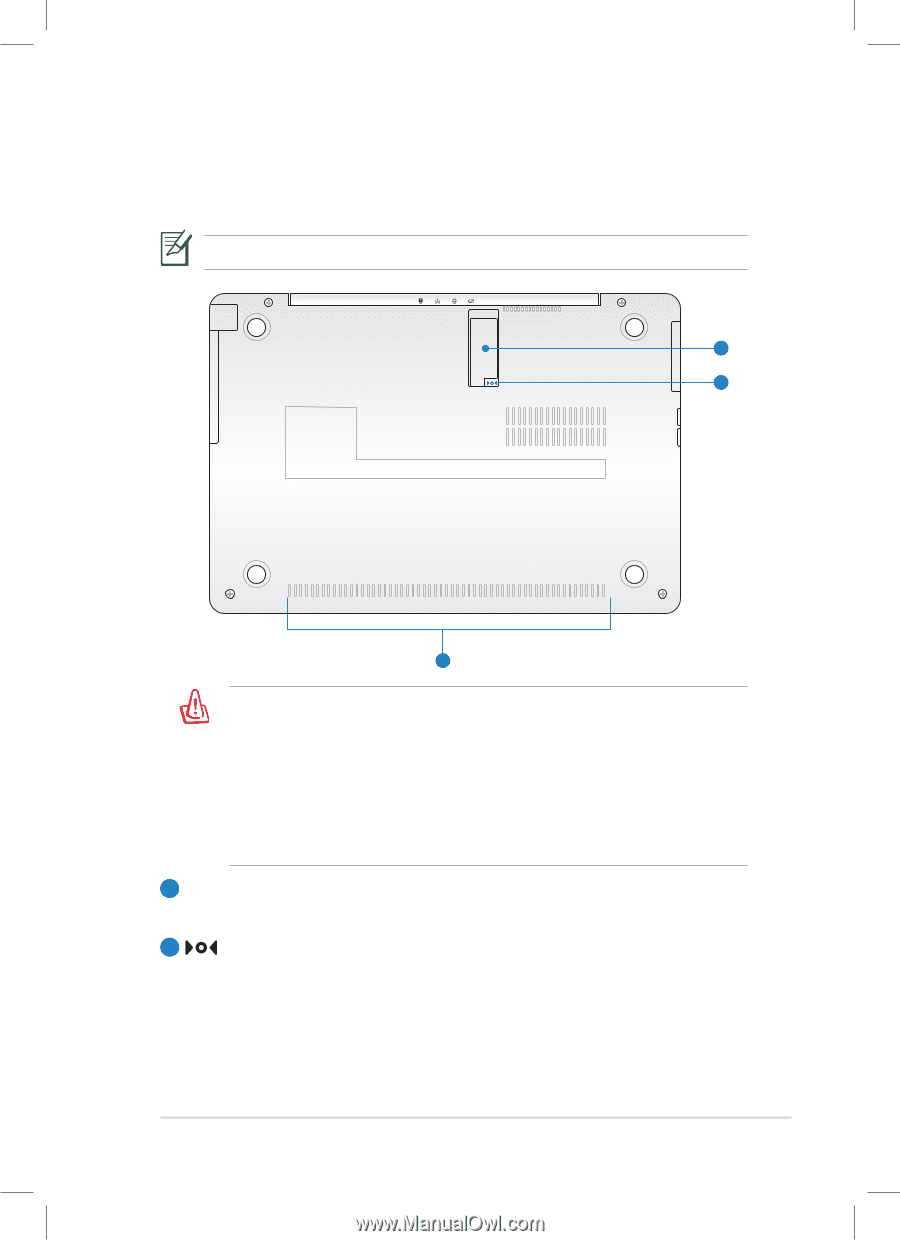
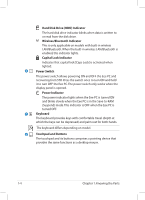
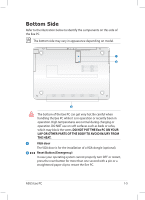
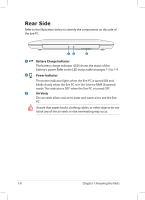
Bottom Side Refer to the illustration below to identify the components on this side of the Eee PC. The bottom side may vary in appearance depending on model. 1 2 3 The bottom of the Eee PC can get very hot. Be careful when handling the Eee PC while it is in operation or recently been in operation. High temperatures are normal during charging or operation. DO NOT use on soft surfaces such as beds or sofas, which may block the vents. DO NOT PUT THE Eee PC ON YOUR LAP OR OTHER PARTS OF THE BODY TO AVOID INJURY FROM THE HEAT. 1 VGA door The VGA door is for the installation of a VGA dongle (optional). 2 Reset Button (Emergency) In case your operating system cannot properly turn OFF or restart, press the reset button for more than one second with a pin or a straightened paper clip to restart the Eee PC. ASUS Eee PC 1-5
-
 1
1 -
2
-
3
-
4
-
5
-
6
-
7
-
 8
8 -
 9
9 -
 10
10 -
 11
11 -
 12
12 -
 13
13 -
 14
14 -
 15
15 -
 16
16 -
 17
17 -
 18
18 -
19
-
20
-
21
-
22
-
23
-
24
-
25
-
26
-
27
-
28
-
29
-
30
-
31
-
32
-
33
-
34
-
35
-
36
-
37
-
38
-
39
-
40
-
41
-
42
-
43
-
44
-
45
-
46
-
47
-
48
-
49
-
50
-
51
-
52
-
53
-
54
-
55
-
56
 |
 |