Asus Eee Slate B121 User Manual - Page 28
Enabling / disabling TPM Support, Clearing TPM Secured Data, TPM Support, Enable], Disable], Advanced - reset
 |
View all Asus Eee Slate B121 manuals
Add to My Manuals
Save this manual to your list of manuals |
Page 28 highlights
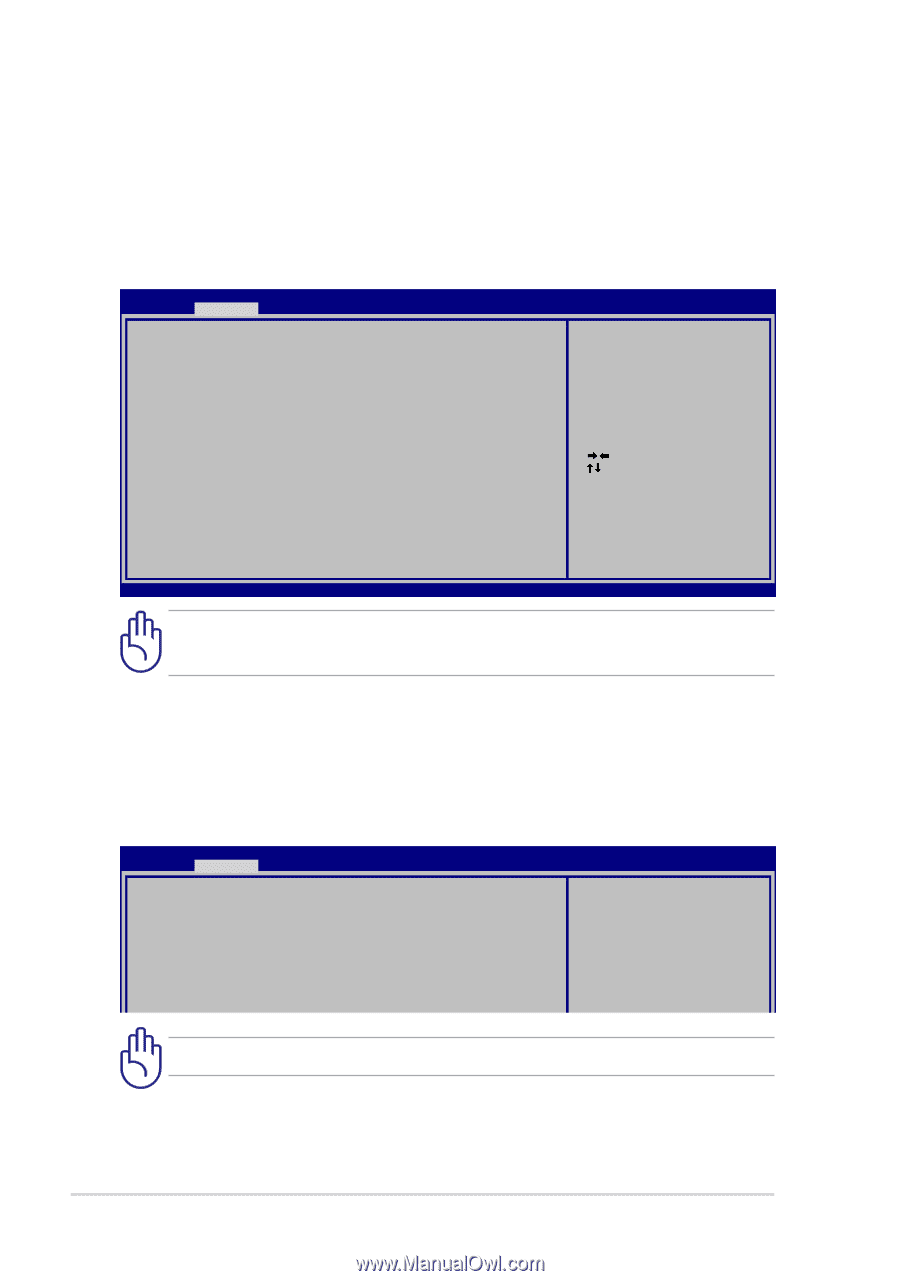
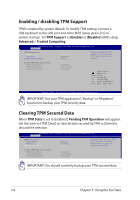
Enabling / disabling TPM Support TPM is enabled by system default. To modify TPM setting, connect a USB keyboard to the USB port and enter BIOS Setup (press [F2] on system startup). Set TPM Support to [Enable] or [Disable]in BIOS setup Advanced > Trusted Computing. Aptio Setup Utility - Copyright (C) 2008 American Megatrends, Inc. � � � Advanced TPM Configuration TPM Support TPM State Pending TPM operation [Enable] [Enabled] [None] Enables or Disables TPM support. O.S. will not show TPM. Reset of platform is required. Current TPM Status Information TPM Enabled Status: TPM Active Status: TPM Enabled Status: [Disabled] [Deactivated] [UnOwned] : Select Screen : Select Item Enter: Select +/-: Change Opt. F1: General Help F9: Optimized Defaults F10: Save ESC: Exit Version 1.28.1119. Copyright (C) 2008 American Megatrends, Inc. IMPORTANT! Use your TPM application's "Backup" or "Migration" function to backup your TPM security data. Clearing TPM Secured Data When TPM State is set to [Enabled], Pending TPM Operation will appear. Set this item to [TPM Clear] to clear all data secured by TPM or [None] to discard the selection. Aptio Setup Utility - Copyright (C) 2008 American Megatrends, Inc. � � � Advanced TPM Configuration TPM Support TPM State Pending TPM operation [Enable] [Enabled] [None] Schedule TPM operation. NOTE: Your Computer will reboot during restart in order to change State of TPM. Current TPM Status Information TPM Enabled Status: TPM Active Status: TPM Enabled Status: [Disabled] [Deactivated] [UnOwned] IMPORTANT! You should routinely backup your TPM secured data. 3-8 Chapter 3: Using the Eee Slate
-
 1
1 -
2
-
3
-
4
-
5
-
6
-
7
-
8
-
9
-
10
-
11
-
12
-
13
-
14
-
15
-
16
-
17
-
18
-
19
-
20
-
21
-
22
-
 23
23 -
 24
24 -
 25
25 -
 26
26 -
 27
27 -
 28
28 -
 29
29 -
 30
30 -
 31
31 -
 32
32 -
 33
33 -
34
-
35
-
36
-
37
-
38
-
39
-
40
-
41
-
42
-
43
-
44
-
45
-
46
-
47
-
48
-
49
-
50
 |
 |