Asus K8N4-E DELUXE K8N4-E Deluxe User's manual for English Version E2009 - Page 130

Cool 'n' Quiet!™ Technology - motherboard drivers

Page 130 highlights

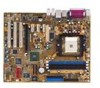
5.3.4 Cool 'n' Quiet!™ Technology The motherboard supports the AMD Cool 'n' Quiet!™ Technology that dynamically and automatically change the CPU speed, voltage, and amount of power depending on the task the CPU performs. Enabling Cool 'n' Quiet!™ Technology To enable Cool 'n' Quiet!™ Technology: 1. Turn on the system and enter BIOS by pressing the key during the Power On Self-Tests (POST). 2. Go to A d v a n c e d - > C P U C o n f i g u r a t i o n - > A M D K 8 C o o l ' n ' Q u i e t C o n t r o l and set it to [Enabled]. See section "4.4 Advanced Menu." 3. In the P o w e r menu, select the item A C P I 2 . 0 S u p p o r t and set it to [Enabled]. See section "4.5 Power Menu." 4. Save your changes and exit BIOS Setup. 5. Reboot your computer and set your Power Option Properties depending on your operating system. Windows® 2000/XP 1. From the Windows® 2000/XP operating system, click the S t a r t button. Select S e t t i n g s, then C o n t r o l P a n e l. 2. Make sure the Control Panel is set to Classic View. 3. Double-click the D i s p l a y icon in the Control Panel then select the S c r e e n S a v e r tab. 4. Click the P o w e r . . . button. The following dialog box appears. 5. From the P o w e r s c h e m e s combo list box, select Minimal Power M a n a g e m e n t. 6. Click O K to effect settings. Make sure to install the Cool 'n' Quiet!™ driver and application before using this feature. 5-14 Chapter 5: Software support

  • 1
  • 2
  • 3
  • 4
  • 5
  • 6
  • 7
  • 8
  • 9
  • 10
  • 11
  • 12
  • 13
  • 14
  • 15
  • 16
  • 17
  • 18
  • 19
  • 20
  • 21
  • 22
  • 23
  • 24
  • 25
  • 26
  • 27
  • 28
  • 29
  • 30
  • 31
  • 32
  • 33
  • 34
  • 35
  • 36
  • 37
  • 38
  • 39
  • 40
  • 41
  • 42
  • 43
  • 44
  • 45
  • 46
  • 47
  • 48
  • 49
  • 50
  • 51
  • 52
  • 53
  • 54
  • 55
  • 56
  • 57
  • 58
  • 59
  • 60
  • 61
  • 62
  • 63
  • 64
  • 65
  • 66
  • 67
  • 68
  • 69
  • 70
  • 71
  • 72
  • 73
  • 74
  • 75
  • 76
  • 77
  • 78
  • 79
  • 80
  • 81
  • 82
  • 83
  • 84
  • 85
  • 86
  • 87
  • 88
  • 89
  • 90
  • 91
  • 92
  • 93
  • 94
  • 95
  • 96
  • 97
  • 98
  • 99
  • 100
  • 101
  • 102
  • 103
  • 104
  • 105
  • 106
  • 107
  • 108
  • 109
  • 110
  • 111
  • 112
  • 113
  • 114
  • 115
  • 116
  • 117
  • 118
  • 119
  • 120
  • 121
  • 122
  • 123
  • 124
  • 125
  • 126
  • 127
  • 128
  • 129
  • 130
  • 131
  • 132
  • 133
  • 134
  • 135
  • 136
  • 137
  • 138
  • 139
  • 140
  • 141
  • 142
  • 143
  • 144
  • 145
  • 146
  • 147
  • 148
  • 149
  • 150
  • 151
  • 152
  • 153
  • 154
  • 155
  • 156
  • 157
  • 158
  • 159
  • 160
  • 161
  • 162
  • 163
  • 164
  • 165
  • 166

5-14
5-14
5-14
5-14
5-14
Chapter 5: Software support
5.3.4
5.3.4
5.3.4
5.3.4
5.3.4
Cool ‘n’ Quiet!™ Technology
The motherboard supports the AMD Cool ‘n’ Quiet!™ Technology that
dynamically and automatically change the CPU speed, voltage, and amount
of power depending on the task the CPU performs.
Enabling Cool ‘n’ Quiet!™ Technology
To enable Cool ‘n’ Quiet!™ Technology:
1.
Turn on the system and enter BIOS by pressing the <Del> key during
the Power On Self-Tests (POST).
2.
Go to Advanced -> CPU Configuration -> AMD K8 Cool
Advanced -> CPU Configuration -> AMD K8 Cool
‘n’Quiet
‘n’Quiet
‘n’Quiet
‘n’Quiet
‘n’Quiet Control
Control
Control
Control
Control and set it to [Enabled]. See section “4.4
Advanced Menu.”
3.
In the Power
Power
Power
Power
Power menu, select the item ACPI 2.0 Support
ACPI 2.0 Support
ACPI 2.0 Support
ACPI 2.0 Support
ACPI 2.0 Support and set it
to [Enabled]. See section “4.5 Power Menu.”
4.
Save your changes and exit
BIOS Setup.
5.
Reboot your computer and set your Power Option Properties
depending on your operating system.
Windows
®
2000/XP
1.
From the Windows
®
2000/XP operating system, click the Start
Start
Start
Start
Start
button. Select Settings
Settings
Settings
Settings
Settings, then Control Panel
Control Panel
Control Panel
Control Panel
Control Panel.
2.
Make sure the Control Panel is set to Classic View.
3.
Double-click the Display
Display
Display
Display
Display icon in the Control Panel then select the
Screen Saver
Screen Saver
Screen Saver
Screen Saver
Screen Saver tab.
4.
Click the Power...
Power...
Power...
Power...
Power... button.
The following dialog box
appears.
5.
From the Power schemes
Power schemes
Power schemes
Power schemes
Power schemes
combo list box, select
Minimal Power
Minimal Power
Minimal Power
Minimal Power
Minimal Power
Management
Management
Management
Management
Management.
6.
Click OK
OK
OK
OK
OK to effect settings.
Make sure to install the
Cool ‘n’ Quiet!™ driver and
application before using
this feature.