Asus KCMR-D12 User Guide - Page 115
RAID driver installation
 |
View all Asus KCMR-D12 manuals
Add to My Manuals
Save this manual to your list of manuals |
Page 115 highlights
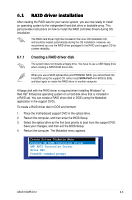
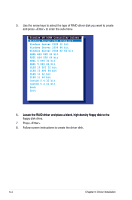
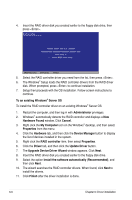
6.�1����R��A�I�D��d�r�iv�e��r�i�n�s�ta��ll�a�t�io�n� After creating the RAID sets for your server system, you are now ready to install an operating system to the independent hard disk drive or bootable array. This part provides instructions on how to install the RAID controller drivers during OS installation. The RAID card driver might be included in the Linux OS installation CD, and could be loaded automatically during the OS installation. However, we recommend you use the RAID driver packaged in the RAID card support CD for a better reliability. 6.1.1 Creating a RAID driver disk The system does not include a floppy drive. You have to use a USB floppy drive when creating a SATA RAID driver disk. When you use a SATA optical drive and PROMISE RAID, you cannot boot into FreeDOS using this support CD. Either reset SATA Port1-4 in BIOS to [IDE] and boot again or create the RAID driver in another computer. A floppy disk with the RAID driver is required when installing Windows® or Red Hat® Enterprise operating system on a hard disk drive that is included in a RAID set. You can create a RAID driver disk in DOS (using the Makedisk application in the support DVD). To create a RAID driver disk in DOS environment 1. Place the motherboard support DVD in the optical drive. 2. Restart the computer, and then enter the BIOS Setup. 3. Select the optical drive as the first boot priority to boot from the support DVD. Save your changes, and then exit the BIOS Setup. 4. Restart the computer. The Makedisk menu appears. Create Driver Diskette Menu Promise SW ROMB Controller Driver AMD AHCI Controller Driver Write DMI FreeDOS command prompt ASUS KCMR-D12 6-3
-
 1
1 -
2
-
3
-
4
-
5
-
6
-
7
-
8
-
9
-
10
-
11
-
12
-
13
-
14
-
15
-
16
-
17
-
18
-
19
-
20
-
21
-
22
-
23
-
24
-
25
-
26
-
27
-
28
-
29
-
30
-
31
-
32
-
33
-
34
-
35
-
36
-
37
-
38
-
39
-
40
-
41
-
42
-
43
-
44
-
45
-
46
-
47
-
48
-
49
-
50
-
51
-
52
-
53
-
54
-
55
-
56
-
57
-
58
-
59
-
60
-
61
-
62
-
63
-
64
-
65
-
66
-
67
-
68
-
69
-
70
-
71
-
72
-
73
-
74
-
75
-
76
-
77
-
78
-
79
-
80
-
81
-
82
-
83
-
84
-
85
-
86
-
87
-
88
-
89
-
90
-
91
-
92
-
93
-
94
-
95
-
96
-
97
-
98
-
99
-
100
-
101
-
102
-
103
-
104
-
105
-
106
-
107
-
108
-
109
-
 110
110 -
 111
111 -
 112
112 -
 113
113 -
 114
114 -
 115
115 -
 116
116 -
 117
117 -
 118
118 -
 119
119 -
 120
120 -
121
-
122
-
123
-
124
-
125
-
126
-
127
-
128
-
129
-
130
-
131
-
132
-
133
-
134
-
135
-
136
-
137
-
138
-
139
-
140
-
141
-
142
-
143
-
144
 |
 |