Asus M3A32-MVP DELUXE User Manual - Page 155
Marvell
 |
View all Asus M3A32-MVP DELUXE manuals
Add to My Manuals
Save this manual to your list of manuals |
Page 155 highlights
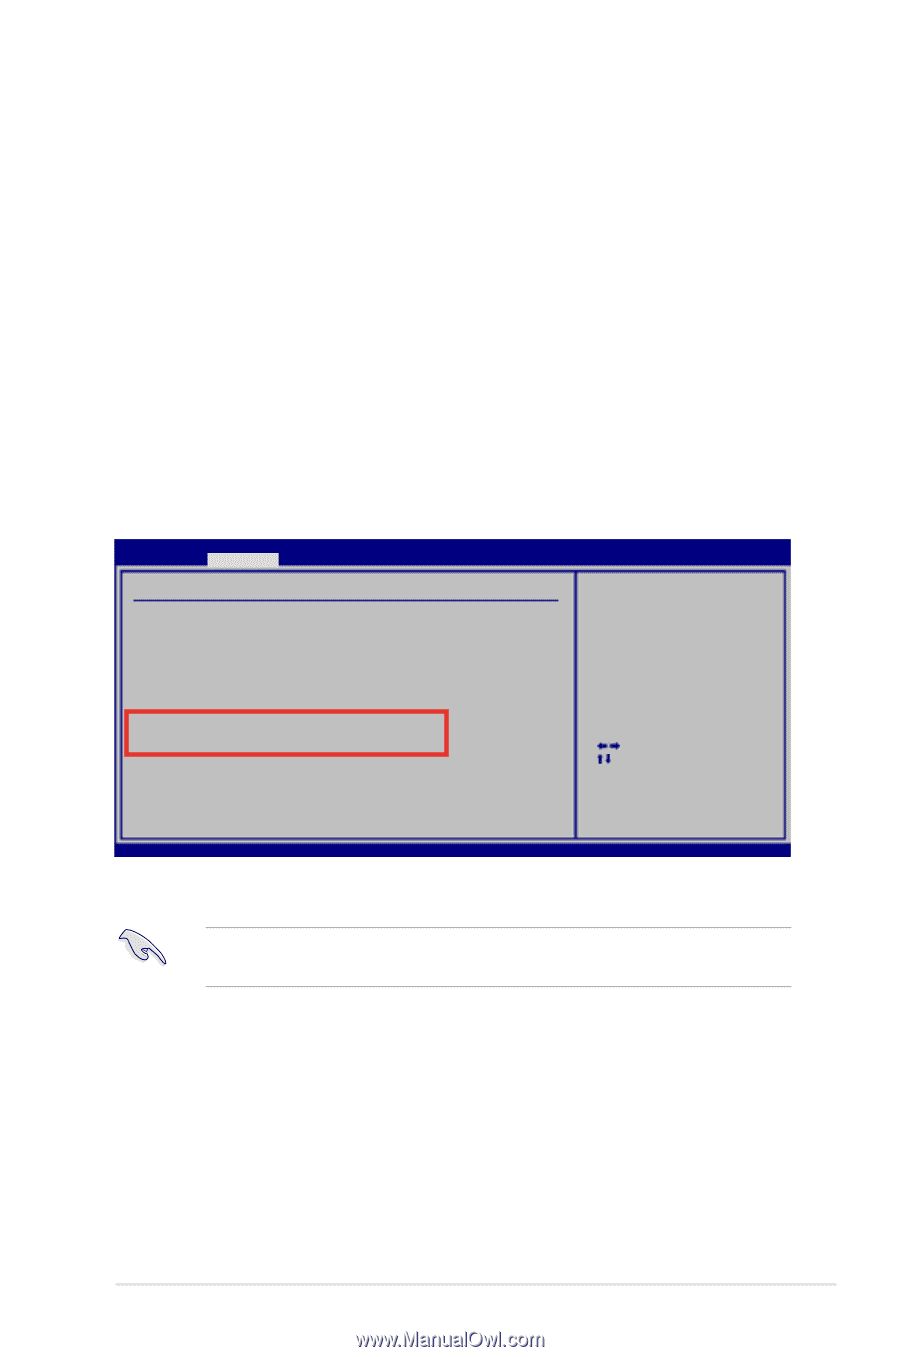
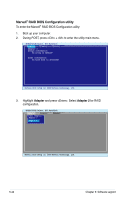
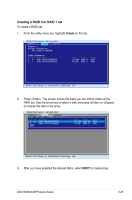
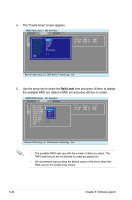
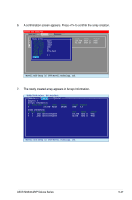
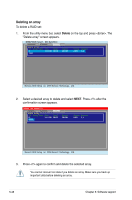
5.4.4 Marvell® RAID configurations The Marvell® 6121 Serial ATA controller allows you to configure RAID 0 and RAID 1 sets on the Serial ATA hard disk drives. Setting the RAID item in BIOS You must set the RAID item in the BIOS Setup before you can create a RAID set(s). To do this: 1. Install two internal Serial ATA hard disk drives to the SATA connectors labeled SATA_RAID1/2. 2. Boot up your computer, and press during POST to enter the BIOS setup. 3. In the Advanced Menu, go to Onboard Devices Configuration, and enable both Marvell 6121 SATA Controller and Marvell Option ROM. 4. Set Marvell IDE/RAID function to [RAID]. Advanced BIOS SETUP UTILITY Onboard Devices Configuraiton Serial Port1 Address [3F8/IRQ4] Serial Port1 Mode [Normal] HD Audio Azalia Device [Auto] Front Panel support Type [HD Audio] Onboard Lan [Enable] Onboard Lan Boot Rom [Disabled] Marvell 6111 SATA Controller [Enable] Marvell 6121 SATA Controller [Enable] Marvell Option ROM [Enable] Marvell IDE/RAID function [RAID] Primary Display Adapter [PCI-E] Allows BIOS to select Serial Port1 Base Addresses. Select Screen Select Item +- Change Option F1 General Help F10 Save and Exit ESC Exit v02.61 (C)Copyright 1985-2007, American Megatrends, Inc. 3. Press to save the changes and exit. The RAID BIOS setup screens shown in this section are for reference only, and may not exactly match the items on your screen. ASUS M3A32-MVP Deluxe Series 5-43
-
 1
1 -
2
-
3
-
4
-
5
-
6
-
7
-
8
-
9
-
10
-
11
-
12
-
13
-
14
-
15
-
16
-
17
-
18
-
19
-
20
-
21
-
22
-
23
-
24
-
25
-
26
-
27
-
28
-
29
-
30
-
31
-
32
-
33
-
34
-
35
-
36
-
37
-
38
-
39
-
40
-
41
-
42
-
43
-
44
-
45
-
46
-
47
-
48
-
49
-
50
-
51
-
52
-
53
-
54
-
55
-
56
-
57
-
58
-
59
-
60
-
61
-
62
-
63
-
64
-
65
-
66
-
67
-
68
-
69
-
70
-
71
-
72
-
73
-
74
-
75
-
76
-
77
-
78
-
79
-
80
-
81
-
82
-
83
-
84
-
85
-
86
-
87
-
88
-
89
-
90
-
91
-
92
-
93
-
94
-
95
-
96
-
97
-
98
-
99
-
100
-
101
-
102
-
103
-
104
-
105
-
106
-
107
-
108
-
109
-
110
-
111
-
112
-
113
-
114
-
115
-
116
-
117
-
118
-
119
-
120
-
121
-
122
-
123
-
124
-
125
-
126
-
127
-
128
-
129
-
130
-
131
-
132
-
133
-
134
-
135
-
136
-
137
-
138
-
139
-
140
-
141
-
142
-
143
-
144
-
145
-
146
-
147
-
148
-
149
-
 150
150 -
 151
151 -
 152
152 -
 153
153 -
 154
154 -
 155
155 -
 156
156 -
 157
157 -
 158
158 -
 159
159 -
 160
160 -
161
-
162
-
163
-
164
-
165
-
166
-
167
-
168
-
169
-
170
-
171
-
172
-
173
-
174
-
175
-
176
 |
 |