Asus M3A32-MVP DELUXE User Manual - Page 158
Raid Level
 |
View all Asus M3A32-MVP DELUXE manuals
Add to My Manuals
Save this manual to your list of manuals |
Page 158 highlights
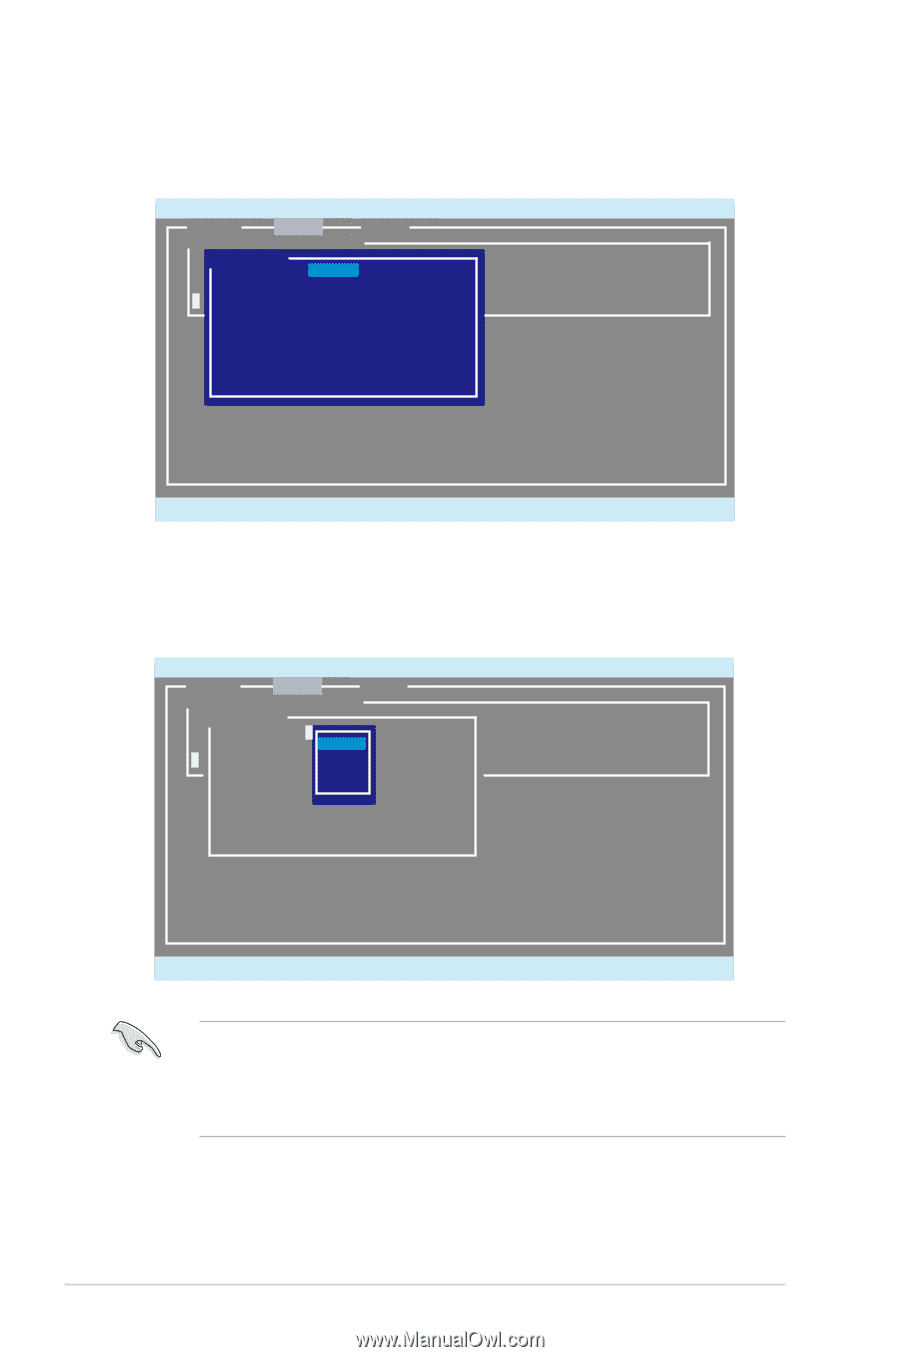
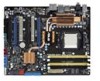
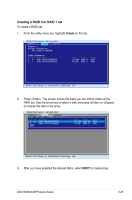
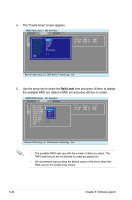
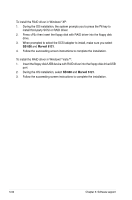
4. The "Create Array" screen appears. ENTER/SPACE:Select, ESC:Back/Exit [Adapter] [Create] [Delete] Select free disks to create IDCrePaotret ArDriasyk Name * 0 Ra0id LeSvAeTlA: :HDRSA7I2D10010KLA330 * 4 Ma1x SizSeA(TMAB): :HD1S67425120610KLA330 Capacity(MB) : 164526 Stripe Size Quick Init Cache Mode Array Name Disks ID NEXT : 64KB : No : Write Back : : 0 1 Size Speed Status 164.6GB SATA II FREE 82.3GB SATA II FREE Marvell BIOS Setup (c) 2006 Marvell Technology, Ltd. 5. Use the arrow key to select the Raid Level item and press to display the available RAID set. Select a RAID set and press to create. ENTER/SPACE:Select, ESC:Back/Exit [Adapter] [Create] [Delete] Select free disks to create IDCrePaotret ArDriasyk Name * 0 Ra0id LeSvAeTlA: :HDRSA7I2D10010KLA330 * 4 Ma1x SizSeA(TMAB): :HD1S6*74R25A12I06D100KLA330 Capacity(MB) : 164R5A2I6D1 Stripe Size : 64KRBAID10 Quick Init : No RAID5 Cache Mode : Write Back Array Name : Disks ID NEXT : 0 1 Size Speed Status 164.6GB SATA II FREE 82.3GB SATA II FREE Marvell BIOS Setup (c) 2006 Marvell Technology, Ltd. • The available RAID sets vary with the number of disks you select. The RAID sets that you are not allowed to create are grayed out. • We recommend that you keep the default values of the items other than Raid Level in the Create Array screen. 5-46 Chapter 5: Software support
-
 1
1 -
2
-
3
-
4
-
5
-
6
-
7
-
8
-
9
-
10
-
11
-
12
-
13
-
14
-
15
-
16
-
17
-
18
-
19
-
20
-
21
-
22
-
23
-
24
-
25
-
26
-
27
-
28
-
29
-
30
-
31
-
32
-
33
-
34
-
35
-
36
-
37
-
38
-
39
-
40
-
41
-
42
-
43
-
44
-
45
-
46
-
47
-
48
-
49
-
50
-
51
-
52
-
53
-
54
-
55
-
56
-
57
-
58
-
59
-
60
-
61
-
62
-
63
-
64
-
65
-
66
-
67
-
68
-
69
-
70
-
71
-
72
-
73
-
74
-
75
-
76
-
77
-
78
-
79
-
80
-
81
-
82
-
83
-
84
-
85
-
86
-
87
-
88
-
89
-
90
-
91
-
92
-
93
-
94
-
95
-
96
-
97
-
98
-
99
-
100
-
101
-
102
-
103
-
104
-
105
-
106
-
107
-
108
-
109
-
110
-
111
-
112
-
113
-
114
-
115
-
116
-
117
-
118
-
119
-
120
-
121
-
122
-
123
-
124
-
125
-
126
-
127
-
128
-
129
-
130
-
131
-
132
-
133
-
134
-
135
-
136
-
137
-
138
-
139
-
140
-
141
-
142
-
143
-
144
-
145
-
146
-
147
-
148
-
149
-
150
-
151
-
152
-
 153
153 -
 154
154 -
 155
155 -
 156
156 -
 157
157 -
 158
158 -
 159
159 -
 160
160 -
 161
161 -
 162
162 -
 163
163 -
164
-
165
-
166
-
167
-
168
-
169
-
170
-
171
-
172
-
173
-
174
-
175
-
176
 |
 |