Asus P4S800 Motherboard DIY Troubleshooting Guide - Page 39
Flashed Successfully
 |
View all Asus P4S800 manuals
Add to My Manuals
Save this manual to your list of manuals |
Page 39 highlights
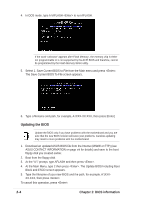
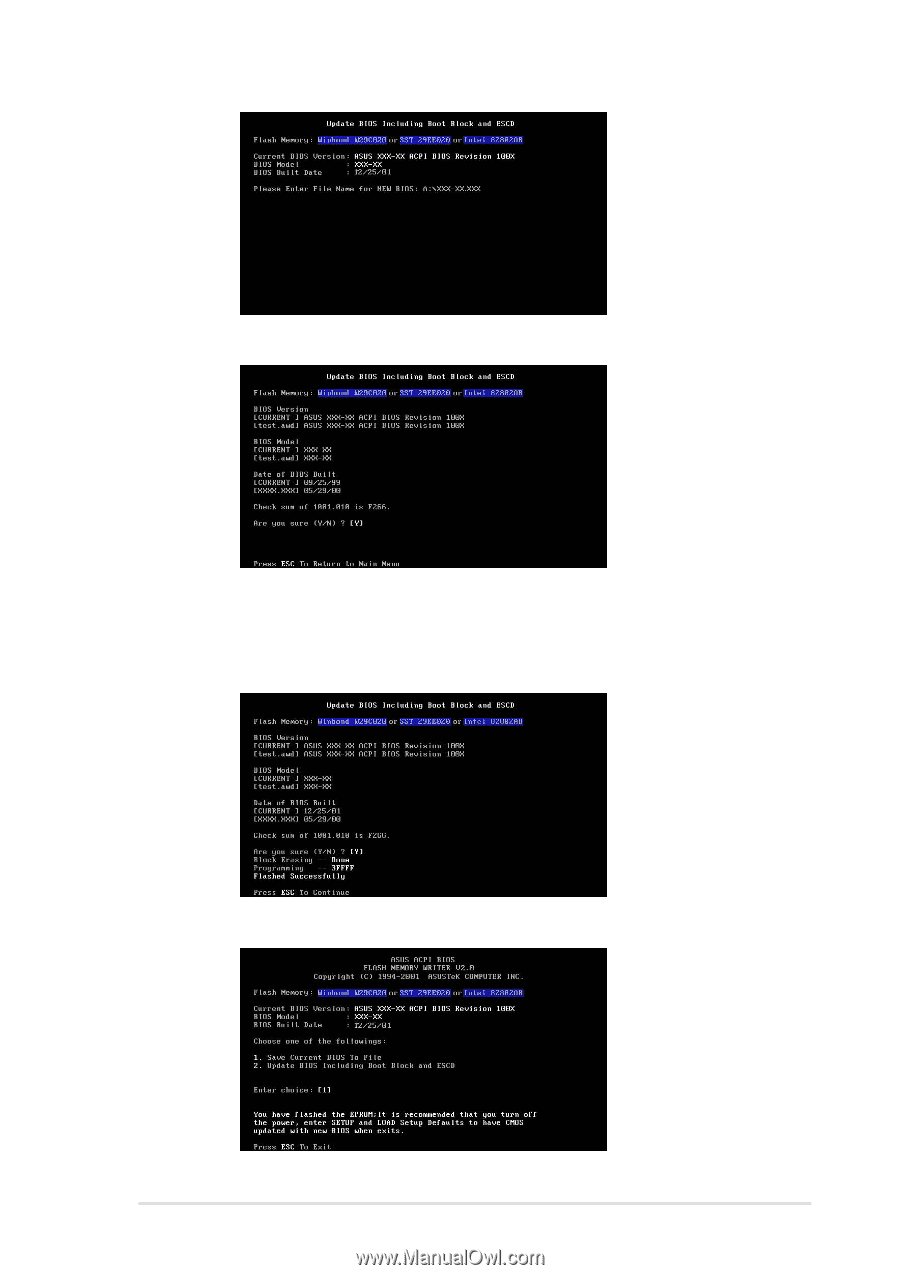
6. When prompted to confirm the BIOS update, press Y to start the update. 7. The utility starts to program the new BIOS information into the Flash ROM. The boot block is updated automatically only when necessary. This minimizes the possibility of boot problems in case of update failures. When the programming is done, the message "Flashed Successfully" appears. 8. Follow the onscreen instructions to continue. ASUS P4S800 motherboard user guide 2-5
-
 1
1 -
2
-
3
-
4
-
5
-
6
-
7
-
8
-
9
-
10
-
11
-
12
-
13
-
14
-
15
-
16
-
17
-
18
-
19
-
20
-
21
-
22
-
23
-
24
-
25
-
26
-
27
-
28
-
29
-
30
-
31
-
32
-
33
-
 34
34 -
 35
35 -
 36
36 -
 37
37 -
 38
38 -
 39
39 -
 40
40 -
 41
41 -
 42
42 -
 43
43 -
 44
44 -
45
-
46
-
47
-
48
-
49
-
50
-
51
-
52
-
53
-
54
-
55
-
56
-
57
-
58
-
59
-
60
-
61
-
62
-
63
-
64
-
65
-
66
 |
 |
ASUS P4S800 motherboard user guide
2-5
6.
When prompted to confirm the BIOS update, press
Y
to start the update.
7.
The utility starts to program the new BIOS information into the Flash ROM. The
boot block is updated automatically only when necessary. This minimizes the
possibility of boot problems in case of update failures.
When the programming
is done, the message
“Flashed Successfully”
appears.
8.
Follow the onscreen instructions to continue.