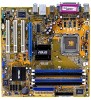
Asus P5GL-MX Motherboard Installation Guide - Page 51
Aktualisieren der BIOS-Datei
 |
View all Asus P5GL-MX manuals
Add to My Manuals
Save this manual to your list of manuals |
Page 51 highlights
Aktualisieren der BIOS-Datei So aktualisieren Sie die BIOS-Datei mit Hilfe des AFUDOS-Programms: 1. Visit the ASUS website (www.asus.com) and download the latest BIOS file for the motherboard. Save the BIOS file to a bootable floppy disk. Write the BIOS filename on a piece of paper. You need to type the exact BIOS filename at the DOS prompt. 2. Kopieren Sie das AFUDOS-Programm (afudos.exe) von der Motherboard Support-CD zu der bootfähigen Diskette, die Sie zuvor erstellt haben. 3. Fahren Sie das System in den DOS-Modus und geben dann folgendes bei der Eingabeaufforderung ein: afudos /i[Dateiname] wobei [Dateiname] die aktuellste oder originale BIOS-Datei auf der bootfähigen Diskette ist. A:\>afudos /iP5GLMX.ROM 4. Das Programm liest die Datei und startet das Aktualisieren des BIOS. A:\>afudos /iP5GLMX.ROM AMI Firmware Update Utility - Version 1.10 Copyright (C) 2002 American Megatrends, Inc. All rights reserved. Reading file ..... done Erasing flash .... done Writing flash .... 0x0008CC00 (9%) Das System darf NICHT während des Aktualisierens des BIOS ausgeschaltet oder neu gestartet werden! Ein Systemstartfehler kann die Folge sein! 5. Die DOS-Eingabeaufforderung wird wieder angezeigt, nachdem der BIOS-Aktualisierungsprozess vervollständigt wurde. Starten Sie das System von der Festplatte neu. A:\>afudos /iP5GLMX.ROM AMI Firmware Update Utility - Version 1.10 Copyright (C) 2002 American Megatrends, Inc. All rights reserved. Reading file ..... done Erasing flash .... done Writing flash .... 0x0008CC00 (9%) Verifying flash .. done A:\> ASUS P5GL-MX 2-5
-
 1
1 -
2
-
3
-
4
-
5
-
6
-
7
-
8
-
9
-
10
-
11
-
12
-
13
-
14
-
15
-
16
-
17
-
18
-
19
-
20
-
21
-
22
-
23
-
24
-
25
-
26
-
27
-
28
-
29
-
30
-
31
-
32
-
33
-
34
-
35
-
36
-
37
-
38
-
39
-
40
-
41
-
42
-
43
-
44
-
45
-
 46
46 -
 47
47 -
 48
48 -
 49
49 -
 50
50 -
 51
51 -
 52
52 -
 53
53 -
 54
54 -
 55
55 -
 56
56 -
57
-
58
-
59
-
60
-
61
-
62
-
63
-
64
-
65
-
66
-
67
-
68
-
69
-
70
-
71
-
72
-
73
-
74
-
75
-
76
-
77
-
78
-
79
-
80
-
81
-
82
-
83
-
84
-
85
-
86
-
87
-
88
-
89
-
90
-
91
-
92
-
93
-
94
 |
 |
