Asus P5Q WS User Manual - Page 135
ASUS EPU-WS Engine
 |
UPC - 610839162819
View all Asus P5Q WS manuals
Add to My Manuals
Save this manual to your list of manuals |
Page 135 highlights
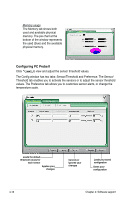
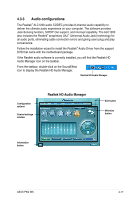
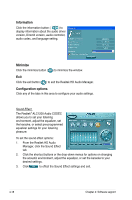
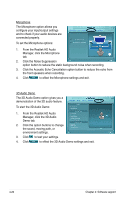
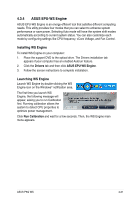
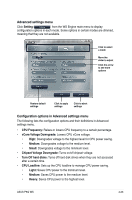
4.3.4 ASUS EPU-WS Engine ASUS EPU-WS Engine is an energy-efficient tool that satisfies different computing needs. This utility provides four modes that you can select to enhance system performance or save power. Selecting Auto mode will have the system shift modes automatically according to current system status. You can also customize each mode by configuring settings like CPU frequency, vCore Voltage, and Fan Control. Installing WS Engine To install WS Engine on your computer: 1. Place the support DVD to the optical drive. The Drivers installation tab appears if your computer has an enabled Autorun feature. 2. Click the Drivers tab and then click ASUS EPU-WS Engine. 3. Follow the screen instructions to complete installation. Launching WS Engine Launch WS Engine by double-clicking the WS Engine icon on the Windows® notification area. The first time you launch WS Engine, the following message will appear, asking you to run Calibration first. Running calibration allows the system to detect CPU properties to optimize power management. Click Run Calibration and wait for a few seconds. Then, the WS Engine main menu appears. ASUS P5Q WS 4-21
-
 1
1 -
2
-
3
-
4
-
5
-
6
-
7
-
8
-
9
-
10
-
11
-
12
-
13
-
14
-
15
-
16
-
17
-
18
-
19
-
20
-
21
-
22
-
23
-
24
-
25
-
26
-
27
-
28
-
29
-
30
-
31
-
32
-
33
-
34
-
35
-
36
-
37
-
38
-
39
-
40
-
41
-
42
-
43
-
44
-
45
-
46
-
47
-
48
-
49
-
50
-
51
-
52
-
53
-
54
-
55
-
56
-
57
-
58
-
59
-
60
-
61
-
62
-
63
-
64
-
65
-
66
-
67
-
68
-
69
-
70
-
71
-
72
-
73
-
74
-
75
-
76
-
77
-
78
-
79
-
80
-
81
-
82
-
83
-
84
-
85
-
86
-
87
-
88
-
89
-
90
-
91
-
92
-
93
-
94
-
95
-
96
-
97
-
98
-
99
-
100
-
101
-
102
-
103
-
104
-
105
-
106
-
107
-
108
-
109
-
110
-
111
-
112
-
113
-
114
-
115
-
116
-
117
-
118
-
119
-
120
-
121
-
122
-
123
-
124
-
125
-
126
-
127
-
128
-
129
-
 130
130 -
 131
131 -
 132
132 -
 133
133 -
 134
134 -
 135
135 -
 136
136 -
 137
137 -
 138
138 -
 139
139 -
 140
140 -
141
-
142
-
143
-
144
-
145
-
146
-
147
-
148
-
149
-
150
-
151
-
152
-
153
-
154
-
155
-
156
-
157
-
158
-
159
-
160
-
161
-
162
-
163
-
164
-
165
-
166
-
167
-
168
-
169
-
170
-
171
-
172
-
173
-
174
-
175
-
176
 |
 |