Asus P5RD1-V Deluxe Motherboard Installation Guide - Page 155
Enhanced Intel SpeedStep, Technology EIST
 |
View all Asus P5RD1-V Deluxe manuals
Add to My Manuals
Save this manual to your list of manuals |
Page 155 highlights
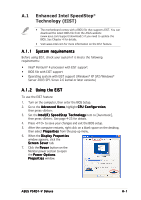
A.1 Enhanced Intel SpeedStep® Technology (EIST) • The motherboard comes with a BIOS file that supports EIST. You can download the latest BIOS file from the ASUS website (www.asus.com/support/download/) if you need to update the BIOS. See Chapter 4 for details. • Visit www.intel.com for more information on the EIST feature. A.1.1 System requirements Before using EIST, check your system if it meets the following requirements: • Intel® Pentium® 4 processor with EIST support • BIOS file with EIST support • Operating system with EIST support (Windows® XP SP2/Windows® Server 2003 SP1/Linux 2.6 kernel or later versions) A.1.2 Using the EIST To use the EIST feature: 1. Turn on the computer, then enter the BIOS Setup. 2. Go to the Advanced Menu, highlight CPU Configuration, then press . 3. Set the Intel(R) SpeedStep Technology item to [Automatic], then press . See page 4-25 for details. 4. Press to save your changes and exit the BIOS setup. 5. After the computer restarts, right click on a blank space on the desktop, then select Properties from the pop-up menu. 6. When the Display Properties window appears, click the Screen Saver tab. 7. Click the Power button on the Monitor power section to open the Power Options Properties window. ASUS P5RD1-V Deluxe A-1
-
 1
1 -
2
-
3
-
4
-
5
-
6
-
7
-
8
-
9
-
10
-
11
-
12
-
13
-
14
-
15
-
16
-
17
-
18
-
19
-
20
-
21
-
22
-
23
-
24
-
25
-
26
-
27
-
28
-
29
-
30
-
31
-
32
-
33
-
34
-
35
-
36
-
37
-
38
-
39
-
40
-
41
-
42
-
43
-
44
-
45
-
46
-
47
-
48
-
49
-
50
-
51
-
52
-
53
-
54
-
55
-
56
-
57
-
58
-
59
-
60
-
61
-
62
-
63
-
64
-
65
-
66
-
67
-
68
-
69
-
70
-
71
-
72
-
73
-
74
-
75
-
76
-
77
-
78
-
79
-
80
-
81
-
82
-
83
-
84
-
85
-
86
-
87
-
88
-
89
-
90
-
91
-
92
-
93
-
94
-
95
-
96
-
97
-
98
-
99
-
100
-
101
-
102
-
103
-
104
-
105
-
106
-
107
-
108
-
109
-
110
-
111
-
112
-
113
-
114
-
115
-
116
-
117
-
118
-
119
-
120
-
121
-
122
-
123
-
124
-
125
-
126
-
127
-
128
-
129
-
130
-
131
-
132
-
133
-
134
-
135
-
136
-
137
-
138
-
139
-
140
-
141
-
142
-
143
-
144
-
145
-
146
-
147
-
148
-
149
-
 150
150 -
 151
151 -
 152
152 -
 153
153 -
 154
154 -
 155
155 -
 156
156 -
 157
157 -
 158
158 -
 159
159 -
 160
160 -
161
-
162
 |
 |
