Asus RS500-E6 EPS4 User Guide - Page 41
Attaching the rack rails, Measure the depth of the rack to determine the length of the rack rails. - 1u ps4
 |
View all Asus RS500-E6 EPS4 manuals
Add to My Manuals
Save this manual to your list of manuals |
Page 41 highlights
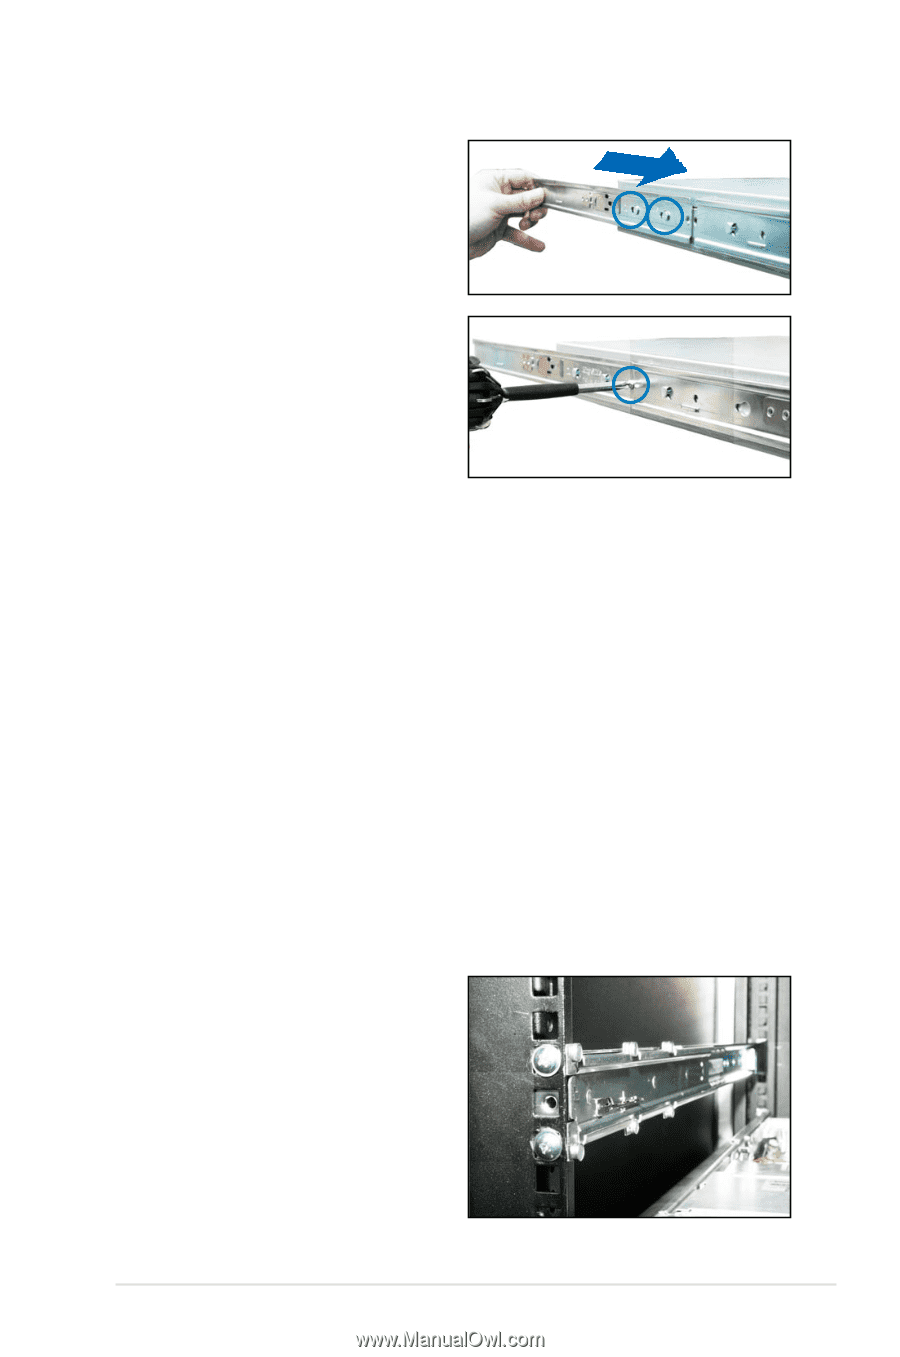
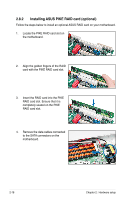
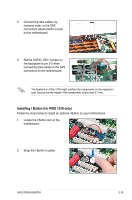
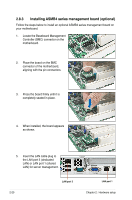
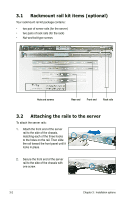
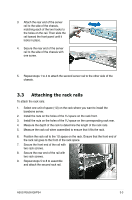
3. Attach the rear end of the server rail to the side of the chassis, matching each of the two hooks to the holes on the rail. Then slide the rail toward the front panel until it locks in place. 4. Secure the rear end of the server rail to the side of the chassis with one screw. 5. Repeat steps 1 to 4 to attach the second server rail to the other side of the chassis. 3.3 Attaching the rack rails To attach the rack rails: 1. Select one unit of space (1U) on the rack where you want to install the barebone server. 2. Install the nuts on the holes of the 1U space on the rack front. 3. Install the nuts on the holes of the 1U space on the corresponding rack rear. 4. Measure the depth of the rack to determine the length of the rack rails. 5. Measure the rack rail when assembled to ensure that it fits the rack. 6. Position the rack rail to the 1U space on the rack. Ensure that the front end of the rack rail goes to the front of the rack space. 7. Secure the front end of the rail with two rack screws. 8. Secure the rear end of the rail with two rack screws. 9. Repeat steps 5 to 8 to assemble and attach the second rack rail. ASUS RS500-E6/PS4 3-3
-
 1
1 -
2
-
3
-
4
-
5
-
6
-
7
-
8
-
9
-
10
-
11
-
12
-
13
-
14
-
15
-
16
-
17
-
18
-
19
-
20
-
21
-
22
-
23
-
24
-
25
-
26
-
27
-
28
-
29
-
30
-
31
-
32
-
33
-
34
-
35
-
 36
36 -
 37
37 -
 38
38 -
 39
39 -
 40
40 -
 41
41 -
 42
42 -
 43
43 -
 44
44 -
 45
45 -
 46
46 -
47
-
48
-
49
-
50
-
51
-
52
-
53
-
54
-
55
-
56
-
57
-
58
-
59
-
60
-
61
-
62
-
63
-
64
-
65
-
66
-
67
-
68
-
69
-
70
-
71
-
72
-
73
-
74
-
75
-
76
-
77
-
78
-
79
-
80
-
81
-
82
-
83
-
84
-
85
-
86
-
87
-
88
-
89
-
90
-
91
-
92
-
93
-
94
-
95
-
96
-
97
-
98
-
99
-
100
-
101
-
102
-
103
-
104
-
105
-
106
-
107
-
108
-
109
-
110
-
111
-
112
-
113
-
114
-
115
-
116
-
117
-
118
-
119
-
120
-
121
-
122
-
123
-
124
-
125
-
126
-
127
-
128
-
129
-
130
-
131
-
132
-
133
-
134
-
135
-
136
-
137
-
138
-
139
-
140
-
141
-
142
-
143
-
144
 |
 |