Asus RS720Q-E6 RS12 User Guide - Page 22
Chassis cover, Removing the top cover
 |
View all Asus RS720Q-E6 RS12 manuals
Add to My Manuals
Save this manual to your list of manuals |
Page 22 highlights
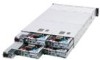
2.1 Chassis cover Removing the top cover 1. Loosen the six screws on the top and the two sides of the top cover, as shown in the following figures. 2. Lift the rear end of the top cover, and follow the direction of the arrow in the right figure to slide the cover toward the rear panel until it is disengaged from the chassis. 2-2 Chapter 2: Hardware setup
-
 1
1 -
2
-
3
-
4
-
5
-
6
-
7
-
8
-
9
-
10
-
11
-
12
-
13
-
14
-
15
-
16
-
 17
17 -
 18
18 -
 19
19 -
 20
20 -
 21
21 -
 22
22 -
 23
23 -
 24
24 -
 25
25 -
 26
26 -
 27
27 -
28
-
29
-
30
-
31
-
32
-
33
-
34
-
35
-
36
-
37
-
38
-
39
-
40
-
41
-
42
-
43
-
44
-
45
-
46
-
47
-
48
-
49
-
50
-
51
-
52
-
53
-
54
-
55
-
56
-
57
-
58
-
59
-
60
-
61
-
62
-
63
-
64
-
65
-
66
-
67
-
68
-
69
-
70
-
71
-
72
-
73
-
74
-
75
-
76
-
77
-
78
-
79
-
80
-
81
-
82
-
83
-
84
-
85
-
86
-
87
-
88
-
89
-
90
-
91
-
92
-
93
-
94
-
95
-
96
-
97
-
98
-
99
-
100
-
101
-
102
-
103
-
104
-
105
-
106
-
107
-
108
-
109
-
110
-
111
-
112
-
113
-
114
-
115
-
116
-
117
-
118
-
119
-
120
-
121
-
122
-
123
-
124
-
125
-
126
-
127
-
128
-
129
-
130
-
131
-
132
-
133
-
134
-
135
-
136
-
137
-
138
-
139
-
140
-
141
-
142
-
143
-
144
-
145
-
146
-
147
-
148
-
149
-
150
-
151
-
152
-
153
-
154
-
155
-
156
-
157
-
158
-
159
-
160
-
161
-
162
-
163
-
164
-
165
-
166
 |
 |

Chapter 2:
Hardware setup
2-2
2.1
Chassis cover
Removing the top cover
1.
Loosen the six screws on the top and the two sides of the top cover, as
shown in the following figures.
2.
Lift the rear end of the top cover,
and follow the direction of the arrow
in the right figure to slide the cover
toward the rear panel until it is
disengaged from the chassis.